![]() RZ 2610955525
RZ 2610955525
|
| Assembly | |||||||
|
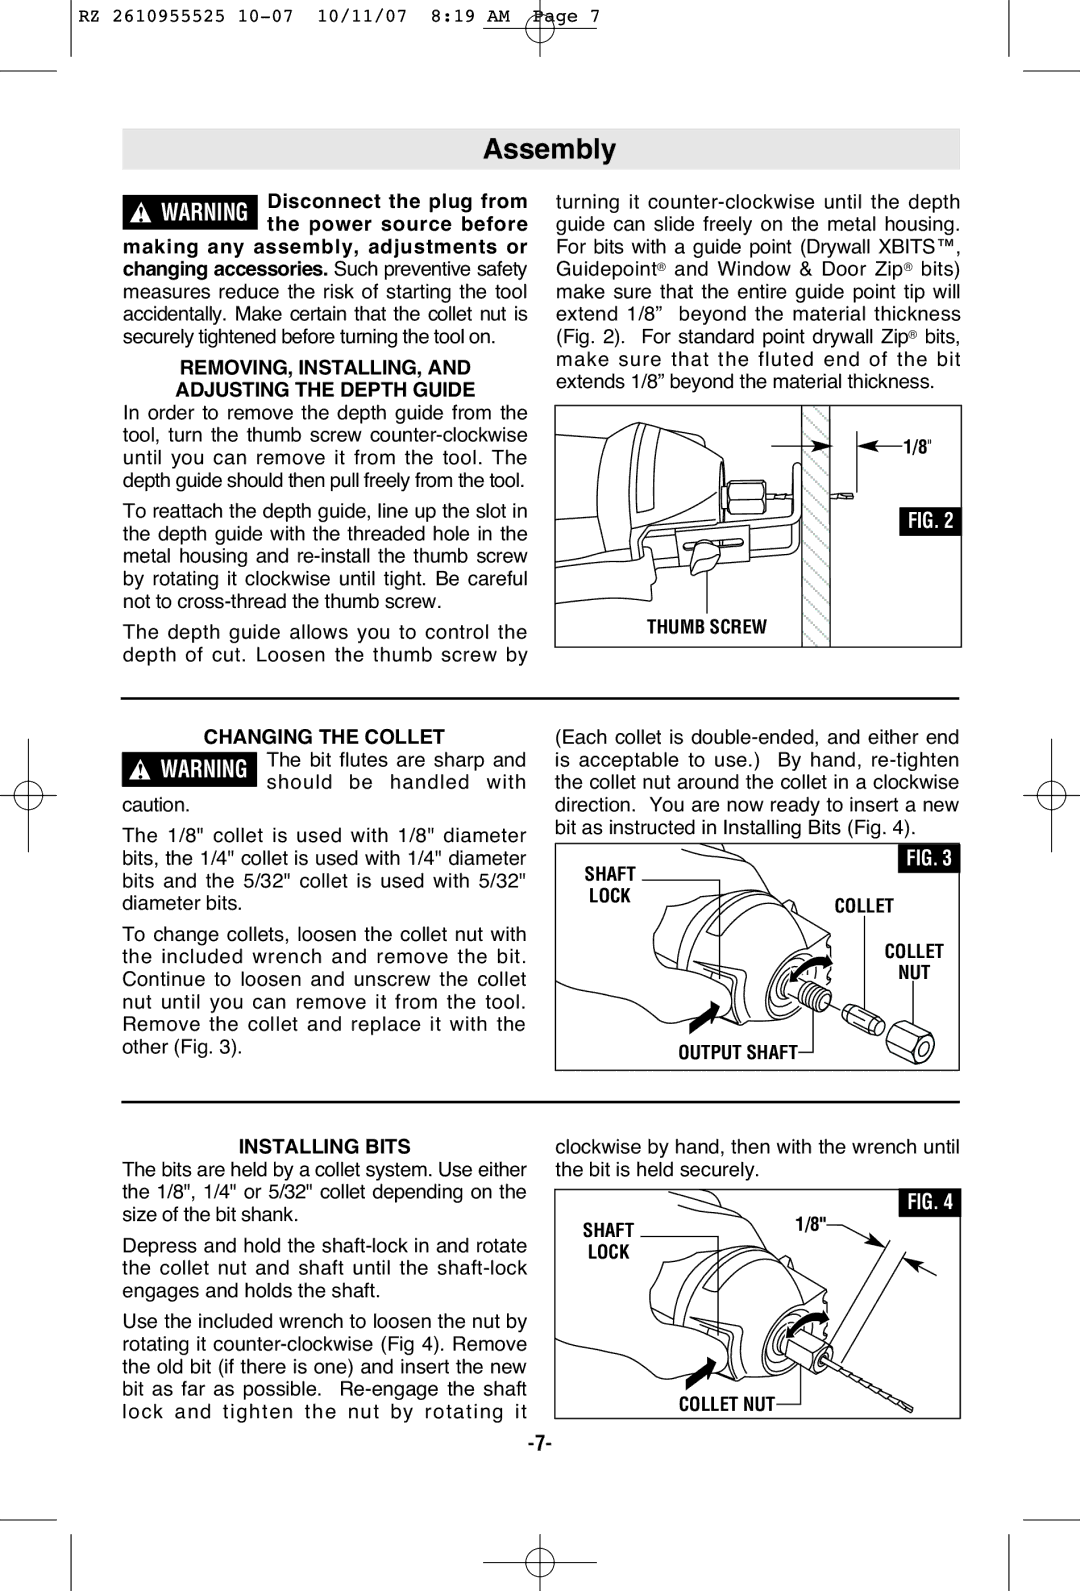
| Disconnect the plug from | turning it | ||||||
! | WARNING | ||||||||
| the power source before | guide can slide freely on the metal housing. | |||||||
making any assembly, adjustments or | For bits with a guide point (Drywall XBITS™, | ||||||||
changing accessories. Such preventive safety | Guidepoint® and Window & Door Zip® bits) | ||||||||
measures reduce the risk of starting the tool | make sure that the entire guide point tip will | ||||||||
accidentally. Make certain that the collet nut is | extend 1/8” beyond the material thickness | ||||||||
securely tightened before turning the tool on. | ® | ||||||||
(Fig. 2). For standard point drywall Zip bits, | |||||||||
| REMOVING, INSTALLING, AND | make sure that the fluted end of the bit | |||||||
| ADJUSTING THE DEPTH GUIDE | extends 1/8” beyond the material thickness. | |||||||
In order to remove the depth guide from the |
|
|
|
|
|
|
| ||
|
|
|
|
|
|
| |||
tool, turn the thumb screw |
|
|
|
|
|
| |||
|
|
|
| 1/8" | |||||
until you can remove it from the tool. The |
|
|
|
|
|
|
| ||
|
|
|
|
|
|
| |||
depth guide should then pull freely from the tool. |
|
|
|
|
|
|
| ||
To reattach the depth guide, line up the slot in |
|
|
|
|
|
|
| ||
|
|
|
|
|
| FIG. 2 | |||
the depth guide with the threaded hole in the |
|
|
|
|
|
|
| ||
|
|
|
|
|
|
| |||
metal housing and |
|
|
|
|
|
|
| ||
by rotating it clockwise until tight. Be careful |
|
|
|
|
|
|
| ||
|
|
|
|
|
|
| |||
not to |
|
|
|
|
|
|
| ||
The depth guide allows you to control the | THUMB SCREW | ||||||||
depth of cut. Loosen the thumb screw by |
|
|
|
|
|
|
| ||
|
|
|
|
|
|
| |||
CHANGING THE COLLET
!The bit flutes are sharp and caution.WARNING should be handled with The 1/8" collet is used with 1/8" diameter bits, the 1/4" collet is used with 1/4" diameter bits and the 5/32" collet is used with 5/32" diameter bits.
To change collets, loosen the collet nut with the included wrench and remove the bit. Continue to loosen and unscrew the collet nut until you can remove it from the tool. Remove the collet and replace it with the other (Fig. 3).
SHAFT
LOCKCOLLET
COLLET
NUT
OUTPUT SHAFT
INSTALLING BITS
The bits are held by a collet system. Use either the 1/8", 1/4" or 5/32" collet depending on the size of the bit shank.
Depress and hold the
Use the included wrench to loosen the nut by rotating it
clockwise by hand, then with the wrench until the bit is held securely.
| FIG. 4 |
SHAFT | 1/8" |
LOCK |
|
| COLLET NUT |