![]() RZ 2610955525
RZ 2610955525
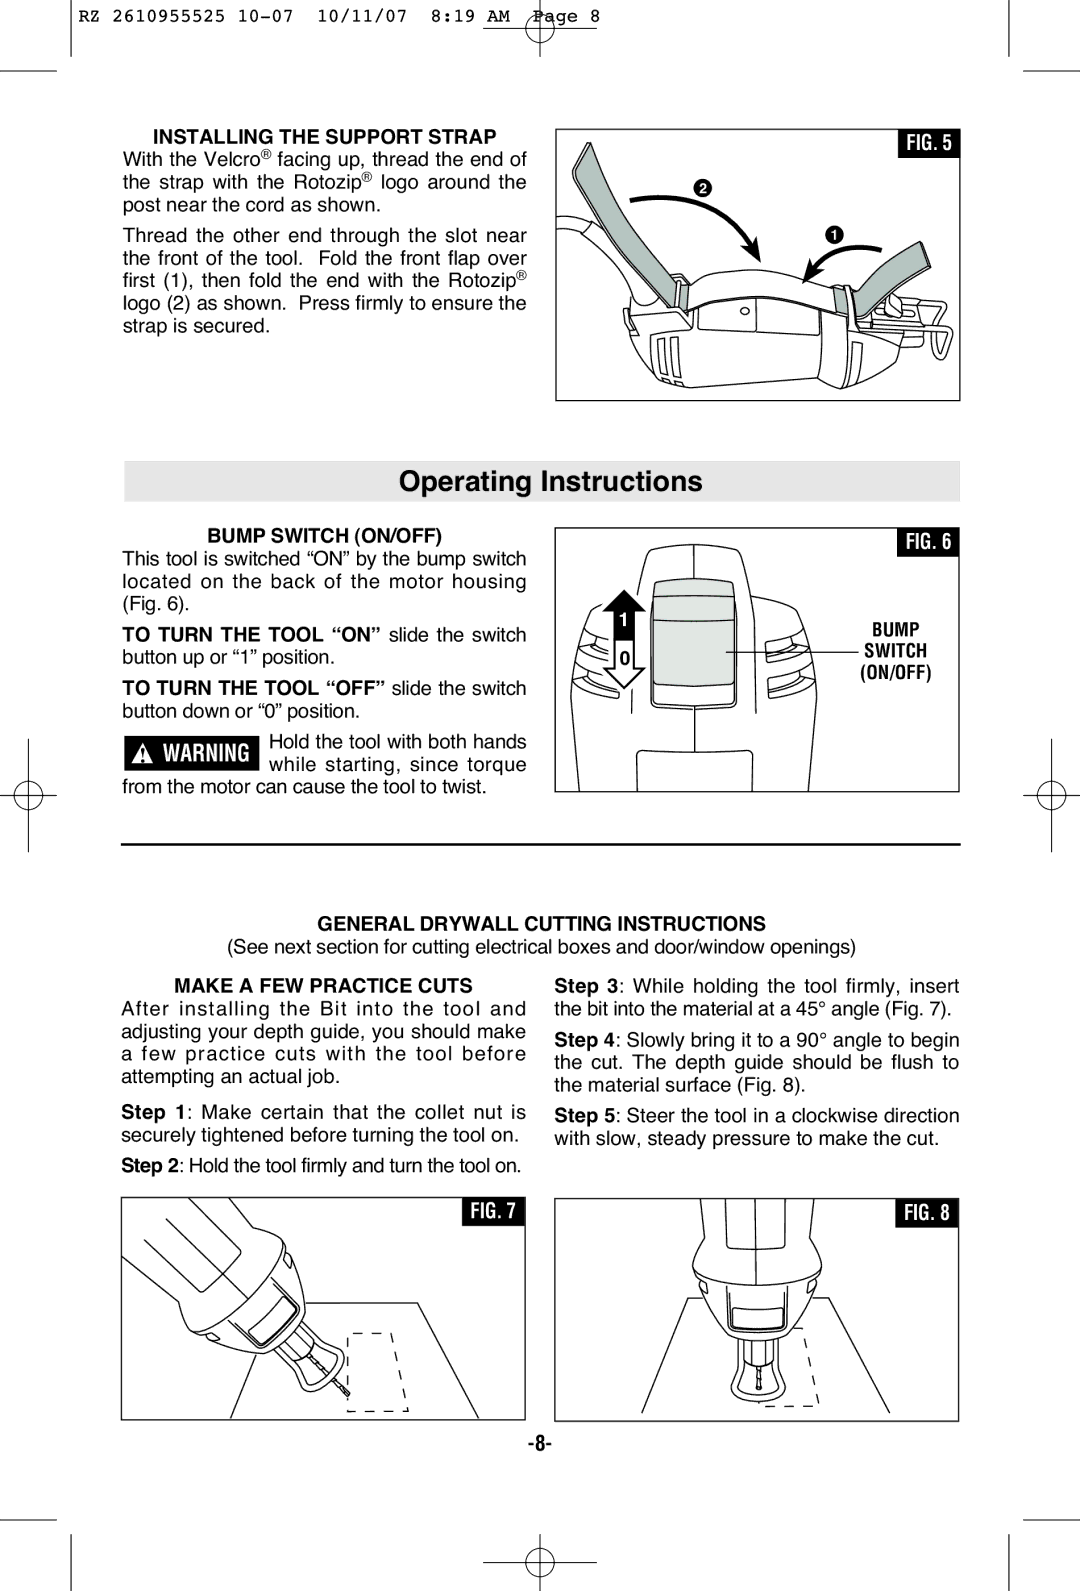
INSTALLING THE SUPPORT STRAP
With the Velcro® facing up, thread the end of the strap with the Rotozip® logo around the post near the cord as shown.
Thread the other end through the slot near the front of the tool. Fold the front flap over first (1), then fold the end with the Rotozip® logo (2) as shown. Press firmly to ensure the strap is secured.
FIG. 5 |
2 |
1 |
Operating Instructions
|
| BUMP SWITCH (ON/OFF) |
|
|
|
|
| |
|
|
|
|
|
| FIG. 6 | ||
This tool is switched “ON” by the bump switch |
|
|
|
|
| |||
|
|
|
|
| ||||
located on the back of the motor housing | 1 |
|
|
|
| |||
(Fig. 6). |
|
|
| BUMP | ||||
TO TURN THE TOOL “ON” slide the switch | 0 |
|
| SWITCH | ||||
|
| |||||||
button up or “1” position. |
|
| (ON/OFF) | |||||
TO TURN THE TOOL “OFF” slide the switch |
|
|
|
|
| |||
button down or “0” position. |
|
|
|
|
| |||
|
|
|
|
| ||||
|
|
| Hold the tool with both hands |
|
|
|
|
|
| ! | WARNING |
|
|
|
|
| |
|
|
|
|
|
| |||
|
| while starting, since torque |
|
|
|
|
| |
from the motor can cause the tool to twist. |
|
|
|
|
| |||
|
|
|
|
| ||||
|
|
|
|
|
|
|
|
|
|
|
| GENERAL DRYWALL CUTTING INSTRUCTIONS |
|
| |||
|
| (See next section for cutting electrical boxes and door/window openings) |
|
| ||||
|
| MAKE A FEW PRACTICE CUTS | Step 3: While holding the tool firmly, insert | |||||
After installing the Bit into the tool and | the bit into the material at a 45° angle (Fig. 7). | |||||||
adjusting your depth guide, you should make | Step 4: Slowly bring it to a 90° angle to begin | |||||||
a few practice cuts with the tool before | the cut. The depth guide should be flush to | |||||||
attempting an actual job. | the material surface (Fig. 8). |
|
| |||||
Step 1: Make certain that the collet nut is | Step 5: Steer the tool in a clockwise direction | |||||||
securely tightened before turning the tool on. | with slow, steady pressure to make the cut. | |||||||
Step 2: Hold the tool firmly and turn the tool on. |
|
|
|
|
| |||
FIG. 7 | FIG. 8 |