ST2-XM SETUP AND CONNECTIONS
ANTENNA CONNECTIONS
XM Antenna
Connect the included XM antenna for XM recep- tion to the back panel of the XM module. The antenna comes with 20 feet of cable. If this length is not sufficient, there are aftermarket antenna kits available for custom lengths. Position the antenna near a
The antenna may also be attached to an exter- nal wall by sliding the slots on the back of the antenna onto four screws mounted on an exteri- or wall. Establish the best receiving position for the antenna before attaching it to the wall.
XM Signal Strength Mode
To test the XM reception, turn the unit on. When the XM radio is powered for the first time, the XM service will start playing XM Channel 1, a preview/promotional channel. Verify that Channel 1 is playing by pressing the Tune Up/Tune Down buttons. Enter Signal Strength Mode by pressing and holding the ST/MONO button on the
GOOD SIGNAL Signal strength good MARGINAL SIG Signal strength marginal
POOR SIGNAL | Signal strength poor |
NO SIGNAL | Loss of signal |
Adjust the antenna until GOOD SIGNAL is dis- played. Press ST/MONO to exit Signal Strength Mode.
75 ohm
to 300 ohm balun
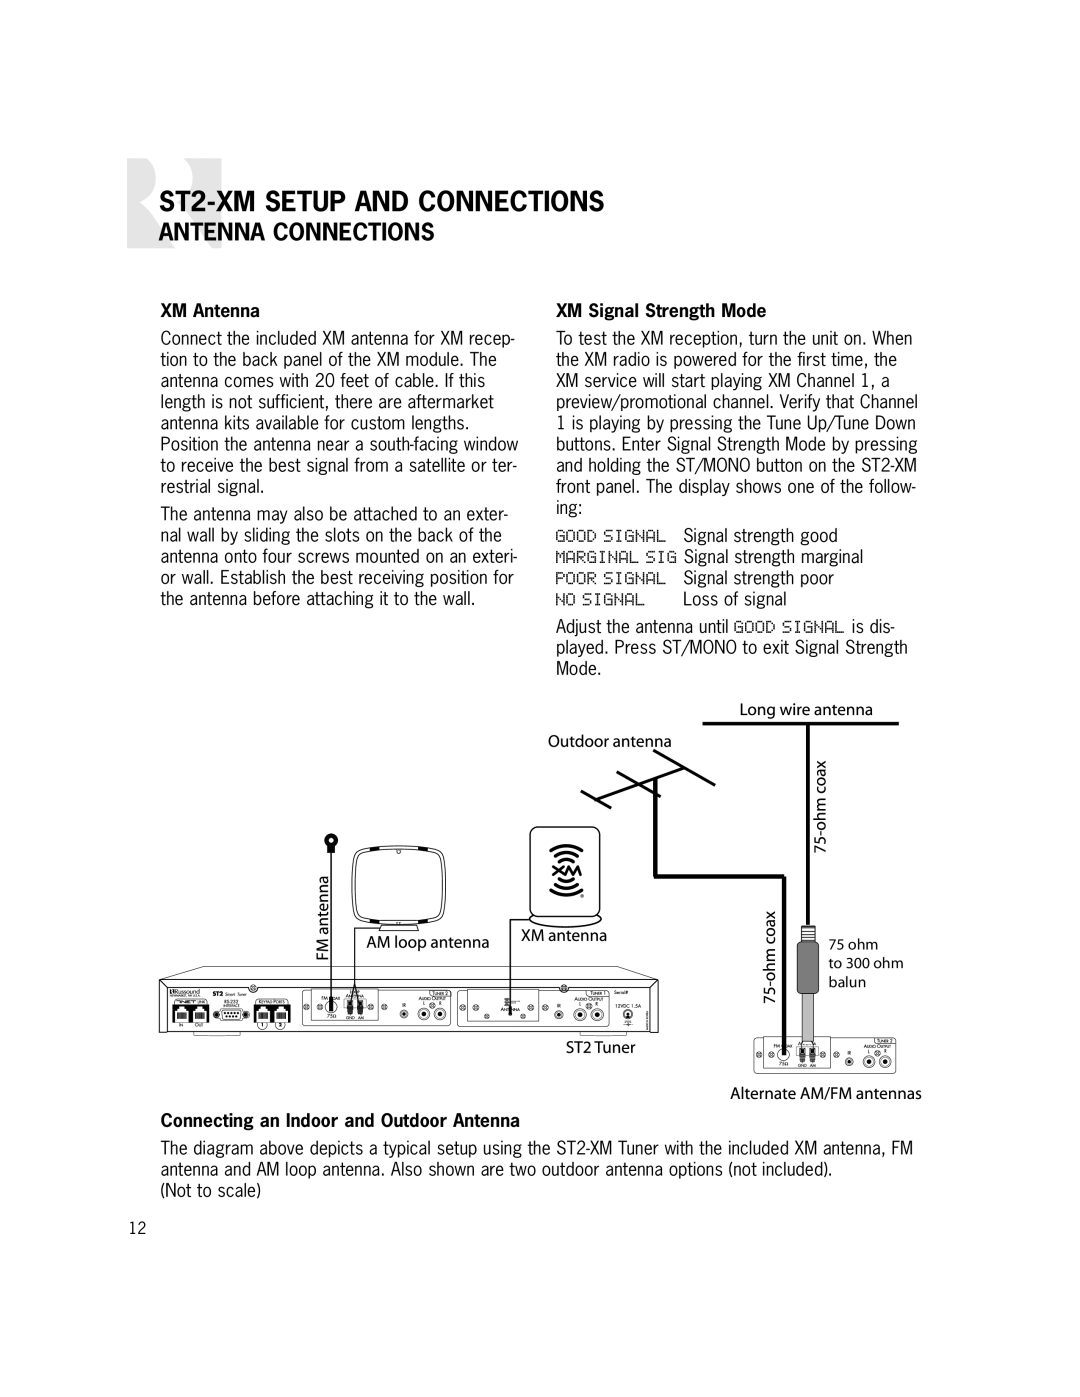
Connecting an Indoor and Outdoor Antenna
The diagram above depicts a typical setup using the
(Not to scale)
12