ASSEMBLY INSTRUCTIONS
BLOWER TUBE AND NOZZLE ASSEMBLY - BOTH MODELS
NOTE: Do not install tubes while unit is running.
1.Align the grooves in the blower tube with the pins in the blower outlet.
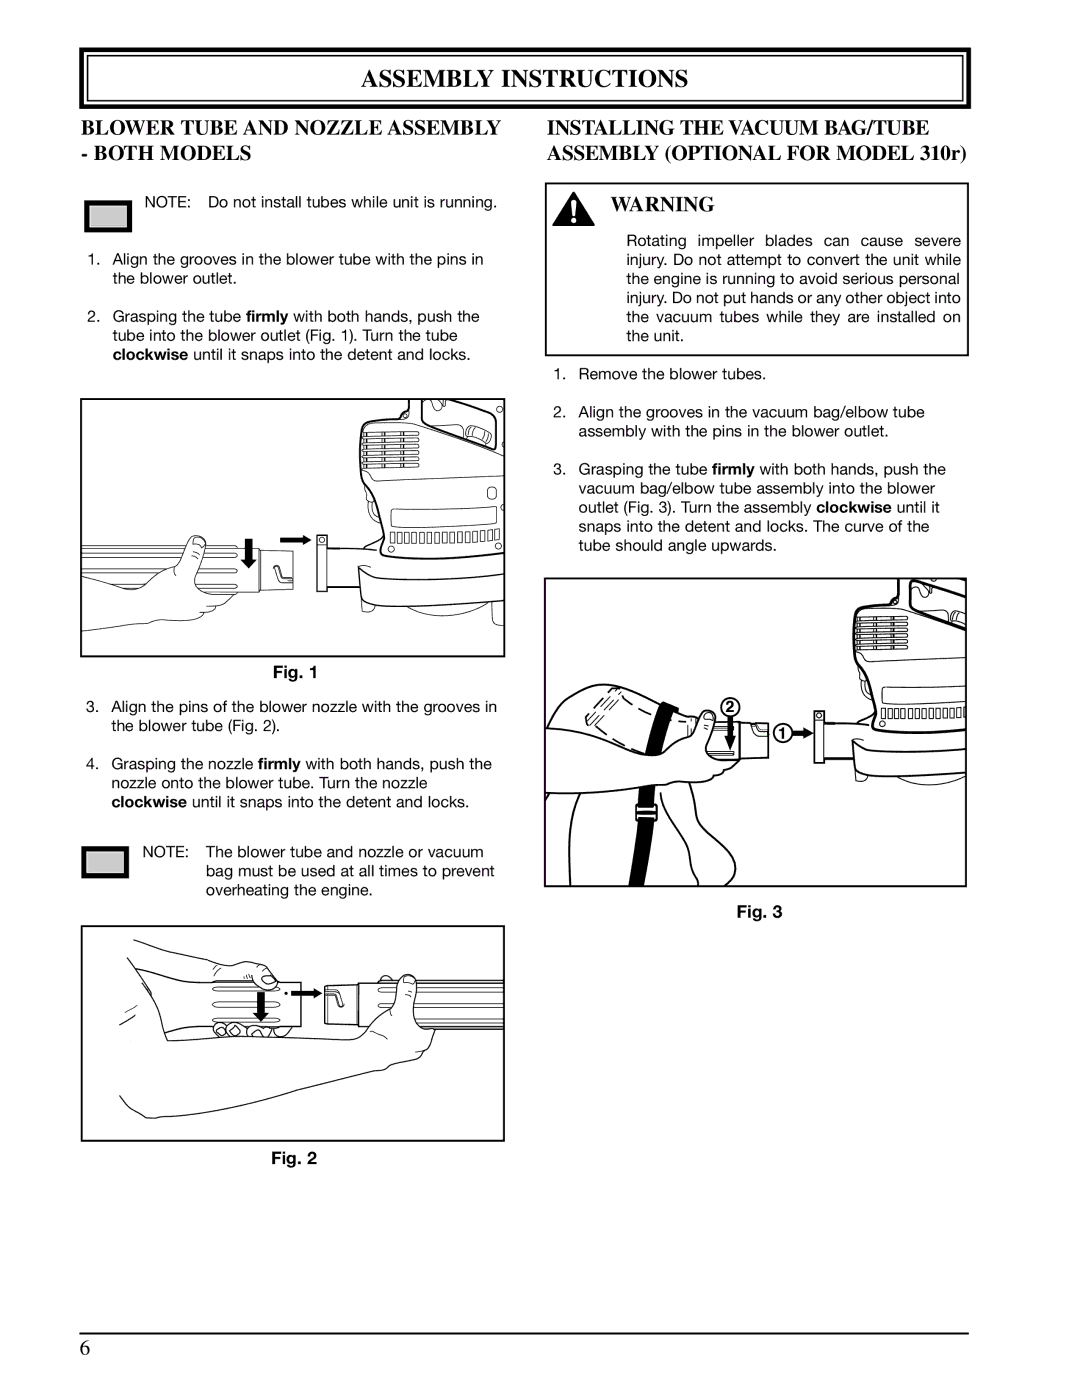
2.Grasping the tube firmly with both hands, push the tube into the blower outlet (Fig. 1). Turn the tube clockwise until it snaps into the detent and locks.
INSTALLING THE VACUUM BAG/TUBE ASSEMBLY (OPTIONAL FOR MODEL 310r)
WARNING
Rotating impeller blades can cause severe injury. Do not attempt to convert the unit while the engine is running to avoid serious personal injury. Do not put hands or any other object into the vacuum tubes while they are installed on the unit.
1.Remove the blower tubes.
2.Align the grooves in the vacuum bag/elbow tube assembly with the pins in the blower outlet.
3.Grasping the tube firmly with both hands, push the vacuum bag/elbow tube assembly into the blower outlet (Fig. 3). Turn the assembly clockwise until it snaps into the detent and locks. The curve of the tube should angle upwards.
Fig. 1
3. Align the pins of the blower nozzle with the grooves in the blower tube (Fig. 2).
4. Grasping the nozzle firmly with both hands, push the nozzle onto the blower tube. Turn the nozzle clockwise until it snaps into the detent and locks.
NOTE: The blower tube and nozzle or vacuum bag must be used at all times to prevent overheating the engine.
Fig. 3
Fig. 2
6