ASSEMBLY INSTRUCTIONS (Continued)
INSTALLING THE ADAPTER ONTO THE UPPER VACUUM TUBE - (OPTIONAL FOR MODEL 310r)
NOTE: Do not install while unit is running.
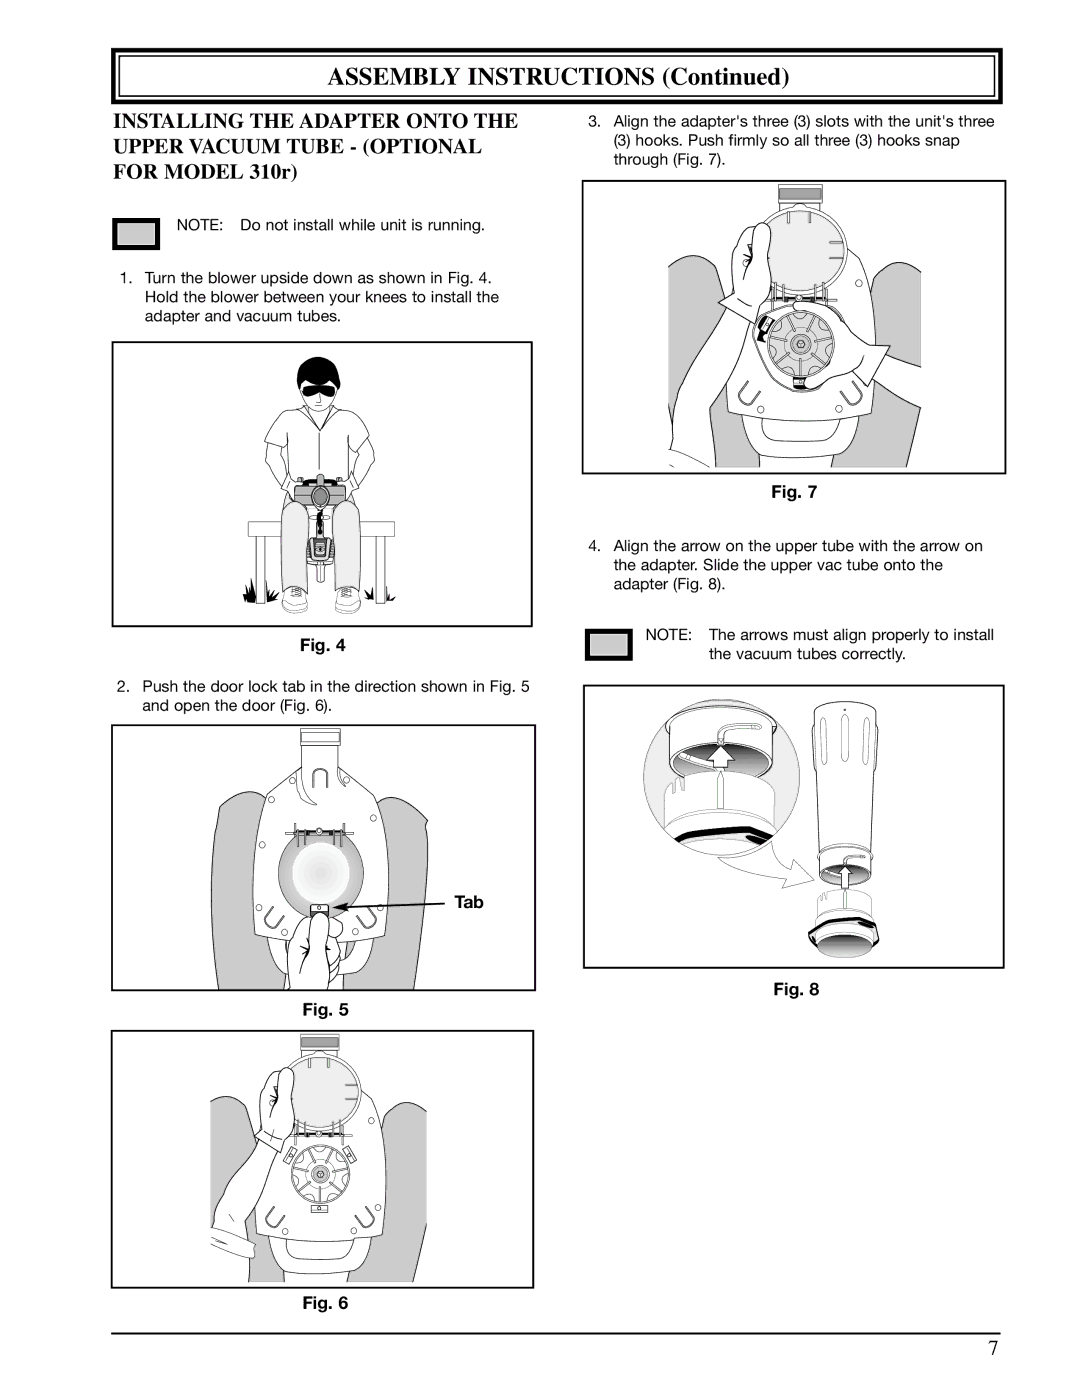
1.Turn the blower upside down as shown in Fig. 4. Hold the blower between your knees to install the adapter and vacuum tubes.
Fig. 4
2.Push the door lock tab in the direction shown in Fig. 5 and open the door (Fig. 6).
Tab
Fig. 5
3.Align the adapter's three (3) slots with the unit's three
(3) hooks. Push firmly so all three (3) hooks snap through (Fig. 7).
Fig. 7
4.Align the arrow on the upper tube with the arrow on the adapter. Slide the upper vac tube onto the adapter (Fig. 8).
NOTE: The arrows must align properly to install the vacuum tubes correctly.
Fig. 8
Fig. 6
7