JIG SAW MOUNTING
When used for jig saw mounting, this kit can be used with all Ryobi jig saws, plus most other brands of jig saws. Proper mounting of the jig saw base to the clamping brackets will determine which saws will work. The jig saw must be mounted securely for safety.
TO ASSEMBLE JIG SAW TO MOUNTING PLATE
See Figure 10.
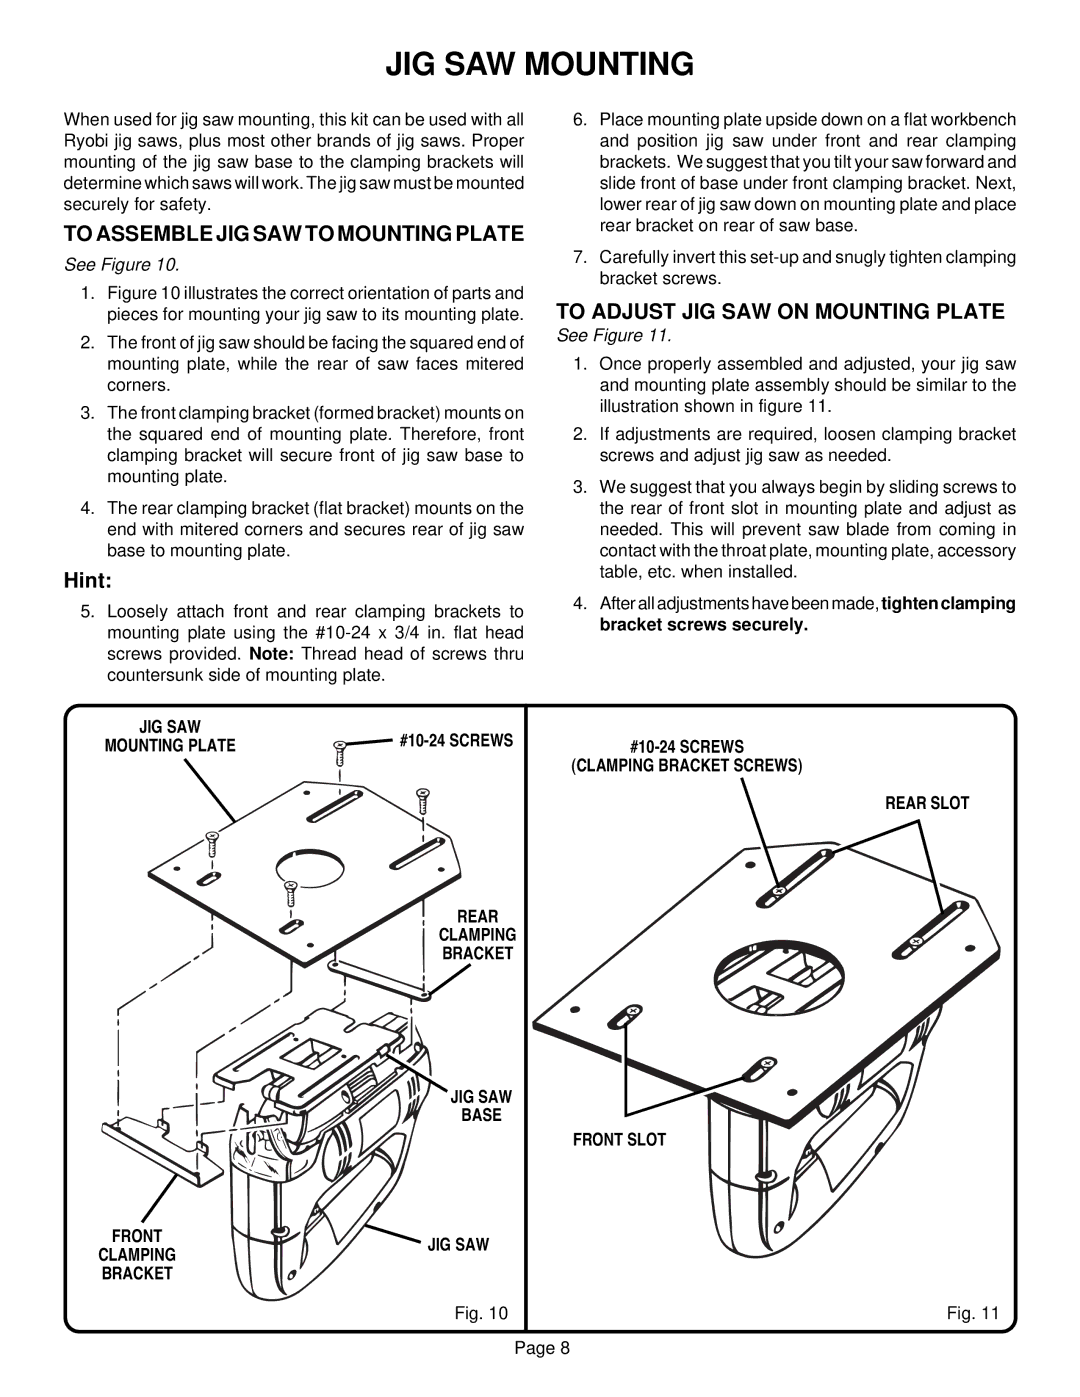
1.Figure 10 illustrates the correct orientation of parts and pieces for mounting your jig saw to its mounting plate.
2.The front of jig saw should be facing the squared end of mounting plate, while the rear of saw faces mitered corners.
3.The front clamping bracket (formed bracket) mounts on the squared end of mounting plate. Therefore, front clamping bracket will secure front of jig saw base to mounting plate.
4.The rear clamping bracket (flat bracket) mounts on the end with mitered corners and secures rear of jig saw base to mounting plate.
Hint:
5.Loosely attach front and rear clamping brackets to mounting plate using the
6.Place mounting plate upside down on a flat workbench and position jig saw under front and rear clamping brackets. We suggest that you tilt your saw forward and slide front of base under front clamping bracket. Next, lower rear of jig saw down on mounting plate and place rear bracket on rear of saw base.
7.Carefully invert this
TO ADJUST JIG SAW ON MOUNTING PLATE
See Figure 11.
1.Once properly assembled and adjusted, your jig saw and mounting plate assembly should be similar to the illustration shown in figure 11.
2.If adjustments are required, loosen clamping bracket screws and adjust jig saw as needed.
3.We suggest that you always begin by sliding screws to the rear of front slot in mounting plate and adjust as needed. This will prevent saw blade from coming in contact with the throat plate, mounting plate, accessory table, etc. when installed.
4.After all adjustments have been made, tighten clamping bracket screws securely.
JIG SAW |
| |
MOUNTING PLATE | ||
|
| (CLAMPING BRACKET SCREWS) |
REAR SLOT
REAR
CLAMPING
BRACKET
JIG SAW
BASE
FRONT SLOT
FRONT | JIG SAW | |
CLAMPING | ||
| ||
BRACKET |
|
Fig. 10 | Fig. 11 |
Page 8