OPERATION
CHARGING FLASHLIGHT
If your flashlight did not come in a cordless kit with other cordless products, a battery pack and charging assembly were not included. If you decide to purchase a battery pack, request recommended battery pack part number 1311146. If you decide to purchase a charging assembly, request recommended charging assembly part number 1411133, 1411140 or
TO CHARGE BATTERY PACK:
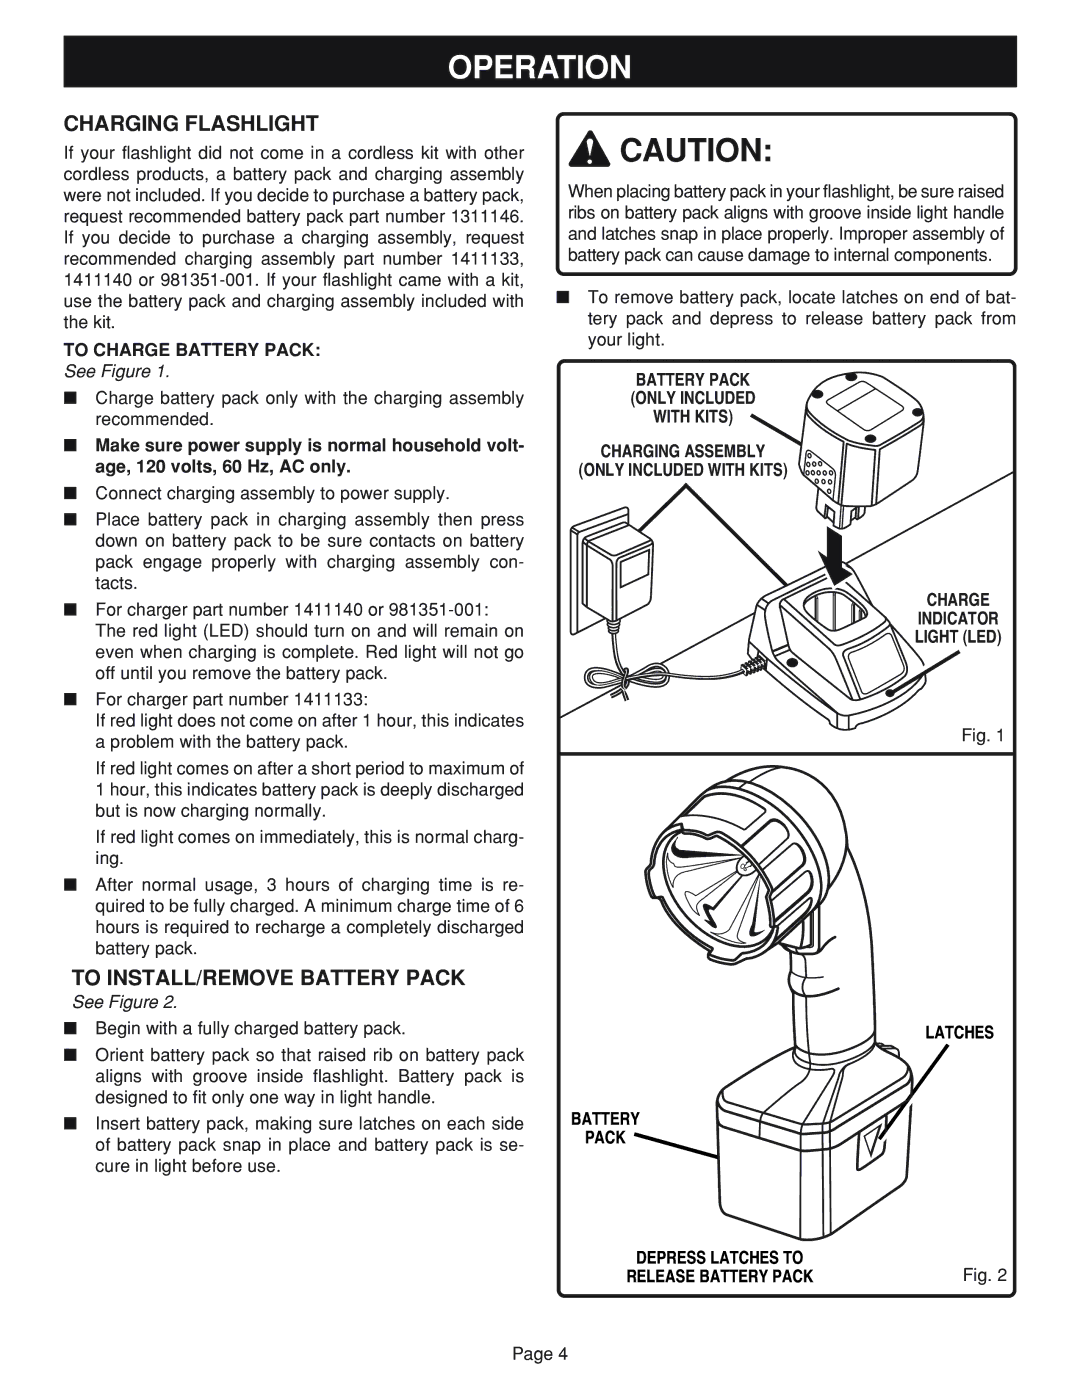
See Figure 1.
■Charge battery pack only with the charging assembly recommended.
■Make sure power supply is normal household volt- age, 120 volts, 60 Hz, AC only.
■Connect charging assembly to power supply.
■Place battery pack in charging assembly then press down on battery pack to be sure contacts on battery pack engage properly with charging assembly con- tacts.
■For charger part number 1411140 or
■For charger part number 1411133:
If red light does not come on after 1 hour, this indicates a problem with the battery pack.
If red light comes on after a short period to maximum of 1 hour, this indicates battery pack is deeply discharged but is now charging normally.
If red light comes on immediately, this is normal charg- ing.
■After normal usage, 3 hours of charging time is re- quired to be fully charged. A minimum charge time of 6 hours is required to recharge a completely discharged battery pack.
TO INSTALL/REMOVE BATTERY PACK
See Figure 2.
■Begin with a fully charged battery pack.
■Orient battery pack so that raised rib on battery pack aligns with groove inside flashlight. Battery pack is designed to fit only one way in light handle.
■Insert battery pack, making sure latches on each side of battery pack snap in place and battery pack is se- cure in light before use.
![]() CAUTION:
CAUTION:
When placing battery pack in your flashlight, be sure raised ribs on battery pack aligns with groove inside light handle and latches snap in place properly. Improper assembly of battery pack can cause damage to internal components.
■To remove battery pack, locate latches on end of bat- tery pack and depress to release battery pack from your light.
BATTERY PACK (ONLY INCLUDED WITH KITS)
CHARGING ASSEMBLY
(ONLY INCLUDED WITH KITS)
CHARGE
INDICATOR
LIGHT (LED)
Fig. 1
LATCHES
BATTERY
PACK ![]()
DEPRESS LATCHES TO | Fig. 2 |
RELEASE BATTERY PACK |
Page 4