OPERATION
STARTING AND ENDING A CUT
INTERNAL ROUTING
Tilt router and place on workpiece, letting edge of subbase contact workpiece first. Be careful not to let router bit contact workpiece. Turn router on and let motor build to its full speed. Gradually feed cutter into workpiece until subbase is level with workpiece.
![]() WARNING:
WARNING:
Keep a firm grip on router with both hands at all times. Failure to do so could result in loss of control leading to possible serious injury.
Upon completion of cut, turn motor off and let it come to a complete stop before removing router from work surface.
![]() WARNING:
WARNING:
Never pull router out of work and place upside down on work surface before the cutter stops.
EDGING WITH PILOT BITS
The
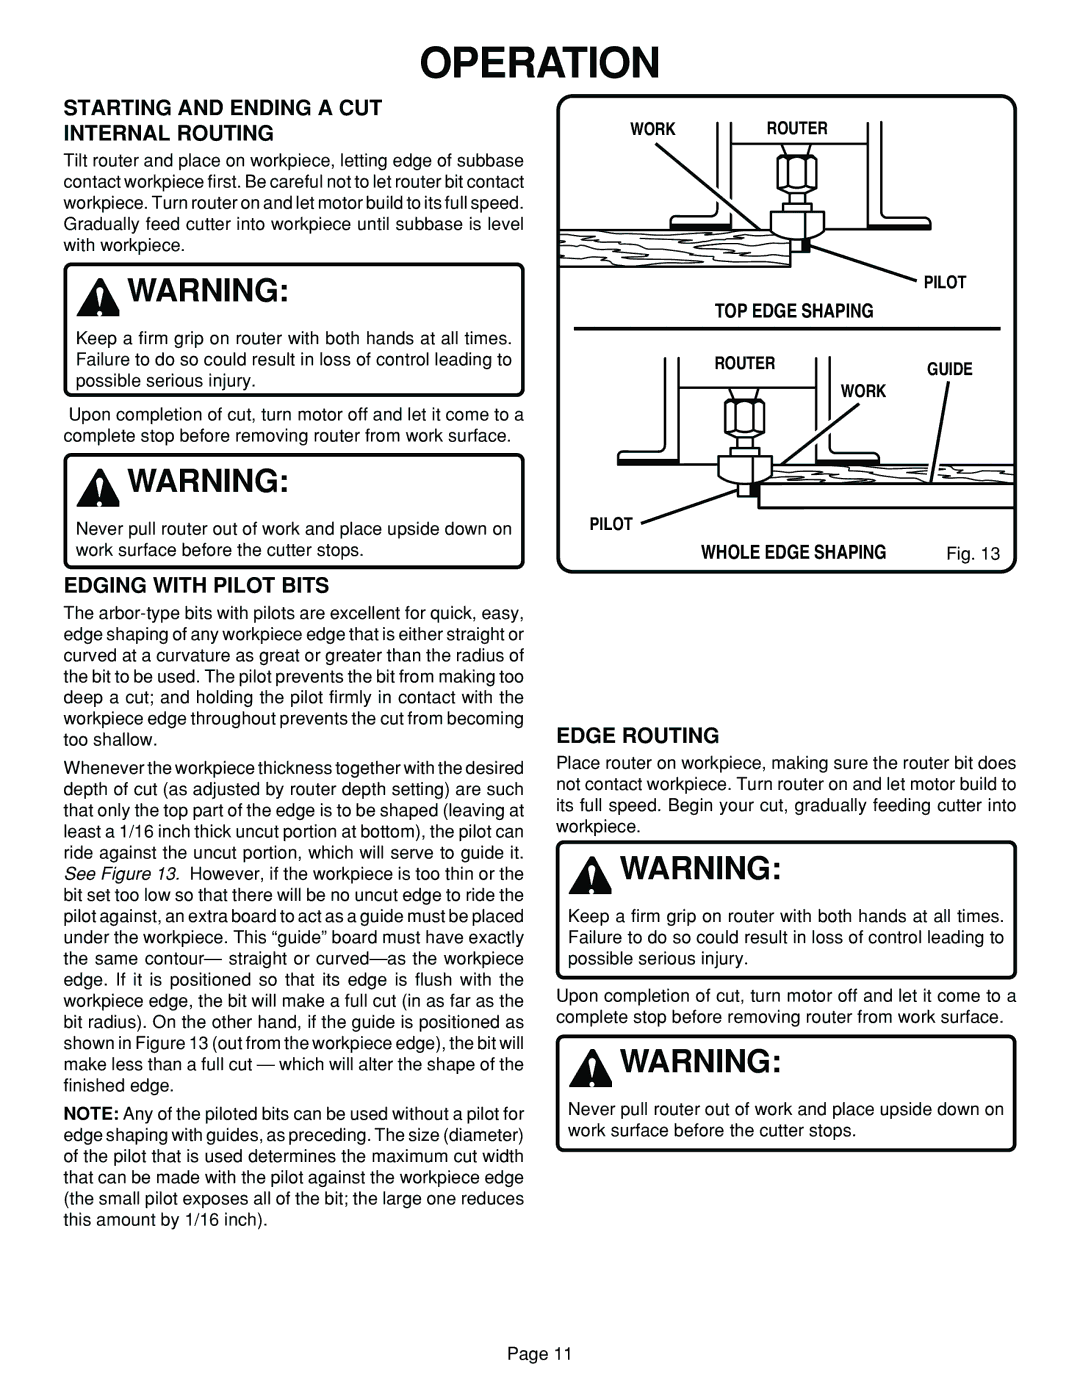
Whenever the workpiece thickness together with the desired depth of cut (as adjusted by router depth setting) are such that only the top part of the edge is to be shaped (leaving at least a 1/16 inch thick uncut portion at bottom), the pilot can ride against the uncut portion, which will serve to guide it. See Figure 13. However, if the workpiece is too thin or the bit set too low so that there will be no uncut edge to ride the pilot against, an extra board to act as a guide must be placed under the workpiece. This “guide” board must have exactly the same contour— straight or
NOTE: Any of the piloted bits can be used without a pilot for edge shaping with guides, as preceding. The size (diameter) of the pilot that is used determines the maximum cut width that can be made with the pilot against the workpiece edge (the small pilot exposes all of the bit; the large one reduces this amount by 1/16 inch).
WORKROUTER
PILOT
TOP EDGE SHAPING
ROUTERGUIDE
WORK
PILOT
WHOLE EDGE SHAPING | Fig. 13 |
EDGE ROUTING
Place router on workpiece, making sure the router bit does not contact workpiece. Turn router on and let motor build to its full speed. Begin your cut, gradually feeding cutter into workpiece.
![]() WARNING:
WARNING:
Keep a firm grip on router with both hands at all times. Failure to do so could result in loss of control leading to possible serious injury.
Upon completion of cut, turn motor off and let it come to a complete stop before removing router from work surface.
![]() WARNING:
WARNING:
Never pull router out of work and place upside down on work surface before the cutter stops.
Page 11