ASSEMBLY
Attach the plastic tubing to the sawdust blower and bellows tube on the top of the saw housing.
Apply a coat of paste wax to the saw table surface to allow the workpiece to slide easily across the surface. Wipe the saw table thoroughly with a dry cloth to remove excess wax.
MOUNTING SCROLL SAW TO WORKBENCH
![]() WARNING:
WARNING:
To avoid serious personal injury from unexpected tool movement, always securely mount scroll saw to a workbench.
If the scroll saw is to be used in a permanent application, we recommend that you secure it in a permanent location such as a workbench. When mounting the saw to a workbench, holes should be drilled through the supporting surface of the workbench.
■Each hole in the base of the saw should be bolted securely using machine bolts, washers, and nuts (not included). Bolts should be of sufficient length to accom- modate the saw base, washers, nuts, and the thickness of the workbench.
■Place scroll saw on workbench. Using the saw base as a pattern, locate and mark the holes where the scroll saw is to be mounted.
■Drill four holes through the workbench.
■Place scroll saw on workbench aligning holes in the saw base with the holes drilled in the workbench.
■Insert all four bolts (not included) and tighten securely with washers and nuts (not included).
Note: All bolts should be inserted from the top. Install the washers and nuts from the underside of the bench.
Supporting surface where scroll saw is mounted should be examined carefully after mounting to insure that no move- ment during use can result. If any tipping or walking is noted, secure workbench or supporting surface before beginning cutting operations.
Reducing Noise and Vibration:
You may wish to place a foam pad or piece of carpet between the saw base and the workbench to help reduce noise and vibration.
If a foam pad or piece of carpet is used, do not overtighten the mounting bolts. Leave some cushion between the pad- ding and the saw base to help absorb the noise and vibration.
The size of the padding material should be approximately 24 in. x 12 in. x 1/2 in. (610 mm x 305 mm x 13 mm).
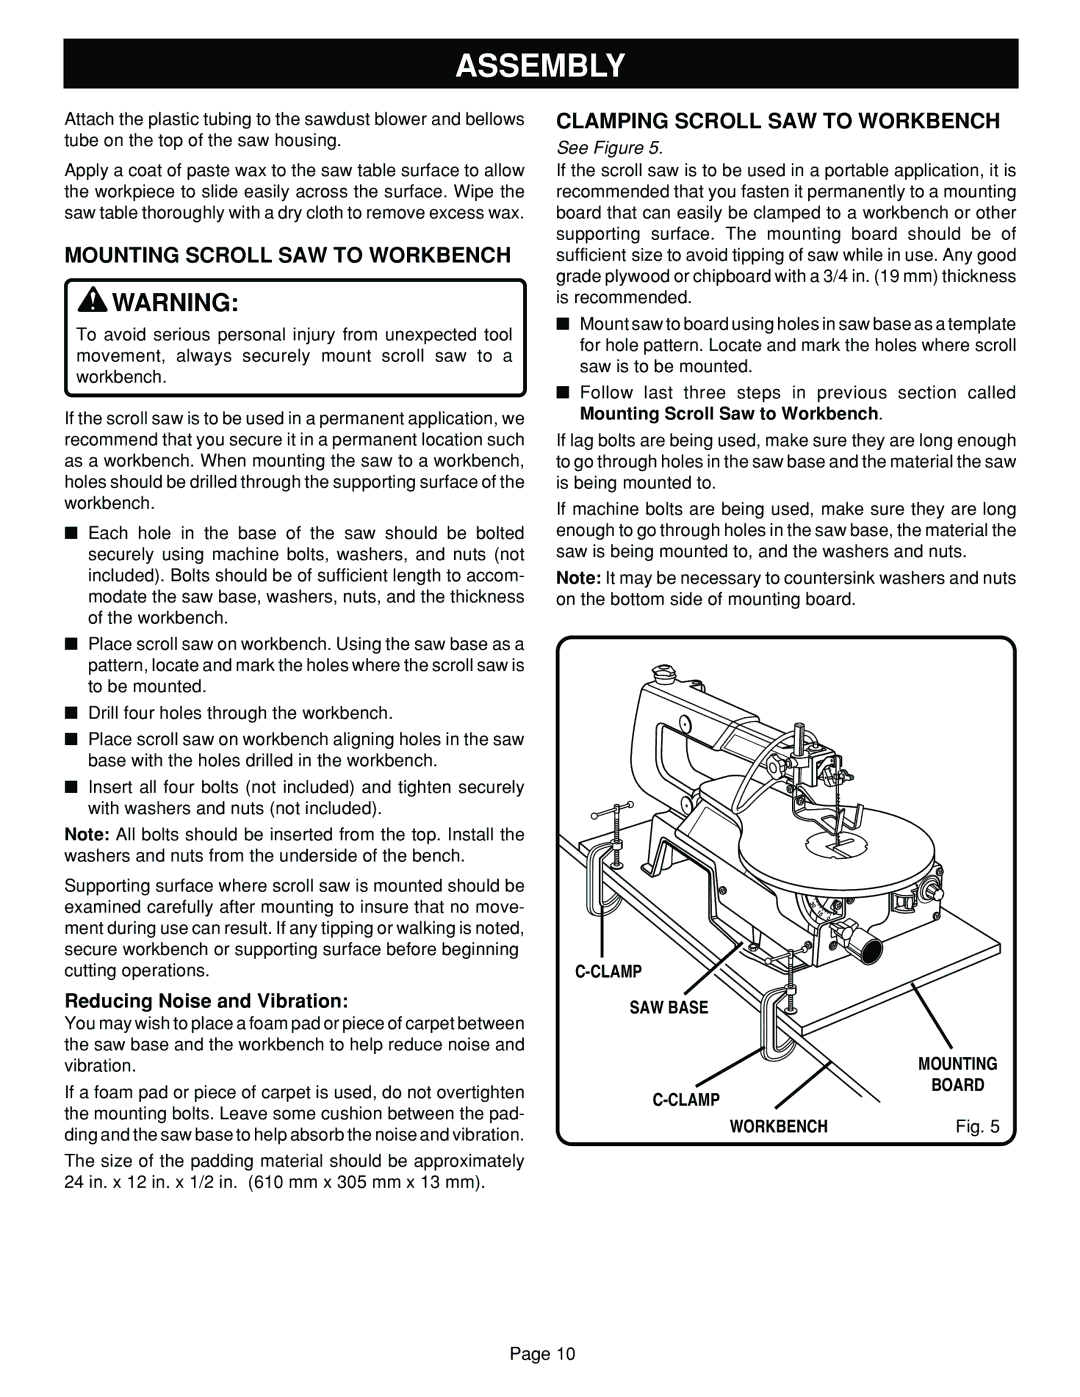
CLAMPING SCROLL SAW TO WORKBENCH
See Figure 5.
If the scroll saw is to be used in a portable application, it is recommended that you fasten it permanently to a mounting board that can easily be clamped to a workbench or other supporting surface. The mounting board should be of sufficient size to avoid tipping of saw while in use. Any good grade plywood or chipboard with a 3/4 in. (19 mm) thickness is recommended.
■Mount saw to board using holes in saw base as a template for hole pattern. Locate and mark the holes where scroll saw is to be mounted.
■Follow last three steps in previous section called Mounting Scroll Saw to Workbench.
If lag bolts are being used, make sure they are long enough to go through holes in the saw base and the material the saw is being mounted to.
If machine bolts are being used, make sure they are long enough to go through holes in the saw base, the material the saw is being mounted to, and the washers and nuts.
Note: It may be necessary to countersink washers and nuts on the bottom side of mounting board.
30
1 5
0
C-CLAMP
SAW BASE
MOUNTING
BOARD
WORKBENCH | Fig. 5 |
Page 10