
VC120 specifications
The Ryobi VC120 is an innovative vacuum cleaner designed to provide high-performance cleaning solutions for both indoor and outdoor environments. Its compact and lightweight design makes it easy to handle while still remaining powerful enough to tackle various messes.One of the standout features of the VC120 is its versatility. It is equipped with a powerful motor that generates strong suction, allowing it to effectively pick up dirt, dust, debris, and even liquid spills. This makes it an ideal choice for homeowners looking to maintain cleanliness in their living spaces or for those who engage in outdoor activities such as gardening and DIY projects.
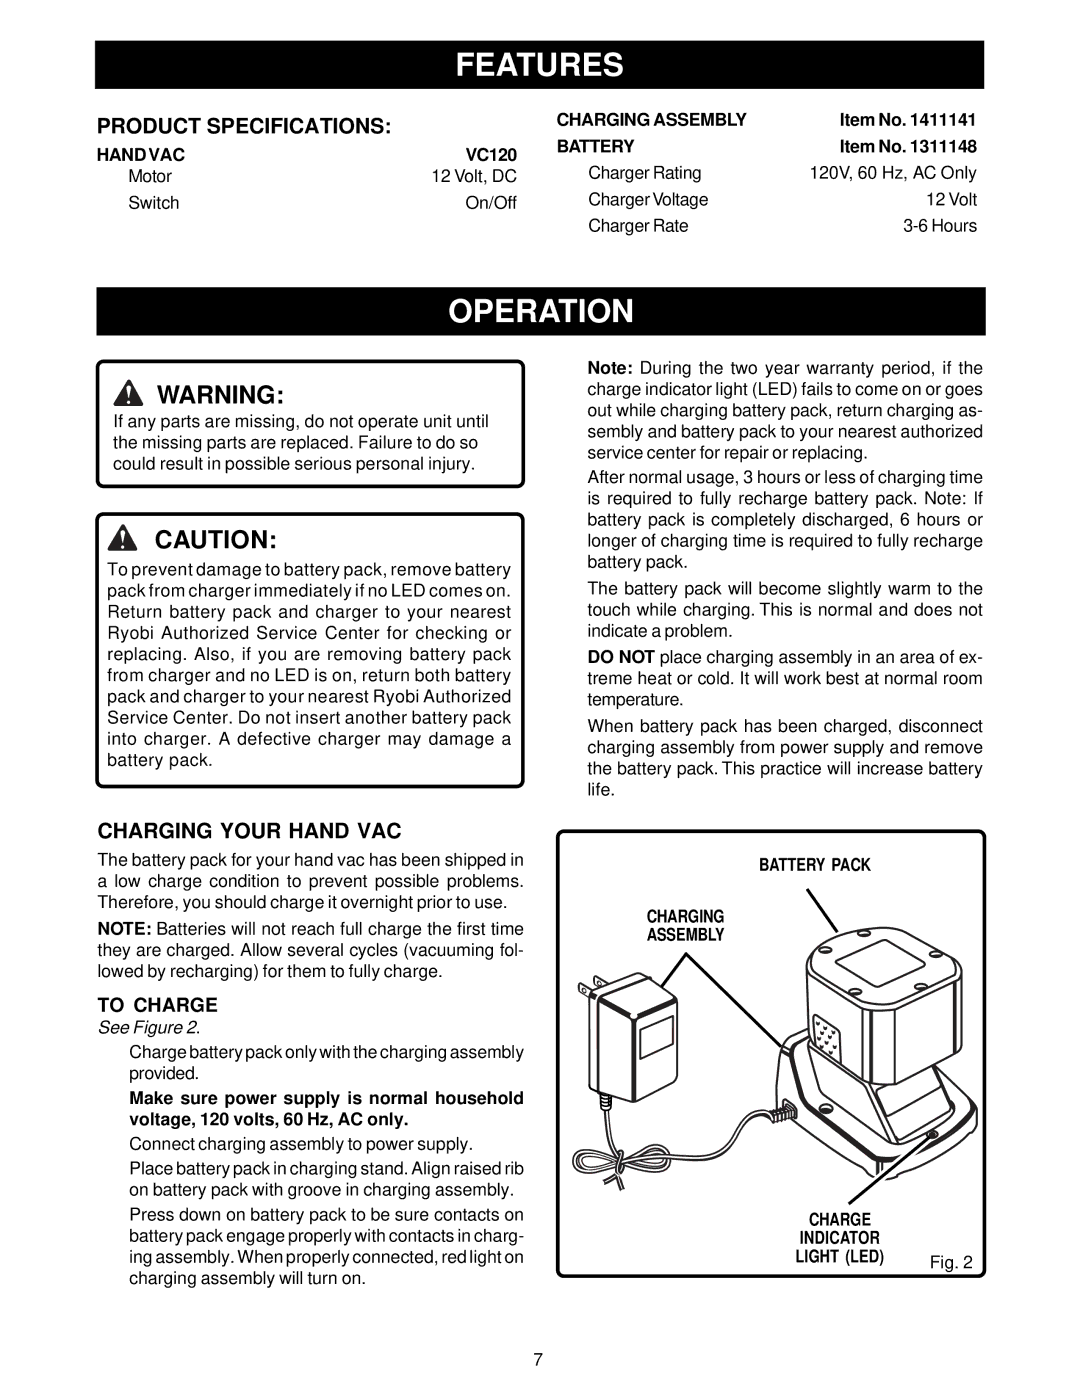
The VC120 features a cordless design powered by a lithium-ion battery. This eliminates the hassle of tangled cords and offers freedom of movement, making it suitable for cleaning hard-to-reach areas. The battery life is optimized for durability, providing users with ample cleaning time on a single charge. Additionally, the battery can be easily replaced, ensuring long-term usability.
Another notable characteristic of the Ryobi VC120 is its advanced filtration system. It comes equipped with a washable filter that captures fine particles, ensuring that the air released back into the environment is clean and free from allergens. This feature is particularly beneficial for allergy sufferers and helps in maintaining a healthier indoor atmosphere.
The vacuum’s design includes multiple attachment options, which enhance its versatility. Users can switch between different nozzles and brushes easily to transition from cleaning carpets to hard floors, as well as upholstery and tight spaces. These attachments ensure that every inch of a home or workspace can be effectively cleaned.
User-friendly operation is also a hallmark of the VC120. It features an ergonomic handle for comfort during extended cleaning sessions, and its lightweight build reduces fatigue. The vacuum is designed for easy storage, with a compact form that allows it to fit neatly in closets or small spaces.
In summary, the Ryobi VC120 vacuum cleaner combines powerful suction, cordless convenience, advanced filtration, and versatile attachments to deliver a superior cleaning experience. Whether used at home or for outdoor projects, it provides an efficient solution to keep spaces tidy and well-maintained.