ASSEMBLY
To remove:
nLoosen the knob.
nPush in the button and twist the shafts to remove and separate ends.
nCarefully pour fuel into the tank. Avoid spillage.
nPrior to replacing the fuel cap, clean and inspect the gasket.
nImmediately replace fuel cap and hand tighten. Wipe up any fuel spillage.
GUIDE
POWER HEAD
SHAFT
COUPLER
NOTE: It is normal for smoke to be emitted from a new engine after first use.
RECESS
BUTTON
POSITIONING | KNOB |
HOLE | |
PRUNER |
|
ATTACHMENT | Fig. 4 |
CHAIN OILER
Add bar and chain oil in the chain oiler tank before starting the engine of the power head.
FUELING AND REFUELING
FUEL MIXTURE
This product is powered by a
nThis engine is certified to operate on unleaded gasoline intended for automotive use.
nMix high quality
nDo not use automotive oil or
nDO NOT mix quantities larger than usable in a
PREMIUM EXACT MIX™ (50:1)
GASOLINE | OIL |
1 Gallon (US) | 2.6 oz. |
1 Liter | 20 cc (20 ml) |
FILLING TANK
n Clean surface around fuel cap to prevent contami- nation.
n Loosen fuel cap slowly. Rest the cap on a clean surface.
WARNING:
Always shut off engine before fueling. Never add fuel to a machine with a running or hot engine. Move at least 30 ft. from refueling site before starting the engine. Do not smoke!
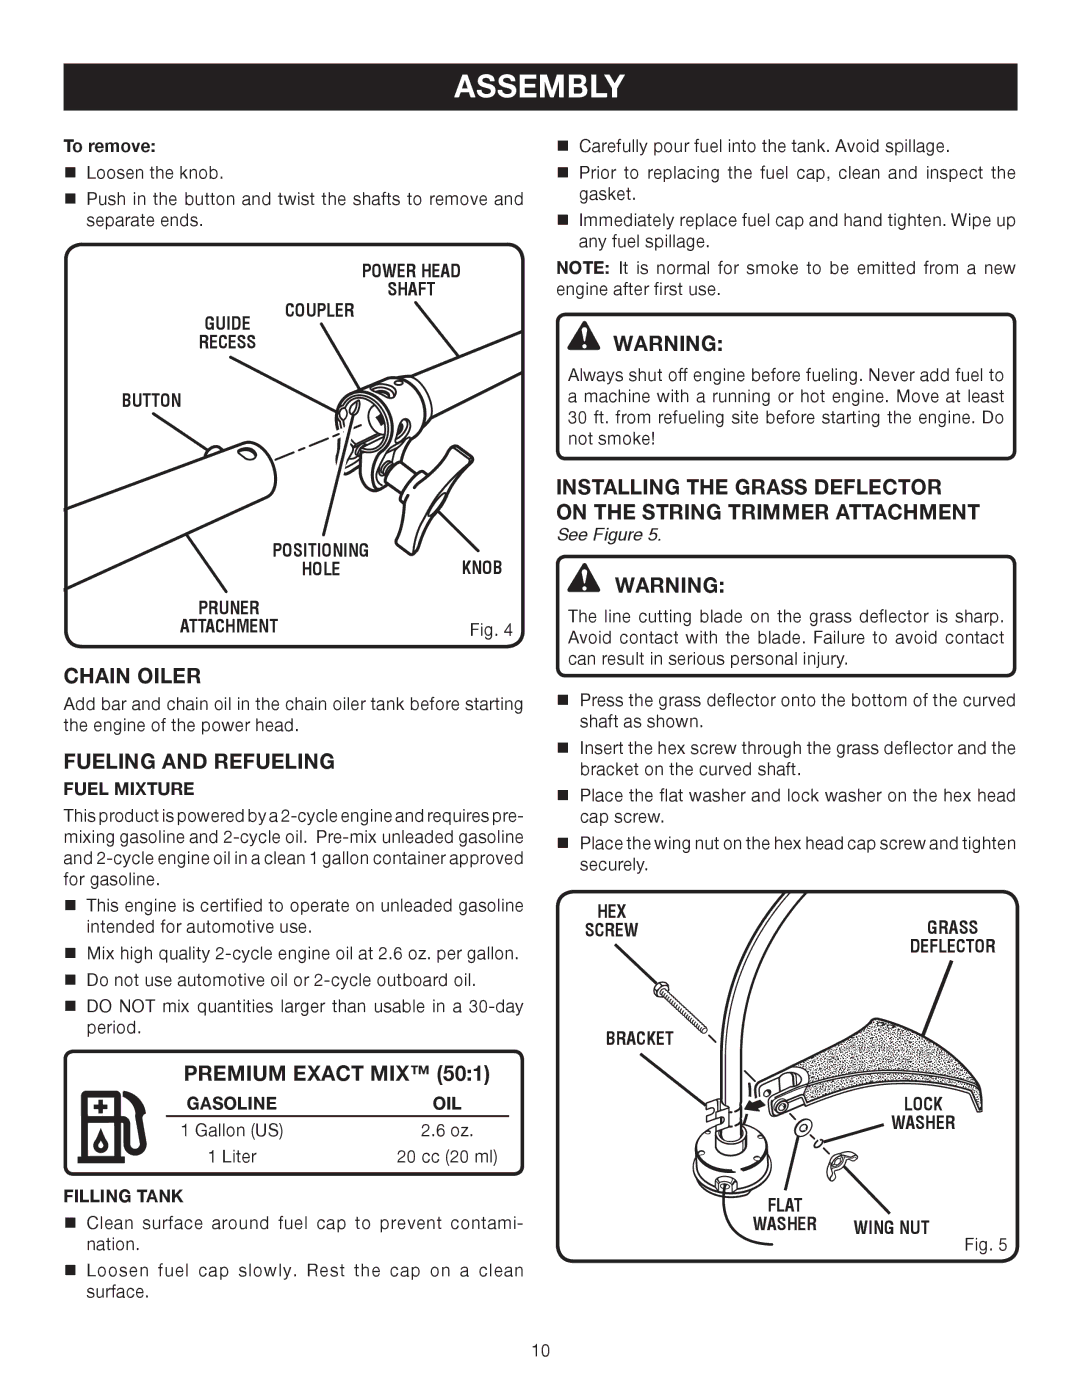
INSTALLING THE GRASS DEFLECTOR ON THE STRING TRIMMER ATTACHMENT
See Figure 5.
WARNING:
The line cutting blade on the grass deflector is sharp. Avoid contact with the blade. Failure to avoid contact can result in serious personal injury.
nPress the grass deflector onto the bottom of the curved shaft as shown.
nInsert the hex screw through the grass deflector and the bracket on the curved shaft.
nPlace the flat washer and lock washer on the hex head cap screw.
nPlace the wing nut on the hex head cap screw and tighten securely.
HEX
SCREWGRASS DEFLECTOR
BRACKET
| LOCK |
| WASHER |
FLAT |
|
WASHER | WING NUT |
| Fig. 5 |
10
