
BL-1051 specifications
The Salton BL-1051 is a remarkable kitchen appliance that combines functionality with innovative design. It is specifically engineered for those who enjoy creating fresh, delicious dishes at home with minimal effort. The appliance embodies a perfect blend of advanced technologies and user-friendly features that cater to both novice cooks and seasoned chefs alike.One of the standout characteristics of the Salton BL-1051 is its powerful motor, which enables efficient blending and mixing. This robust motor can effortlessly handle a variety of ingredients, from soft fruits to tough vegetables, ensuring that users can achieve the desired consistency with ease. The appliance is equipped with multiple speed settings, allowing for precise control over the blending process. Whether making smoothies, soups, or sauces, the BL-1051 adapts seamlessly to the user’s preferences.
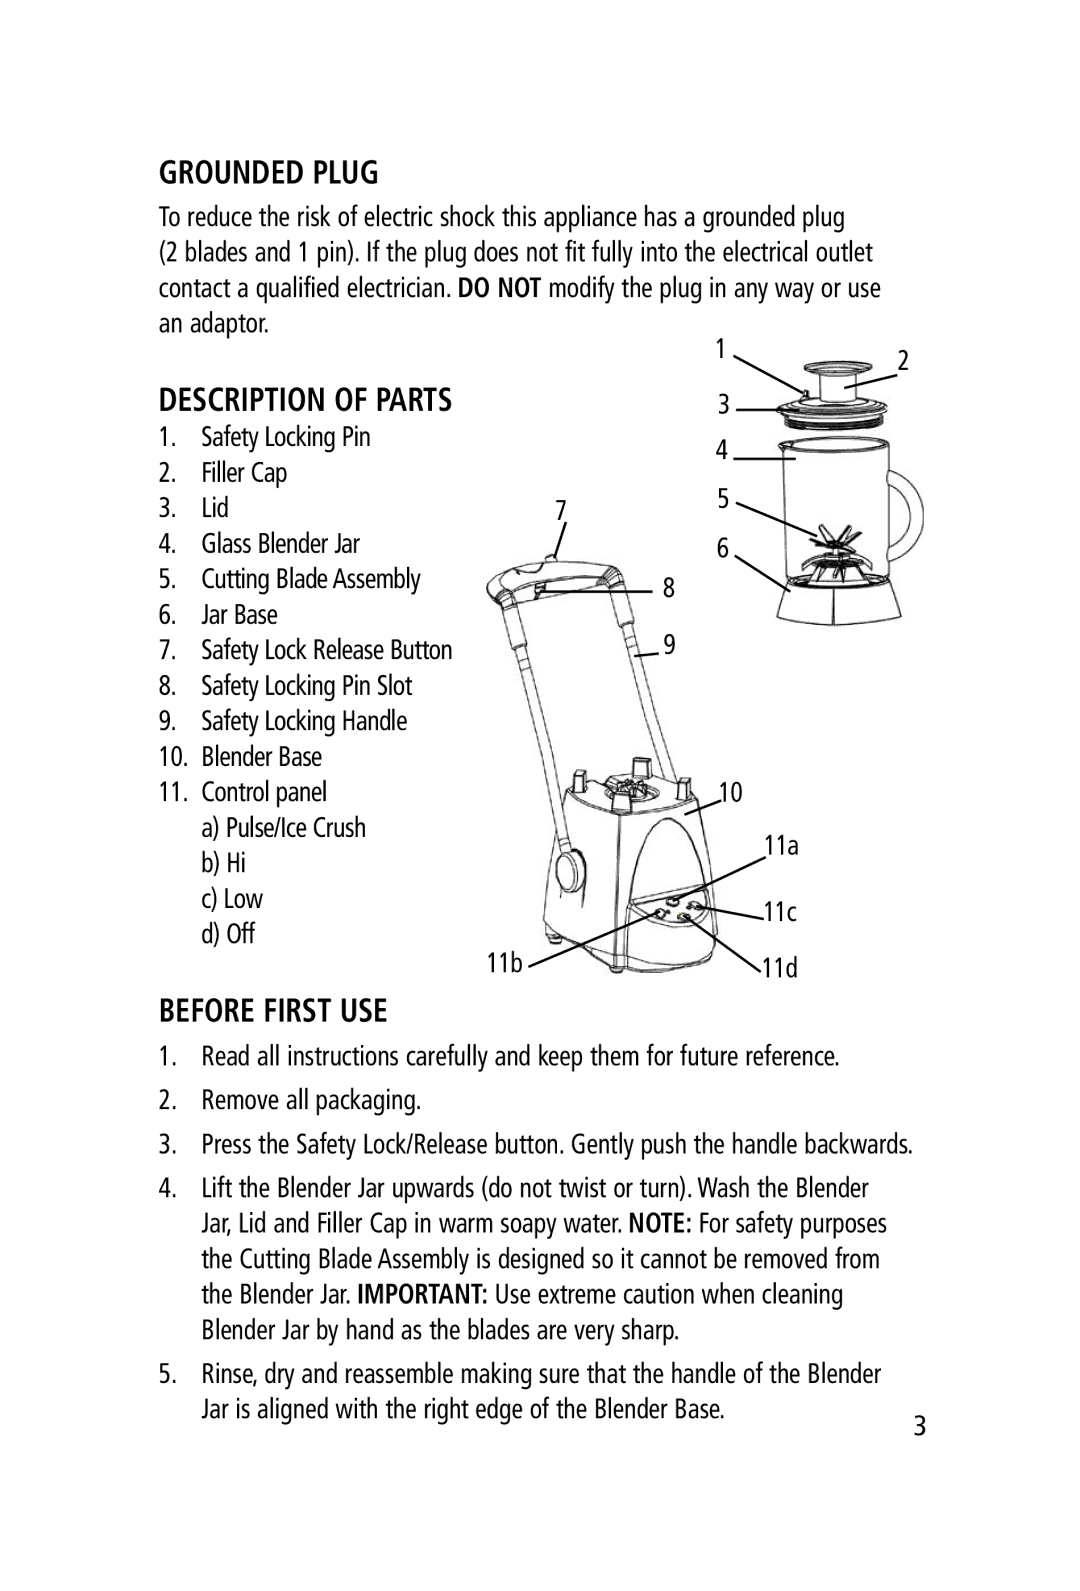
The design of the Salton BL-1051 emphasizes convenience and ease of use. It features a large capacity blending jug, which is perfect for preparing generous servings for families or gatherings. The jug is made from high-quality, BPA-free material that not only enhances safety but also withstands the rigors of daily use. Furthermore, the ergonomic handle ensures a secure grip, providing comfort during operation.
In terms of cleaning, the BL-1051's components are designed with simplicity in mind. The blending jug and blades are dishwasher safe, which removes the hassle often associated with cleanup after cooking. This user-friendly feature keeps the kitchen experience enjoyable and stress-free.
Additionally, the Salton BL-1051 incorporates safety features that protect users during operation. The appliance is designed to prevent overheating, and it comes with a secure lid that locks in place, avoiding any accidental spills or messes.
Another notable technology is the stainless-steel blade system, which is sharp and durable, ensuring long-lasting performance. This allows for precise chopping, grinding, and mixing of ingredients, providing versatility in meal preparation.
Overall, the Salton BL-1051 is a versatile and efficient appliance that enhances any kitchen. Its blend of powerful technology, user-friendly design, and safety features makes it an essential tool for anyone looking to elevate their culinary skills. Whether embarking on new recipes or preparing family favorites, users can rely on the Salton BL-1051 to deliver excellent results every time.