
AW0500 AW0500A specifications
The Samsung AW0500 AW0500A is a portable air conditioning unit designed to provide efficient cooling for residential and commercial spaces. With its sleek design and powerful performance, this model has gained popularity among consumers seeking an effective cooling solution.One of the main features of the Samsung AW0500 AW0500A is its nominal cooling capacity, which is typically around 5,000 BTUs. This makes it suitable for cooling rooms of various sizes, offering optimal performance for spaces up to 150 square feet. The unit also incorporates multiple cooling and fan speeds, allowing users to customize their comfort levels according to their specific needs.
The AW0500 AW0500A utilizes advanced inverter technology that enhances energy efficiency. This technology enables the unit to adjust its cooling output based on the ambient temperature, leading to lower energy consumption and cost savings on electricity bills. Additionally, the appliance’s eco-friendly refrigerant not only contributes to effective cooling but also minimizes its impact on the environment.
Another notable characteristic is its user-friendly interface. The air conditioner features an easy-to-read LED display that provides real-time information on temperature settings and modes. The inclusion of a remote control allows users to operate the unit from a distance, enhancing convenience, especially during hot summer days.
The Samsung AW0500 AW0500A also incorporates a built-in timer, which enables users to program the unit to turn on or off at specific times. This feature helps in managing energy usage and ensuring that the room is comfortably cool when needed. Additionally, the unit comes with a washable filter that helps maintain air quality by capturing dust and allergens, making it a suitable choice for those with respiratory sensitivities.
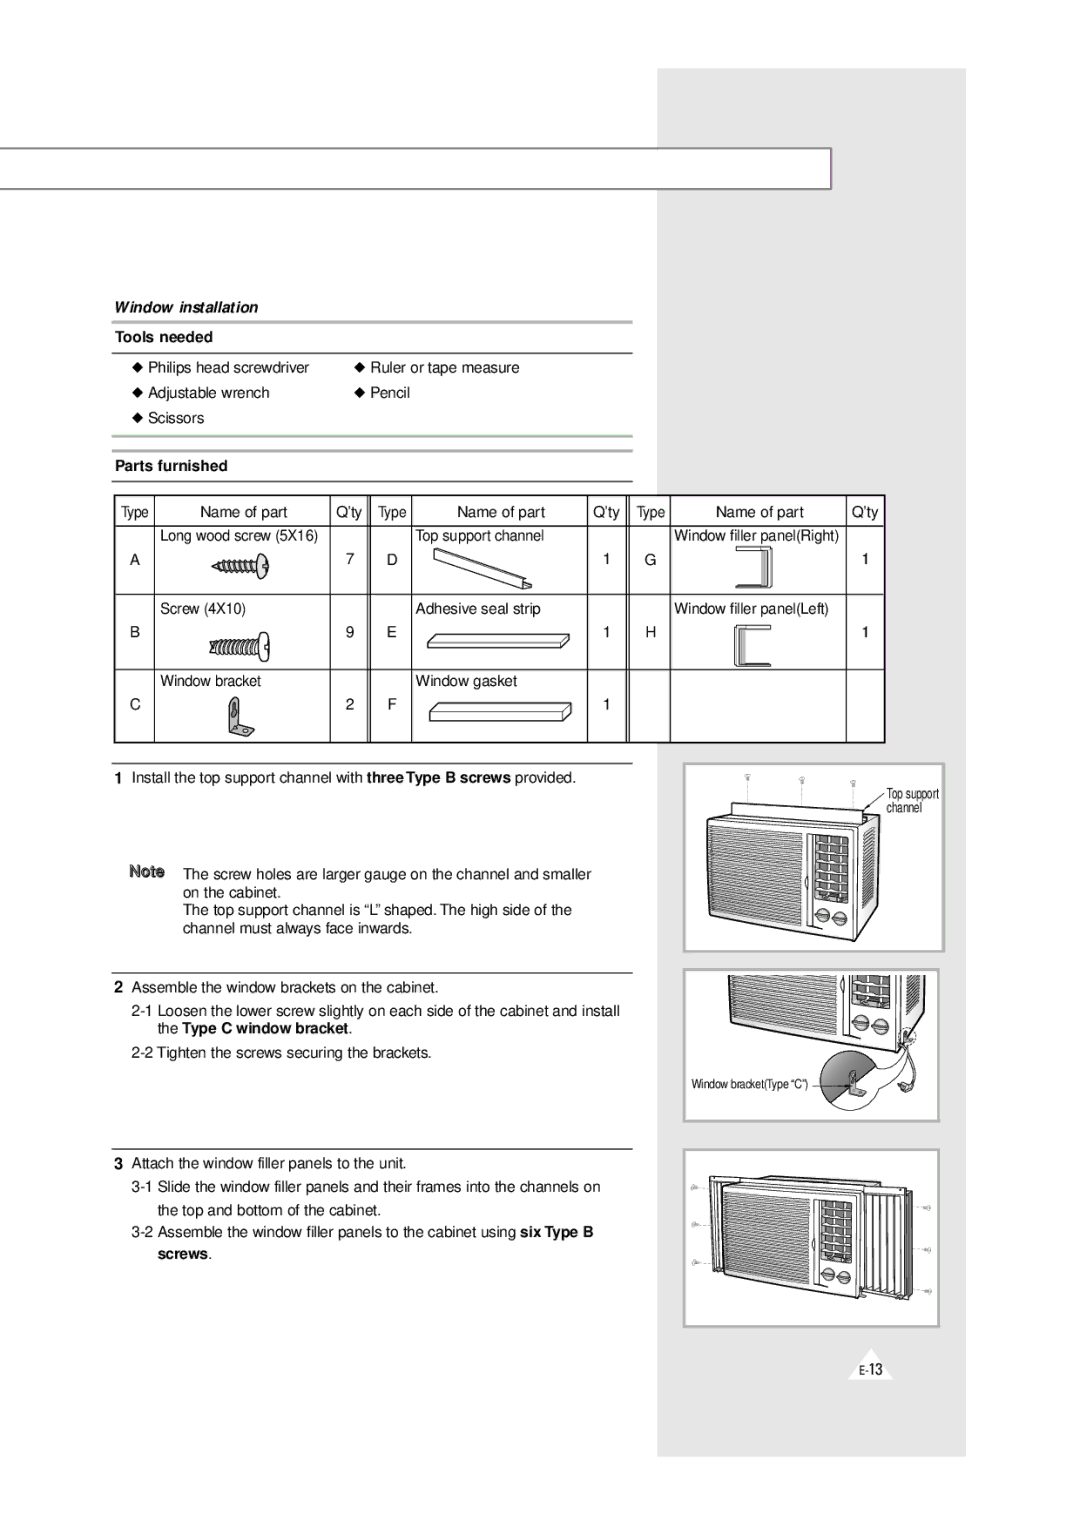
For installation, the AW0500 AW0500A includes a window kit, allowing for straightforward set-up in a variety of environments. Its compact design makes it easy to move from one room to another, catering to different cooling needs throughout the home or office.
In summary, the Samsung AW0500 AW0500A stands out for its blend of efficient cooling technology, user-friendly features, and eco-friendly design, making it an excellent choice for anyone looking to beat the heat.