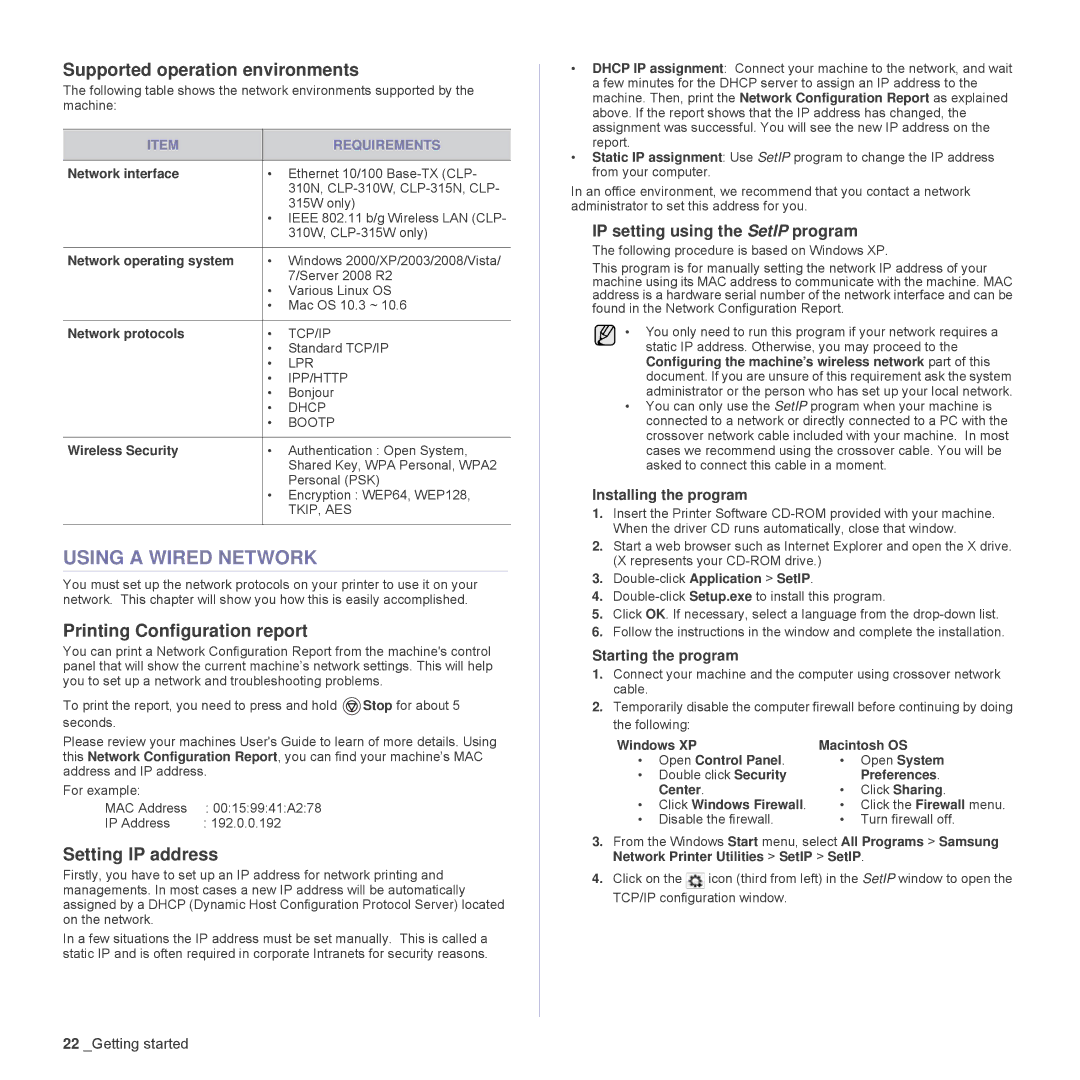
Supported operation environments
The following table shows the network environments supported by the machine:
ITEM |
| REQUIREMENTS |
|
|
|
Network interface | • | Ethernet 10/100 |
|
| 310N, |
|
| 315W only) |
| • IEEE 802.11 b/g Wireless LAN (CLP- | |
|
| 310W, |
|
|
|
Network operating system | • | Windows 2000/XP/2003/2008/Vista/ |
|
| 7/Server 2008 R2 |
| • | Various Linux OS |
| • Mac OS 10.3 ~ 10.6 | |
|
|
|
Network protocols | • | TCP/IP |
| • | Standard TCP/IP |
| • | LPR |
| • | IPP/HTTP |
| • | Bonjour |
| • | DHCP |
| • | BOOTP |
|
|
|
Wireless Security | • | Authentication : Open System, |
|
| Shared Key, WPA Personal, WPA2 |
|
| Personal (PSK) |
| • | Encryption : WEP64, WEP128, |
|
| TKIP, AES |
|
|
|
USING A WIRED NETWORK
You must set up the network protocols on your printer to use it on your network. This chapter will show you how this is easily accomplished.
Printing Configuration report
You can print a Network Configuration Report from the machine's control panel that will show the current machine’s network settings. This will help you to set up a network and troubleshooting problems.
To print the report, you need to press and hold ![]() Stop for about 5 seconds.
Stop for about 5 seconds.
Please review your machines User's Guide to learn of more details. Using this Network Configuration Report, you can find your machine’s MAC address and IP address.
For example: |
|
MAC Address | : 00:15:99:41:A2:78 |
IP Address | : 192.0.0.192 |
Setting IP address
Firstly, you have to set up an IP address for network printing and managements. In most cases a new IP address will be automatically assigned by a DHCP (Dynamic Host Configuration Protocol Server) located on the network.
In a few situations the IP address must be set manually. This is called a static IP and is often required in corporate Intranets for security reasons.
•DHCP IP assignment: Connect your machine to the network, and wait a few minutes for the DHCP server to assign an IP address to the machine. Then, print the Network Configuration Report as explained above. If the report shows that the IP address has changed, the assignment was successful. You will see the new IP address on the report.
•Static IP assignment: Use SetIP program to change the IP address from your computer.
In an office environment, we recommend that you contact a network administrator to set this address for you.
IP setting using the SetIP program
The following procedure is based on Windows XP.
This program is for manually setting the network IP address of your machine using its MAC address to communicate with the machine. MAC address is a hardware serial number of the network interface and can be found in the Network Configuration Report.
• You only need to run this program if your network requires a static IP address. Otherwise, you may proceed to the Configuring the machine’s wireless network part of this document. If you are unsure of this requirement ask the system administrator or the person who has set up your local network.
•You can only use the SetIP program when your machine is connected to a network or directly connected to a PC with the crossover network cable included with your machine. In most cases we recommend using the crossover cable. You will be asked to connect this cable in a moment.
Installing the program
1.Insert the Printer Software
2.Start a web browser such as Internet Explorer and open the X drive. (X represents your
3.Double-click Application > SetIP.
4.
5.Click OK. If necessary, select a language from the
6.Follow the instructions in the window and complete the installation.
Starting the program
1.Connect your machine and the computer using crossover network cable.
2.Temporarily disable the computer firewall before continuing by doing the following:
Windows XP | Macintosh OS | ||
• | Open Control Panel. | • | Open System |
• | Double click Security |
| Preferences. |
| Center. | • | Click Sharing. |
• | Click Windows Firewall. | • Click the Firewall menu. | |
• | Disable the firewall. | • | Turn firewall off. |
3.From the Windows Start menu, select All Programs > Samsung Network Printer Utilities > SetIP > SetIP.
4.Click on the ![]() icon (third from left) in the SetIP window to open the TCP/IP configuration window.
icon (third from left) in the SetIP window to open the TCP/IP configuration window.
22 _Getting started