E

Ajuste del canal de TV

Configuraci n


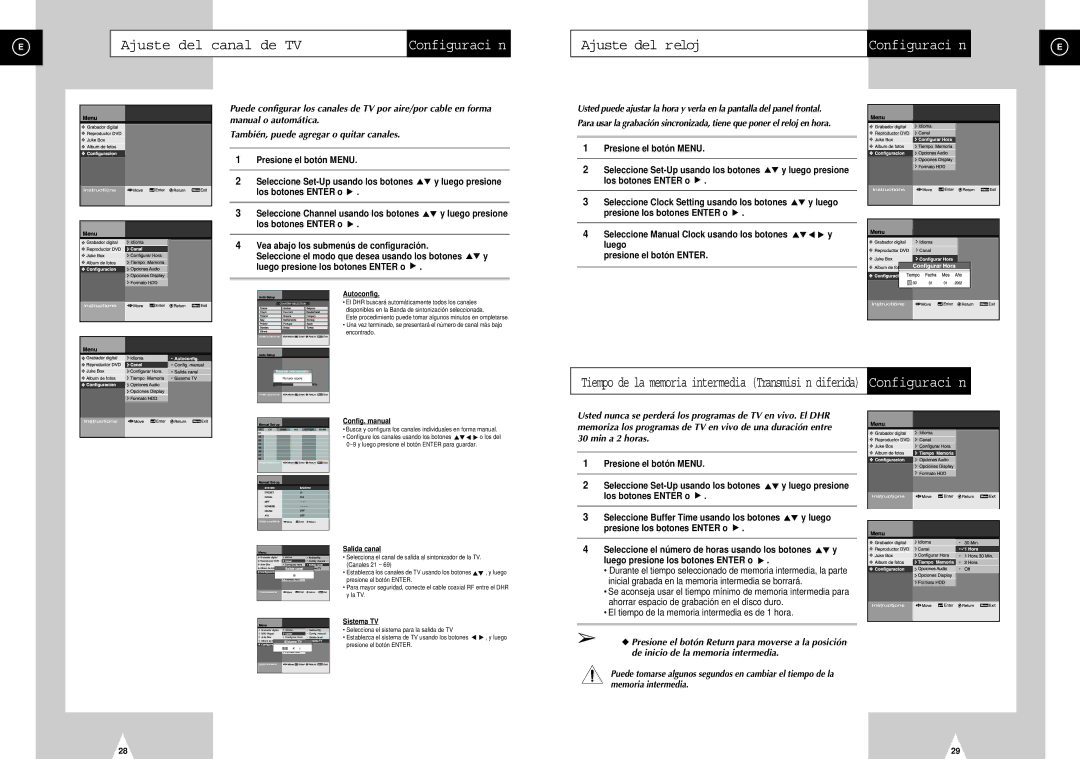
Puede configurar los canales de TV por aire/por cable en forma manual o automática.

También, puede agregar o quitar canales.

1Presione el botón MENU.

2Seleccione Set-Up usando los botones y luego presione

los botones ENTER o .

3Seleccione Channel usando los botones y luego presione

los botones ENTER o .

4 Vea abajo los submenús de configuración.

Seleccione el modo que desea usando los botones y luego presione los botones ENTER o .

Autoconfig.

• El DHR buscará automáticamente todos los canales disponibles en la Banda de sintonización seleccionada.

Este procedimiento puede tomar algunos minutos en ompletarse.

• Una vez terminado, se presentará el número de canal más bajo encontrado.

Busqueda canal automatico

Por favor espere

Config. manual

• Busca y configura los canales individuales en forma manual.

• Configure los canales usando los botones

o los del

0~9 y luego presione el botón ENTER para guardar.


Salida canal

• Selecciona el canal de salida al sintonizador de la TV. (Canales 21 ~ 69)

• Establezca los canales de TV usando los botones , y luego presione el botón ENTER.

• Para mayor seguridad, conecte el cable coaxial RF entre el DHR y la TV.

Sistema TV

• Selecciona el sistema para la salida de TV

• Establezca el sistema de TV usando los botones , y luego presione el botón ENTER.

Ajuste del reloj

Configuraci n


Usted puede ajustar la hora y verla en la pantalla del panel frontal.

Para usar la grabación sincronizada, tiene que poner el reloj en hora.

1 Presione el botón MENU.

2 Seleccione Set-Up usando los botones y luego presione los botones ENTER o .

3 Seleccione Clock Setting usando los botones y luego presione los botones ENTER o .

4 Seleccione Manual Clock usando los botones y luego

presione el botón ENTER.

Tiempo de la memoria intermedia (Transmisi n diferida) Configuraci n

Usted nunca se perderá los programas de TV en vivo. El DHR memoriza los programas de TV en vivo de una duración entre 30 min a 2 horas.

1 Presione el botón MENU.

2Seleccione Set-Up usando los botones y luego presione

los botones ENTER o .

3Seleccione Buffer Time usando los botones y luego

presione los botones ENTER o .

4 Seleccione el número de horas usando los botones y luego presione los botones ENTER o .

• Durante el tiempo seleccionado de memoria intermedia, la parte inicial grabada en la memoria intermedia se borrará.

Se aconseja usar el tiempo mínimo de memoria intermedia para

ahorrar espacio de grabación en el disco duro.

El tiempo de la memoria intermedia es de 1 hora.

Presione el botón Return para moverse a la posición de inicio de la memoria intermedia.

Puede tomarse algunos segundos en cambiar el tiempo de la memoria intermedia.

E

28

29

Page 15
Image 15
Samsung DVD-H40E/XEC, DVD-H40E/AFR manual Ajuste del canal de TV

DVD-H40E/AFR, DVD-H40E/XEC specifications

The Samsung DVD-H40E is a versatile and feature-rich DVD player that showcases Samsung's dedication to home entertainment technology. Available in models such as the DVD-H40E/XEC and DVD-H40E/AFR, this DVD player offers a variety of functions that cater to different user preferences.

At the core of the Samsung DVD-H40E is its impressive compatibility with various disc formats, including DVD-Video, DVD±R/RW, CD-DA, and MP3-CD, which ensures that users can enjoy their favorite movies and music without the hassle of compatibility issues. This player also supports JPEG image playback, enabling users to view their photo collections directly on their TV screens.

The DVD-H40E features progressive scan technology, which enhances video quality by providing a smoother and sharper picture. By displaying images in full resolution, the progressive scan capability reduces motion blur and improves overall clarity, making it particularly beneficial for action-packed films and fast-paced scenes. Coupled with the player's Dolby Digital and DTS support, viewers can experience immersive audio that complements the stunning visuals.

Another standout feature of the Samsung DVD-H40E is its user-friendly interface and remote control. The intuitive design allows for easy navigation through menus, settings, and playback options, making it accessible for all users, from tech enthusiasts to casual viewers. The remote control adds convenience, allowing users to manage playback from the comfort of their seating area.

The player also incorporates features like fast and slow motion playback, enabling viewers to rewatch their favorite scenes at varying speeds. Additionally, the DVD-H40E is equipped with parental controls, giving families the ability to restrict access to certain content based on age ratings.

In terms of connectivity, the Samsung DVD-H40E includes composite video and audio outputs, allowing for simple connection to most TVs. It also supports S-Video output for those seeking improved picture quality. The compact design of the DVD-H40E ensures it fits well in any entertainment setup without taking up much space.

In summary, the Samsung DVD-H40E/XEC and DVD-H40E/AFR models blend technology and practicality, making them excellent choices for anyone looking to enhance their home viewing experience. With compatibility with various formats, high-quality video and audio output, and user-friendly features, it is a reliable addition to any entertainment system. Whether for casual viewing or an immersive movie night, the Samsung DVD-H40E stands out as a solid choice for DVD enthusiasts.