DVD-VR300
Getting Started
Important Safety Instructions
Precaution
Maintenance of Cabinet
Handling Cautions
Disc Storage
Disc Specifications
DVD-RW Disc Playback and Recording
Contents
Reference
General Features
Before Reading User’s Manual
How to use the DVD Recorder-VCR
Step Recording
Description
Front Panel
Front Panel Display
Rear Panel
Started
Menu Button
Tour of the Remote Control
Quick Overview
Connecting & Setting Up
Unpacking
Accessories
Method1 Antenna + DVD Recorder VCR + TV No Cable box
Method 2 Antenna +Cable box +
Method 1 Connecting to a video input jack
Method 2 Connecting to an S-video input jack
This connection will use your TV’s speakers
Method 1 Connecting to your TV
FrontLspeakerFrontRspeaker
External Devices
Method 3 Connecting a Camcorder to the DV in jack
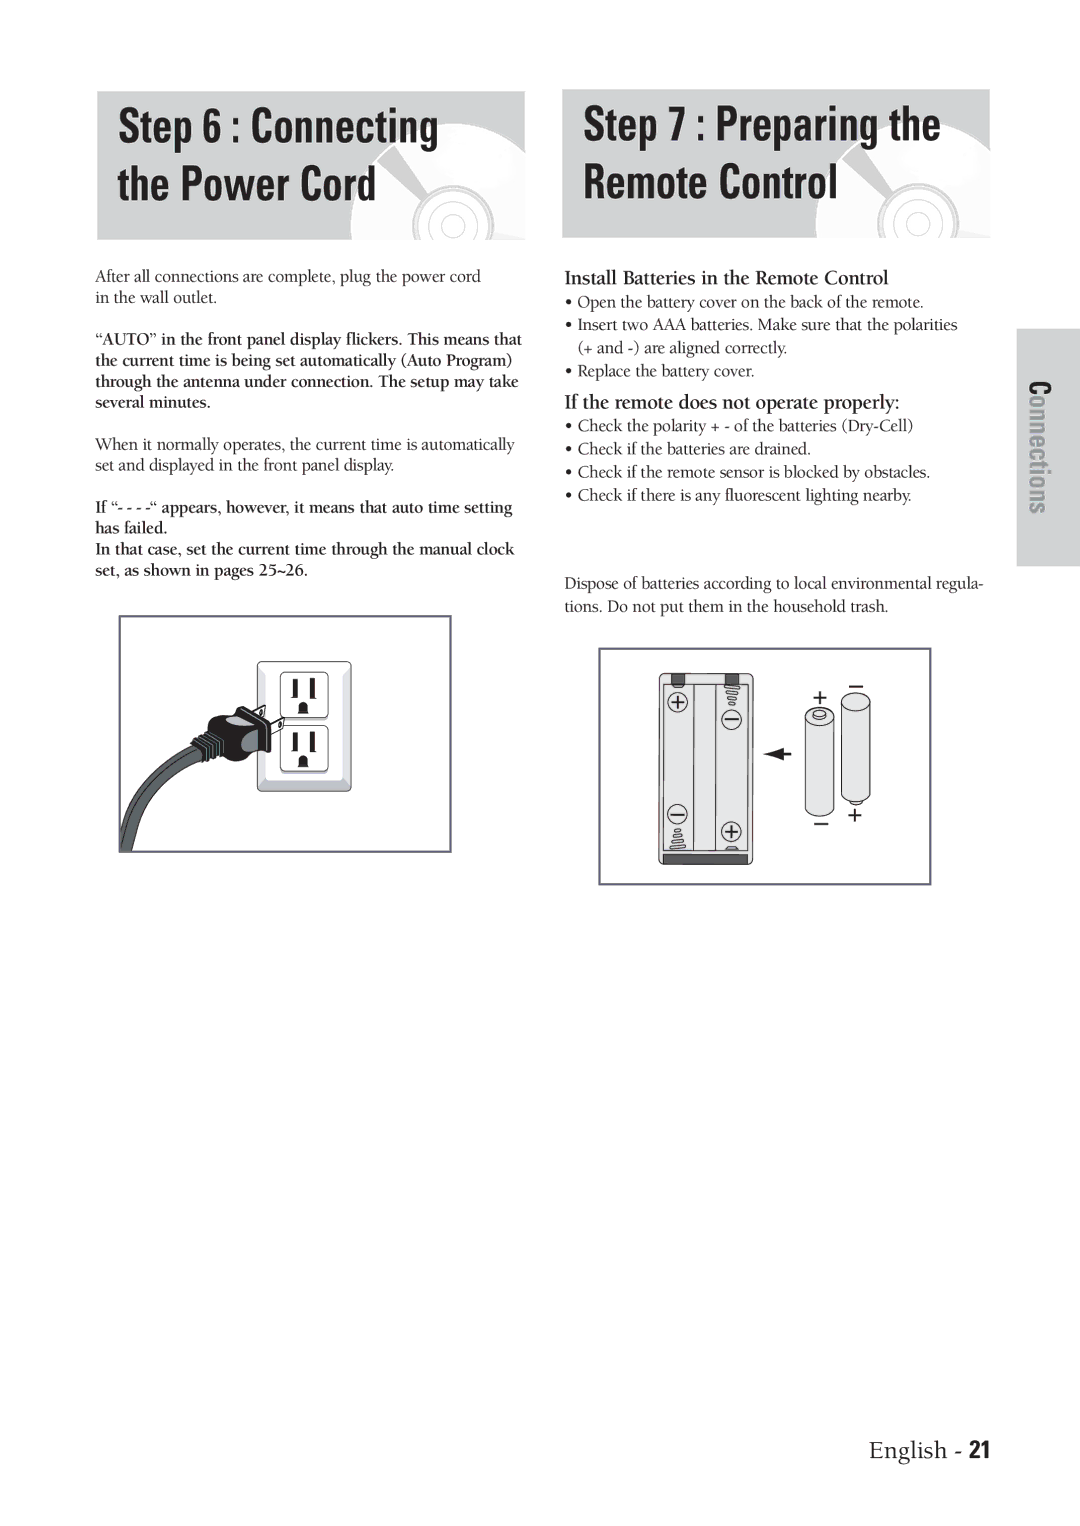
Install Batteries in the Remote Control
Power Cord Remote Control
Setting the Remote Control
Menu Button
On-Screen Menu Navigation
Up/Down and Left/Right
Enter Button
Select a channel that carries a time signal using
Auto Clock Set
Clock Data CH
Manual Clock Set
Time Zone
Daylight Saving
Set the Clock Select Channel Set
Channel Set
Select Antenna/Cable TV
With the DVD in Stop press the Menu button
Language Features
Setting Up
Select the desired Language using ❷ buttons
Then press the ❿ or Enter button
Setting Up the Audio Options
Digital Output
Dynamic Compression
TV Aspect
DisplayVideo Options
Black Level
3D NRNoise Reduction
Setting Up the Parental Control
Select Rating Level you want using
On the remote
About the Change Password
Auto Channel Memory
Run Auto channel memory
Channel Add/Delete
Select Channel Add/Delete
Select Channel to Add/Delete
Add/Delete Channel
RF Output Channel
Select RF Output Channel
Change RF Output CH
Select VCR
VCR Setting
Select Tape Length
Select System
Select Video Input
Video Input
Press the Menu button
Use the ❷ buttons to highlight Video Input
Set Front Display
Front Display
Before Playing
Region code DVD-Video only
Disc types that can be played
Discs that cannot be played
Playing a Disc
Press OPEN/CLOSE button to close the disc tray
Slow Motion Play Step Motion Play
What’s a track?
About Anykey
What’s a chapter?
What’s a title?
Using Repeat Play For DVD-VIDEO/DVD-RAM/DVD
Using Repeat Play For Audio CD/MP3
Repeat Play
For DVD-VIDEO/DVD-RAM/ DVD- RW/DVD-R
To return to normal playback
❿ buttons. Then, press the Enter button
Press the Anykey button during playback Use
Selecting the subtitle language
Changing the Camera Angle
Selecting the Audio language
Select the desired angle
Setting a book mark
Using Bookmarks
Bookmarking with DVD-RAM/ DVD- Rwvr disc
Playing Back a Bookmark
Clearing a Bookmark
Zooming-In
For DVD-RAM/DVD-RW/ DVD-R disc
Using the Disc Title Menu
For DVD-VIDEO disc
Menu of the disc
Audio CD Cdda Screen Elements
Play Option Mode
To change repeat mode
Ramdom Play continues until the play option is changed
To Program Tracks
When using a combination MP3/JPEG disc
Buttons on the Remote
Switching between the PIP and main screens
Using PIP
Deactivating PIP
Press the PIP button again
Playing the VCR Tracking
Adjust Tracking Manually
Insert VHS Tape
Play Tape
VHS Playback
Features
End search
Variable Search System
Scan and play
Forward Intro Scan
Recordable discs
Before Recording
This section shows various DVD recording methods
This recorder can record on the following discs
Recording Formats
Concerning copy control signals
DVD-RW Video mode/-R
DVD-RWVR mode/-RAM
Pausing / Resuming
Start Recording
Making One Touch Recording OTR
Activate OTR
Add Recording Time
Press the Enter button
Set timer recording option
Editing the settings for a timer recording
Deleting a Timer Recording Entry
Watching the Images Being Recorded Time Slip
Recording From External Devices
Insert Tape
Input Jack
Select a Channel to Record
Pause/Resume Recording
Record Speed
Direct copy DVD to VCR
DVD to VCR
Direct copy VCR to DVD
VCR to DVD
Setup Timer Rec
Setup Timer Rec Title Menu Disc Menu
No Disc
Setup
Setup Timer Rec Copy Title List Playlist
Setup Timer Rec Copy Title List Disc Manager
Photo
Or press the Title button on the remote control
Viewing Title List
Record List edit items
Press the ❷ button to select Play, and then press
Pressing the Anykey button and using the title
Selected entry title will be played back
You can also playback a recorded program by
Entry
Or press the Title List button on the remote
Control
Deleting a Title List Entry
DVD-RAMVR, DVD-RWVR mode Since
Press the ❷ button to select Protection, and then
Locking a Title List Entry
Trol
Deleting a Section from a Title List Entry
Creating a Playlist Entry
Image and time at the end point are
Press the Enter button to select END point
Edit Playlist screen is displayed
Press the Menu or Return button to exit
Or press the Play List button on the remote con- trol
Playing Playlist Entries
Renaming Playlist Entries
Editing Scene for a Playlist Entry
Playing a Desired Scene
Modifying a Scene Replacing a Scene
Adding a Scene
Moving a Scene Changing the Position of a Scene
Next scene, because the selected scene
Yellow selection window is displayed on the scene to move
On the End window
Deleting a Scene from Playlist
To delete, and then press the Enter button
Press the ❷ buttons to select delete, and then
Or press the Play List button on the remote control
Press the Menu button when the disc is
Stopped
Press the ❷ button to select Copy, and then press
Editing Disc Name
You will be prompted with the delete confirmation
Message ‘Do you want to delete?’
Is cleared
Disc Protection
Editing
Disc is formatted
Delete All Title Lists Cartridge Protect Info DVD-RAM
Once a disc is finalized, you cannot delete entries
Finalizing a disc
From the record list
After being finalized, the DVD-R operates
Unfinalizing a disc V/VR mode
Operation Same as Additional DVD-Video
Operation
Reference
Timer recording does
For a while when Power turns on Cannot record TV
Input is displayed
Programs
Troubleshooting
Problems and Solutions VCR
General
Specifications
Input
Output
Samsung Limited Warranty