5 Tryk på knappen OK, ved scenens slutpunkt.


Scene No.001


00:00:20


00:05:30


01/JAN/2004 12:00


01/JAN/2004 12:00


00:05:30


Tryk på knapperne ➛ ❿, for at vælge den

3 placering, hvor til du ønsker at flytte den valgte scene, og tryk derefter på knappen OK.

• Den valgte scene flyttes til den nye placering.

4

Tryk på knappen for at vælge “Start”, og

tryk derefter på knappen OK.


• Billedet og tiden ved startpunktet vises i start-


punktvinduet.


Scene No.001


01/JAN/2004 12:00


01/JAN/2004 12:00


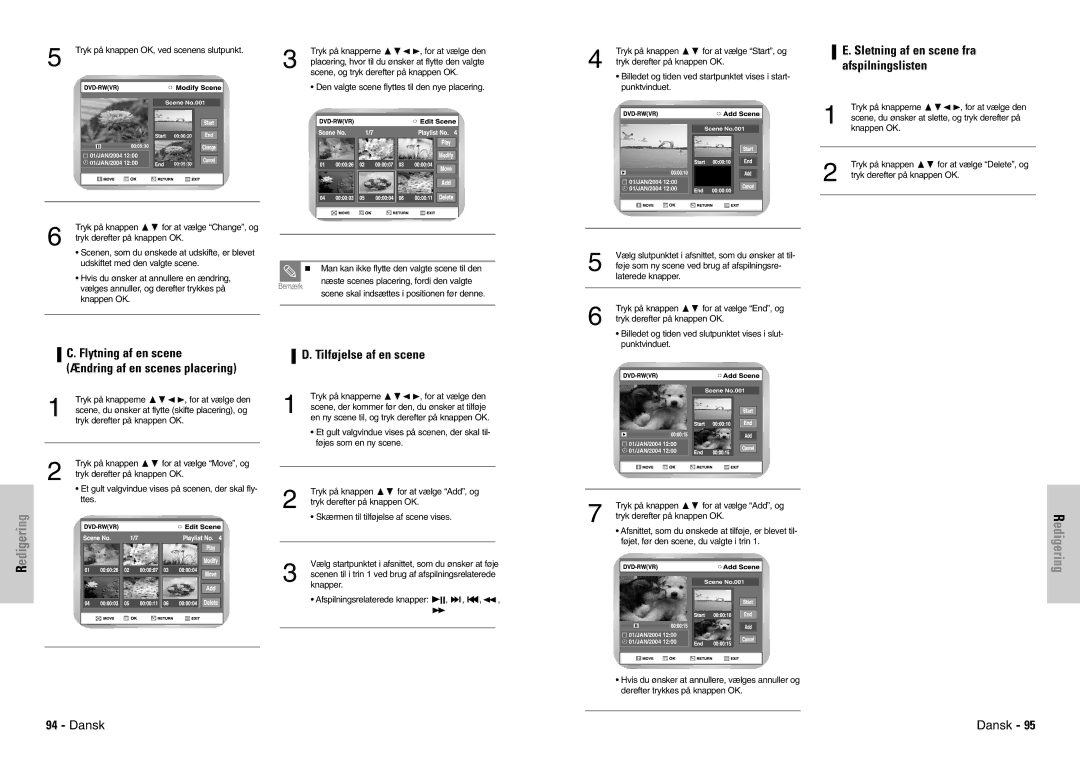
E. Sletning af en scene fra afspilningslisten

Tryk på knapperne ➛ ❿, for at vælge den

1 scene, du ønsker at slette, og tryk derefter på knappen OK.

2

Tryk på knappen for at vælge “Delete”, og

tryk derefter på knappen OK.


6

Tryk på knappen for at vælge “Change”, og


tryk derefter på knappen OK.


• Scenen, som du ønskede at udskifte, er blevet


udskiftet med den valgte scene.


Man kan ikke flytte den valgte scene til den


• Hvis du ønsker at annullere en ændring,


næste scenes placering, fordi den valgte


vælges annuller, og derefter trykkes på


Bemærk


scene skal indsættes i positionen før denne.


knappen OK.


5

Vælg slutpunktet i afsnittet, som du ønsker at til-


føje som ny scene ved brug af afspilningsre-


laterede knapper.


6

Tryk på knappen for at vælge “End”, og

tryk derefter på knappen OK.

• Billedet og tiden ved slutpunktet vises i slut- punktvinduet.

C. Flytning af en scene

(Ændring af en scenes placering)

Tryk på knapperne ➛ ❿, for at vælge den

1 scene, du ønsker at flytte (skifte placering), og tryk derefter på knappen OK.

2

Tryk på knappen for at vælge “Move”, og

tryk derefter på knappen OK.

• Et gult valgvindue vises på scenen, der skal fly- ttes.

Redigering

D. Tilføjelse af en scene

Tryk på knapperne ➛ ❿, for at vælge den

1 scene, der kommer før den, du ønsker at tilføje en ny scene til, og tryk derefter på knappen OK.

Et gult valgvindue vises på scenen, der skal til- føjes som en ny scene.

2

Tryk på knappen for at vælge “Add”, og

tryk derefter på knappen OK.

• Skærmen til tilføjelse af scene vises.

Vælg startpunktet i afsnittet, som du ønsker at føje

3 scenen til i trin 1 ved brug af afspilningsrelaterede knapper.

Afspilningsrelaterede knapper: II, ❿❿l , l➛➛,➛➛ ,

❿❿

Scene No.001

01/JAN/2004 12:00 01/JAN/2004 12:00

7

Tryk på knappen for at vælge “Add”, og

tryk derefter på knappen OK.

• Afsnittet, som du ønskede at tilføje, er blevet til- føjet, før den scene, du valgte i trin 1.

Scene No.001

01/JAN/2004 12:00 01/JAN/2004 12:00

Hvis du ønsker at annullere, vælges annuller og derefter trykkes på knappen OK.

Redigering

94 - Dansk

Dansk - 95

Page 48
Image 48
Samsung DVD-VR300E/XEE Sletning af en scene fra afspilningslisten, Flytning af en scene Ændring af en scenes placering

DVD-VR300E/XEE specifications

The Samsung DVD-VR300E/XEE is a versatile and innovative device that seamlessly combines the functionalities of a DVD recorder and a video cassette recorder (VCR). This unique dual functionality makes it an excellent choice for those looking to preserve their cherished video content.

One of the main features of the Samsung DVD-VR300E/XEE is its ability to record television programs directly onto DVD media or VHS tapes. It supports various recording formats, including DVD-R, DVD-RW, and DVD+RW, allowing users to create high-quality DVDs of their favorite shows and movies. The inclusion of VCR functionality means that users can also play and record from traditional VHS tapes, making it a perfect solution for those with extensive collections of older video formats.

The DVD-VR300E/XEE is equipped with a user-friendly interface that simplifies the recording process. It features one-touch recording, which enables rapid setup for recording schedules. With an integrated timer recording feature, users can conveniently program recordings in advance, ensuring they never miss a moment of their favorite content.

In terms of connectivity, the Samsung DVD-VR300E/XEE is designed with multiple ports, including composite, S-Video, and RCA connections. This versatile selection allows it to easily connect to various audio and video devices, such as cable boxes, satellite receivers, or camcorders. Additionally, the inclusion of a built-in tuner enables direct recording from over-the-air broadcasts.

Picture quality is a significant characteristic of the Samsung DVD-VR300E/XEE. With advanced video processing capabilities, it ensures vibrant and clear playback of recorded content. The device supports various resolutions and formats, guaranteeing compatibility with most televisions.

Another standout feature of the Samsung DVD-VR300E/XEE is its multi-format support, allowing playback of a wide range of DVD formats along with CD audio. This enhances its utility, making it an all-around media device for playback and recording needs.

In conclusion, the Samsung DVD-VR300E/XEE stands out for its combination of DVD and VHS recording capabilities, ease of use, diverse connectivity options, and exceptional video quality. Whether for archiving old VHS tapes or recording new content onto DVDs, it serves as a reliable solution that meets the needs of any home entertainment enthusiast.