3

Tryk på knapperne for at vælge “Standard

Timer”, og tryk derefter på knappen eller OK.

Scheduled Record List

TUE 06

WED 07

OK

Tryk på knapperne , for at vælge tallet for

4 tidsprogrammeringen, som du ønsker at redi- gere, og tryk derefter på knappen eller OK.

• Elementer for at redigere og slette vises.

Scheduled Record List


TUE 06


WED 07


- -

- - -

- - / - -

- - : - -

- - : - -

- -

- -


- -

- - -

- - / - -

- - : - -

- - : - -

- -

- -


- -

- - -

- - / - -

- - : - -

- - : - -

- -

- -


- -

- - -

- - / - -

- - : - -

- - : - -

- -

- -


OK

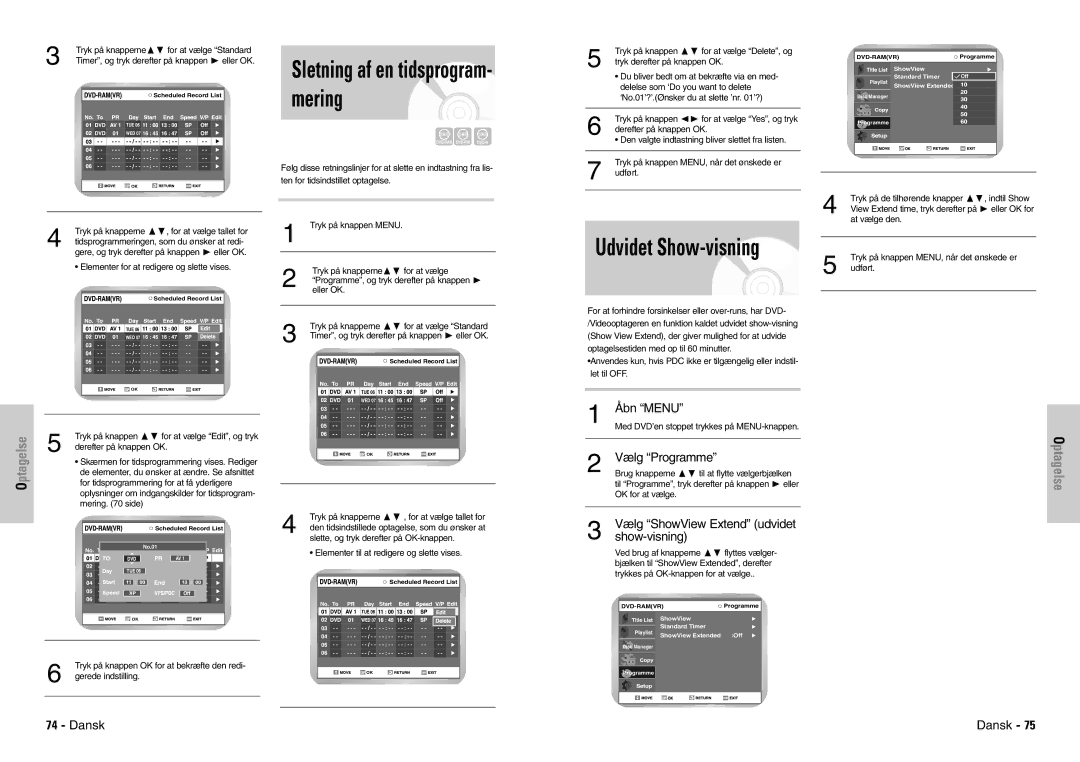
Sletning af en tidsprogram- mering

DVD-RAM DVD-RW DVD-R

Følg disse retningslinjer for at slette en indtastning fra lis- ten for tidsindstillet optagelse.


1

Tryk på knappen MENU.


Tryk på knapperne for at vælge


2


“Programme”, og tryk derefter på knappen


eller OK.


Tryk på knapperne for at vælge “Standard


3


Timer”, og tryk derefter på knappen eller OK.

Scheduled Record List

TUE 06

5

Tryk på knappen for at vælge “Delete”, og

tryk derefter på knappen OK.


• Du bliver bedt om at bekræfte via en med-


delelse som ‘Do you want to delete


‘No.01’?’.(Ønsker du at slette ’nr. 01’?)


6

Tryk på knappen ➛❿ for at vælge “Yes”, og tryk

derefter på knappen OK.


• Den valgte indtastning bliver slettet fra listen.


7

Tryk på knappen MENU, når det ønskede er

udført.


Udvidet Show-visning

For at forhindre forsinkelser eller over-runs, har DVD- /Videooptageren en funktion kaldet udvidet show-visning (Show View Extend), der giver mulighed for at udvide optagelsestiden med op til 60 minutter.

•Anvendes kun, hvis PDC ikke er tilgængelig eller indstil- let til OFF.

DVD-RAM(VR)

Programme


ShowView


Standard Timer

Off

Playlist


ShowView Extended


Disc Manager

Programme

4

Tryk på de tilhørende knapper

, indtil Show


View Extend time, tryk derefter på eller OK for at vælge den.

Tryk på knappen MENU, når det ønskede er

5 udført.

Optagelse

5

Tryk på knappen for at vælge “Edit”, og tryk

derefter på knappen OK.

Skærmen for tidsprogrammering vises. Rediger de elementer, du ønsker at ændre. Se afsnittet for tidsprogrammering for at få yderligere oplysninger om indgangskilder for tidsprogram- mering. (70 side)

Scheduled Record List

No.01

AV 1

- -

- - -

- - / - - - - : - - - - : - -

- -

- -

- -

- - -

TUE 06

- -

- -

- - / - - - - : - - - - : - -

- -

- - -

- - / - - - - : - - - - : - -

- -

- -

- -

- - -

- - / - - - - : - - - - : - -

- -

- -

Speed


- -

- - -

- - / - - - - : - - - - : - -

- -

- -


OK


6

Tryk på knappen OK for at bekræfte den redi-


gerede indstilling.


WED 07

OK

4

Tryk på knapperne , for at vælge tallet for

den tidsindstillede optagelse, som du ønsker at


slette, og tryk derefter på OK-knappen.


• Elementer til at redigere og slette vises.


Scheduled Record List


TUE 06


WED 07


- -

- - -

- -- - /

- - :

- -

- - - -:

- -

- -


- -

- - -

- - / - -

- - :

- -

- - : - -

- -

- -


- -

- - -

- - / - -

- - :

- -

- - : - -

- -

- -


- -

- - -

- - / - -

- - :

- -

- - : - -

- -

- -


OK

1

Åbn “MENU”


Med DVD’en stoppet trykkes på MENU-knappen.


Optagelse

2

Vælg “Programme”


Brug knapperne til at flytte vælgerbjælken


til “Programme”, tryk derefter på knappen eller


OK for at vælge.


3

Vælg “ShowView Extend” (udvidet


show-visning)


Ved brug af knapperne

flyttes vælger-


bjælken til “ShowView Extended”, derefter


trykkes på OK-knappen for at vælge..


DVD-RAM(VR)

Programme


ShowView


Playlist

Standard Timer


ShowView Extended

:Off


Disc Manager

Programme

74 - Dansk

Dansk - 75

Page 38
Image 38
Samsung DVD-VR300E/XEE manual Vælg Programme, Vælg ShowView Extend udvidet Show-visning

DVD-VR300E/XEE specifications

The Samsung DVD-VR300E/XEE is a versatile and innovative device that seamlessly combines the functionalities of a DVD recorder and a video cassette recorder (VCR). This unique dual functionality makes it an excellent choice for those looking to preserve their cherished video content.

One of the main features of the Samsung DVD-VR300E/XEE is its ability to record television programs directly onto DVD media or VHS tapes. It supports various recording formats, including DVD-R, DVD-RW, and DVD+RW, allowing users to create high-quality DVDs of their favorite shows and movies. The inclusion of VCR functionality means that users can also play and record from traditional VHS tapes, making it a perfect solution for those with extensive collections of older video formats.

The DVD-VR300E/XEE is equipped with a user-friendly interface that simplifies the recording process. It features one-touch recording, which enables rapid setup for recording schedules. With an integrated timer recording feature, users can conveniently program recordings in advance, ensuring they never miss a moment of their favorite content.

In terms of connectivity, the Samsung DVD-VR300E/XEE is designed with multiple ports, including composite, S-Video, and RCA connections. This versatile selection allows it to easily connect to various audio and video devices, such as cable boxes, satellite receivers, or camcorders. Additionally, the inclusion of a built-in tuner enables direct recording from over-the-air broadcasts.

Picture quality is a significant characteristic of the Samsung DVD-VR300E/XEE. With advanced video processing capabilities, it ensures vibrant and clear playback of recorded content. The device supports various resolutions and formats, guaranteeing compatibility with most televisions.

Another standout feature of the Samsung DVD-VR300E/XEE is its multi-format support, allowing playback of a wide range of DVD formats along with CD audio. This enhances its utility, making it an all-around media device for playback and recording needs.

In conclusion, the Samsung DVD-VR300E/XEE stands out for its combination of DVD and VHS recording capabilities, ease of use, diverse connectivity options, and exceptional video quality. Whether for archiving old VHS tapes or recording new content onto DVDs, it serves as a reliable solution that meets the needs of any home entertainment enthusiast.