B I L E P H O N E
MPCSCH-R910IndulgeEnglishUMEA14CB012711F4
Headquarters
Open Source Software
Disclaimer of Warranties Exclusion of Liability
Table of Contents
Messaging
130
105
157
149
Special Text
Getting Started
Text Conventions
Battery
Battery Indicator
Displaying Your Phone Number
Removing the battery cover
Battery Cover
Installing the Battery
Install the battery cover
Charging the Battery
Removing the Battery
Connect the USB cable to the charging head
Insert the USB cable into the port
Plug the charging head into a standard AC power outlet
Non-Supported Batteries
Turning Your Phone On
Turning Your Phone On and Off
Your Google Account
System Tutorial
Roaming
TTY Mode
Setting up Voicemail
Voicemail
Memory Card
Installing a Memory Card
Security on
Press the Power/Lock Key to wake the screen If there are no
Securing Your Phone
Removing a Memory Card
Unlocking with a Personal Screen Unlock Pattern
Unlocking with a Password
Speakerphone Voice recognition by Nuance
Features
Understanding Your Phone
Android OS Motion and position sensitivity
Earpiece Listen to callers
Front View
Side Views
Messaging menu
Card slot
Back View
Or waken the display
Videos
Touch Screen Display
Display settings
System Alert Check Notifications Panel for alerts
Missed Call Displays when there is a missed call
Changing the Screen Orientation
Annunciator Line
Navigation
Command Keys
Touch Sweep
Notification Panel
Context-sensitive Menus
Touch Menu Touch and hold on an item
Clearing Notifications
Home screen is the starting point for using your phone
Home Screen
Connection Buttons
Adding and removing Home screen panels
Extended Home Screen
Adding Widgets to a Home Screen panel
Primary Shortcuts
Customizing the Home Screen Panels
Editing the Primary Shortcuts
Appears, then drag the Widget to the icon
Facebook Access your Facebook account
Power control Set network and power settings
YouTube Search YouTube and watch videos
Adding Folders to a Home Screen panel
Facebook Phonebook View your Facebook Phonebook contents
Adding Shortcuts to a Home Screen panel
Appears, then drag the Shortcut to the icon
Touch Applications
Changing the Wallpaper on a Home Screen panel
Wallpaper
Adding Applications to a Home Screen panel
Page
Top Games Locate and download games by name or category
Removing Applications
Call Functions
Making Calls Using the Phone Dialer
Making Calls
Making Calls from Contacts
Enter 911 using the touch keypad Touch to place the call
Making Calls using Speed Dials
Making Calls using Voice Commands
Three-Way Calling
Making Calls using Favorites
Answering Calls
Making Calls from Call Log
Sending Calls to Voicemail
When you receive a call while on a call
Answering Call-Waiting Calls
In-Call Options
Ending a Call
Call Log
Accessing Call Log
Sending Messages using Call Log
Creating or Updating Contacts Using Call Log
Deleting Call log records
While viewing the Call log, press Menu, then touch Delete
Touch Delete to delete marked records
For more information, refer to Voicemail on
Entering Upper and Lower Case Letters
Using the Sliding Qwerty Keypad
Entering Text
Sliding keypad
Press a third time to return to abc or ABC mode
Entering Numbers and Symbols
Screen Qwerty Keyboards
Your phone offers three screen Qwerty keyboards
Using the Swype Keyboard
Screen Keyboard Types
Changing the Keyboard Type
Entering Symbols and Numbers
Configuring Swype
Swype Help
Editing Keyboard
Using the Android Keyboard
Using Swype Speech Recognition
Configuring the Android Keyboard
Using Android Speech Recognition
Using the Samsung Keypad
Changing the Text Input Mode Keypad
Configuring the Samsung Keypad
Using Abc Mode
Using XT9 Predictive Text
Using Symbol/Numeric Mode
Touch the desired number, symbol, or emoticon characters
Touch Abc To return to Abc mode
Page
Touch Add account Google
Setting Up Your Accounts
Accounts and Contacts
Accounts
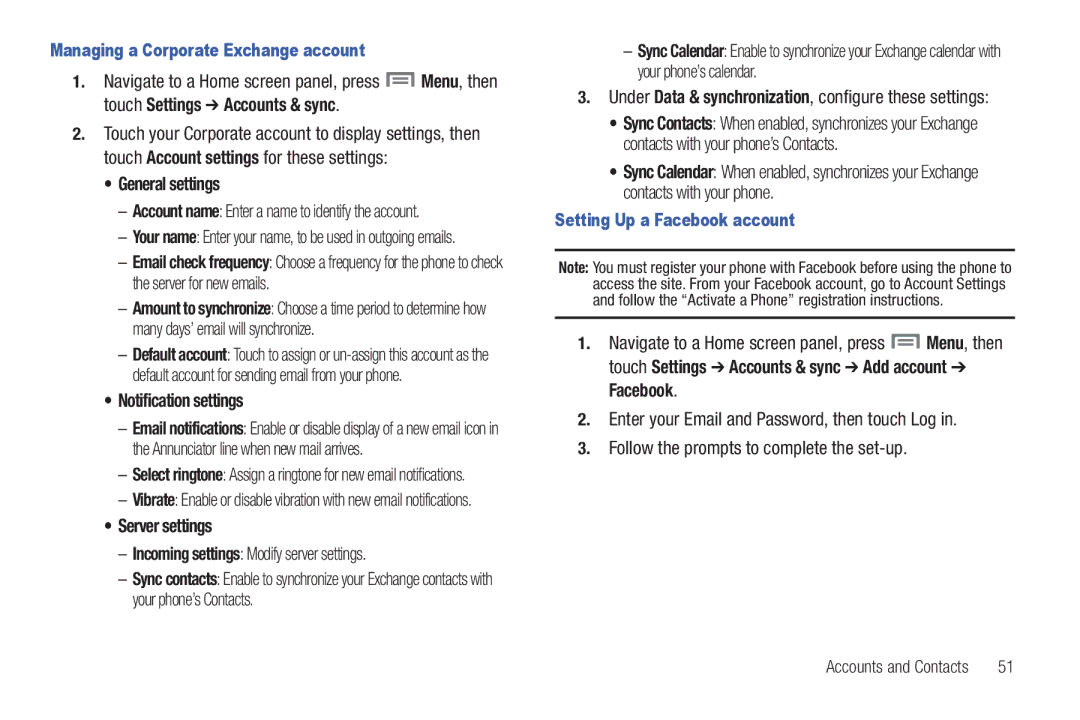
Managing a Google account
Touch Add account Corporate
Adding a Corporate account
Incoming settings Modify server settings
General settings
Notification settings
Server settings
Touch contact fields to enter information
To access Contacts
Contacts
Creating Contacts
Updating Contacts
When you finish entering information, touch Save
Make changes to update an existing contact
Touch Postal address to enter a postal address
Updating Contacts from the Phone Dialer
Get Friends
Updating Contacts from Call log
Touch a contact to separate it
Contacts Display Options
Linked Contacts
Touch a contact to display its information
Sending a Namecard
Bluetooth For more information, refer to Bluetooth on
Sending multiple namecards via Bluetooth
Touch Send
My Profile
Favorites
Editing a Group
Accessing Groups
Groups
Creating a New Group
Sending a Message to Group Members
History
Adding Contacts to a Group
Removing Contacts from a Group
Assigning Speed Dials
Activities
Speed Dials
Navigate to a Home screen panel, touch Contacts Activities
Creating and Sending Messages
Messaging
Types of Messages
Text and Multimedia Messaging
Messaging
Cancel Cancel the message Touch Send to send the message
Settings Configure message settings
Managing Messages
Multimedia message MMS settings
Press Menu, then touch Settings to set
Storage settings
Text message SMS settings
Refreshing Your Gmail Account
Configuring Your Gmail Account
Gmail
Applications Gmail
Google Talk
Gmail account settings
Applications Talk
Applications Email
Send and receive email using popular email services
Configuring Email Accounts
Touch a setup option
Refreshing Your Email Account
Composing and Sending Email
Managing Emails
Combined Inbox
Touch an account to view it
Press Menu, then touch More Account settings
Touch fields to configure the account
Common Settings
MetroWEB
Web and Social Networking
YouTube
Voice Search
Touch Go or
Using MetroWEB Windows
View image Show the selected image by itself
Entering a URL
Delete bookmark Remove the bookmark
Using Bookmarks
Accessing bookmarks and history
Edit bookmark Modify the URL
To clear the history, touch Menu Clear history
Copying Fields or Text
Copying a hyperlink or URL
More
MetroWEB Settings
MetroWEB Menu
Forward Move forward to a previously-viewed
Navigating the Map
Maps
Sign
Labs Access experimental features
Touch a pop-up for these options
Maps Menu
Music Player
Music
Playing Music
Music Player List Touch Menu Add to playlist
Volume Enable on-screen volume control
Setting a song as a ringtone
Creating a Playlist
Camera
Pictures and Video
Camera
Taking Pictures
Settings Settings
Settings Camera
Capturing Video
Camcorder
Use your phone’s built-in Camcorder to record video
Your phone, then touch Camcorder
Normal Record a video of any length
Settings Camcorder
Video Player
Camcorder Options
Progress Bar
To play a video, touch it Size
Viewing Pictures
Gallery
Applications Gallery
Viewing Videos
Touch a category, then touch a picture to select it
Setting a Picture as a Contact Icon
Setting a Picture as Wallpaper
Sharing pictures and video
Scanning and Connecting to a Wi-Fi Network
Wi-Fi
Configuring Wi-Fi Settings
Turning Wi-Fi On or Off
Turning Bluetooth On or Off
Bluetooth
Adding a Wi-Fi Network Manually
Configuring Bluetooth Settings
Formatting a Memory Card
Airplane mode
Installing and Removing a Memory Card
Mobile networks
Transferring Files to a Memory Card
Choosing a view
Accessing Applications
Applications
Customizing the Applications Screens
Following options are available
Setting Up AllShare
Applications AllShare Settings.
AllShare
Receiving Media From a Server
AppStore
Calculator
Selecting Media to Play
Applications Calendar
Sending Events via Bluetooth
Press Menu, then touch Send via Bluetooth
Calendar
Clock
Clock
Facebook
Sending Events via Email
Latitude
Google Search
IM and Social
Iron Man
At the Send sharing requests prompt, touch Yes
Applications Latitude
Sharing your Location with Friends
Press , then touch Add friends
Applications mail@metro
Loopt
Mail@metro
Applications Loopt
Metro Studio
Metro Backup
Market
Memo
MocoSpace
MetroPCS Easy WiFi
Metro411
Mobile Banking
MyExtras
My Files
MySpace
Talk
Settings
Places
Pocket Express
Send Text Name or #
Voice Commands
Virtual Card
Call Name or #
Go To Menu
Lookup Name
Check Item
Voice Commands Settings
About View information about Voice Commands
Voice Recorder
Compose a text note, then use the following options
Write & Go
Applications Voicemail
Applications Write & Go
Wi-Fi Settings
Settings
Accessing Settings
Wireless & network
Gateway When using a static IP, enter the Gateway
Bluetooth
Your phone supports Bluetooth 2.1 + EDR
Advanced Wi-Fi settings
Turning Bluetooth On or Off
Touch a setting to configure Bluetooth
Bluetooth settings
Voicemail
Call settings
Airplane mode
Mobile networks
View your phone’s call time counters
Other Call Settings
Reset
Touch Create Enter the message text, then touch Save
From the Settings menu, touch Call settings Auto Answer
Sound settings
General
Notifications
Touch and enable Use incoming call volume for notifications
Choose a default ringtone for all incoming calls
Incoming calls
Screen lock sounds
Feedback
Audible touch tones
Audible selection
From the Settings menu, touch Sound settings Emergency tone
Touch OK to save your setting
Select Off, Alert play tone, or Vibrate
Display settings
Horizontal calibration
Keyboard timeout
Power saving mode
Location & security
116
Screen unlock settings
Google location services
Set unlock pattern/Change unlock pattern
Credential storage
Passwords
Set unlock Password/Change unlock Password
Visible passwords
Unknown sources
Set or change a password to protect credentials
Clear stored credentials and reset the password
Applications
Development
Running services
From the Settings menu, touch Applications Running services
Manage applications
Manage accounts
General sync settings
From the Settings menu, touch Accounts & sync
Accounts & sync
Mobile backup and restore
Touch an account to display its settings
Privacy
External SD card
Factory data reset
SD card & phone storage
Personal data
Input method
USB settings
Language & keyboard
Select locale
Help
Text settings
Swype Advanced settings
Preferences
Samsung keypad
Tutorial Learn about this keypad’s functions
Android keyboard
Voice input
Word suggestion settings
Touch a setting to configure
Voice input & output
Text-to-speech settings
Accessibility
From the Settings menu, touch Accessibility
Accessibility services
Date & time
Power key
About phone
Exposure to Radio Frequency RF Signals
Health and Safety Information
Do cell phones pose a health hazard?
131
Interphone Study
Steps to Reduce Exposure to Radio Frequency Energy
Reducing Exposure Hands-Free Kits and Other Accessories
Reduce the amount of time spent using your cell phone 132
Cell Phone Industry Actions
Hands-Free Kits
Children and Cell Phones
133
Specific Absorption Rate SAR Certification Information
On the Road Off the Phone
Smart Practices While Driving
Head 0.65 W/Kg
Body-worn 0.86 W/Kg
136
Battery Use and Safety
Drop It Off
Samsung Mobile Products and Recycling
Mail It
Display / Touch-Screen
UL Certified Travel Charger
140
Your Location
Use of Agps in Emergency Calls
Navigation
Extreme heat or cold
Care and Maintenance
Emergency Calls
To make an emergency call
Responsible Listening
143
American Academy of Audiology
Implantable Medical Devices
Operating Environment
Persons who have such devices
Should not carry the mobile device in a breast pocket
Potentially Explosive Environments
Other Medical Devices
Vehicles
Posted Facilities
146
HAC/Wi-Fi Language
Restricting Childrens Access to Your Mobile Device
148
Other Important Safety Information
FCC Notice and Cautions
FCC Notice
Standard Limited Warranty
Warranty Information
What is Covered and For How Long?
150
Warranties of Title or NON-INFRINGEMENT
151
152
End User License Agreement for Software
153
154
155
Precautions for Transfer and Disposal
Richardson, Texas Phone 1-800-SAMSUNG
Customer Care Center Klein Rd Plano, TX
156
Index
Emergency Calls 34 Entering Text
Camcorder
Exposure to Radio Frequency RF Sig- nals Facebook
Get Friends Gmail
Health and Safety Information 130 Home key Home screen
Memory settings
Gallery
My Location My Profile
Pairing with Bluetooth Phone settings
Powering On and Off Privacy
Settings Sharing pictures and video 84 Silent mode
Text settings
Smart Practices While Driving Sound settings
Standard Limited Warranty Swype
Symbol/Numeric mode Synchronization settings
Wireless Networking
Volume
Warranty Information Widgets
Wi-Fi
163