
 Getting Started


Front Panel
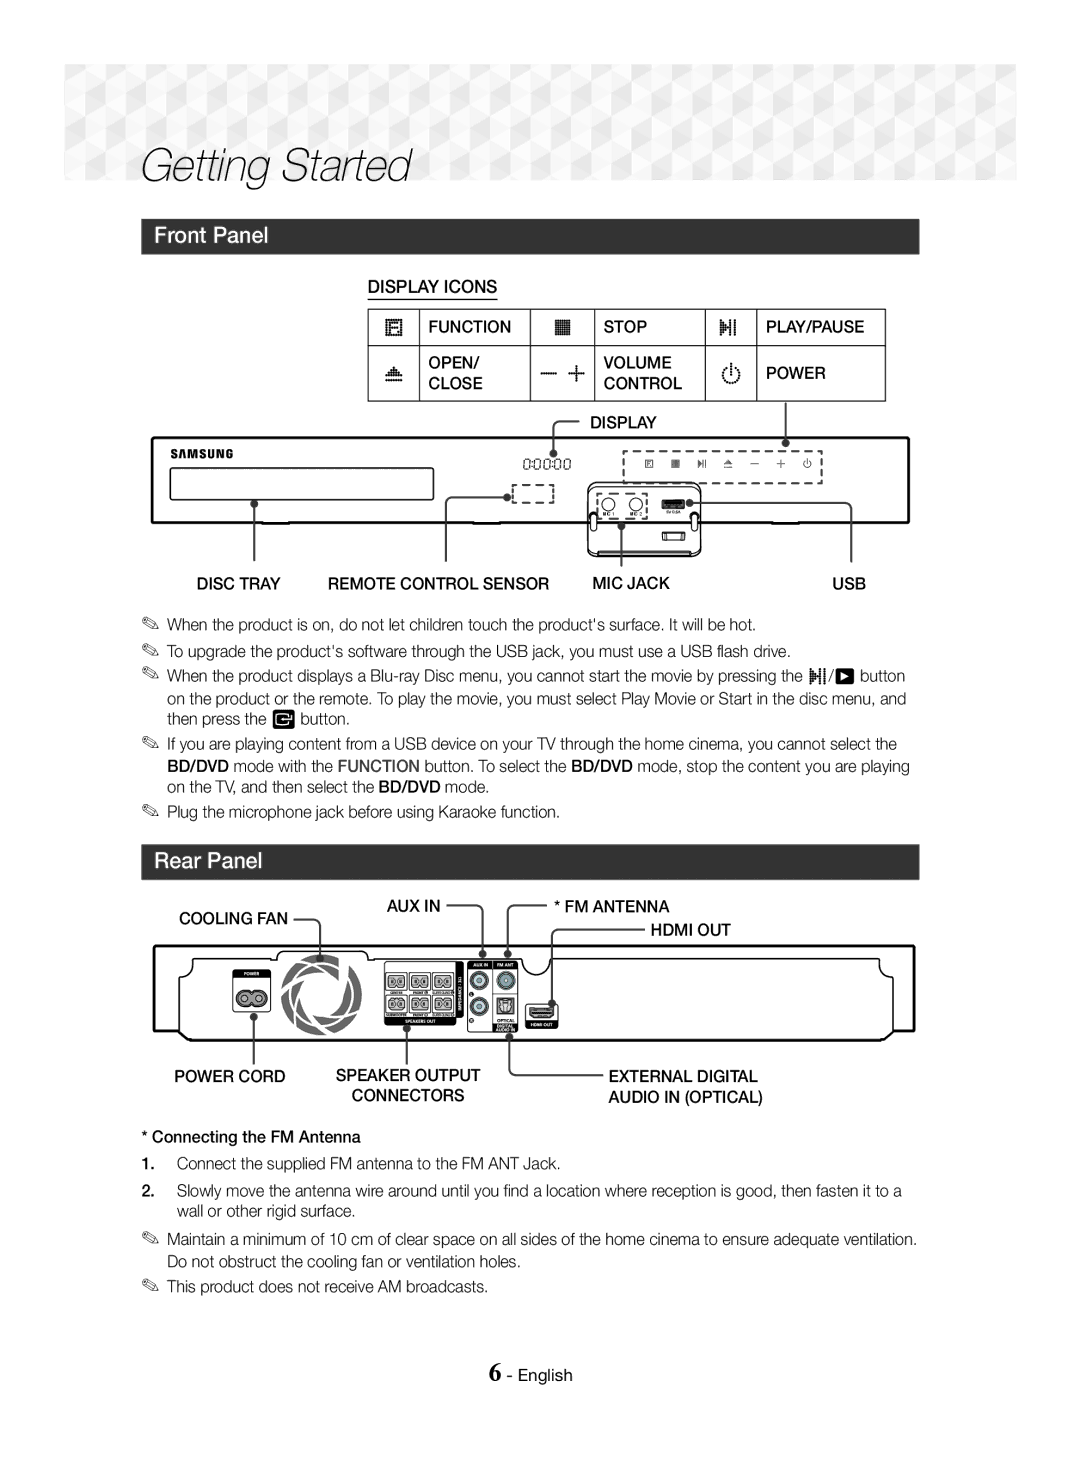
DISPLAY ICONS
| FUNCTION | STOP |
| PLAY/PAUSE |
| OPEN/ | VOLUME | POWER | |
| CLOSE | CONTROL | ||
|
| DISPLAY |
|
|
|
| MIC 1 MIC 2 | 5V 0.5A |
|
DISC TRAY | REMOTE CONTROL SENSOR | MIC JACK | USB | |
✎When the product is on, do not let children touch the product's surface. It will be hot.
✎To upgrade the product's software through the USB jack, you must use a USB flash drive.
✎When the product displays a ![]()
![]()
![]() /6 button on the product or the remote. To play the movie, you must select Play Movie or Start in the disc menu, and then press the E button.
/6 button on the product or the remote. To play the movie, you must select Play Movie or Start in the disc menu, and then press the E button.
✎If you are playing content from a USB device on your TV through the home cinema, you cannot select the BD/DVD mode with the FUNCTION button. To select the BD/DVD mode, stop the content you are playing on the TV, and then select the BD/DVD mode.
✎Plug the microphone jack before using Karaoke function.
Rear Panel
COOLING FAN | AUX IN | * FM ANTENNA |
| HDMI OUT | |
|
| |
| SURROUND |
|
| SURROUND |
|
POWER CORD | SPEAKER OUTPUT | EXTERNAL DIGITAL |
| CONNECTORS | AUDIO IN (OPTICAL) |
* Connecting the FM Antenna
1.Connect the supplied FM antenna to the FM ANT Jack.
2.Slowly move the antenna wire around until you find a location where reception is good, then fasten it to a wall or other rigid surface.
✎Maintain a minimum of 10 cm of clear space on all sides of the home cinema to ensure adequate ventilation. Do not obstruct the cooling fan or ventilation holes.
✎This product does not receive AM broadcasts.
