victoryia
I N S TA L L AT I O N
Connecting a VCR
These instructions assume that you have already connected your TV to an antenna or a cable TV system (according to the instructions on pages
Skip step 1 if you have not yet connected to an antenna or a cable system.
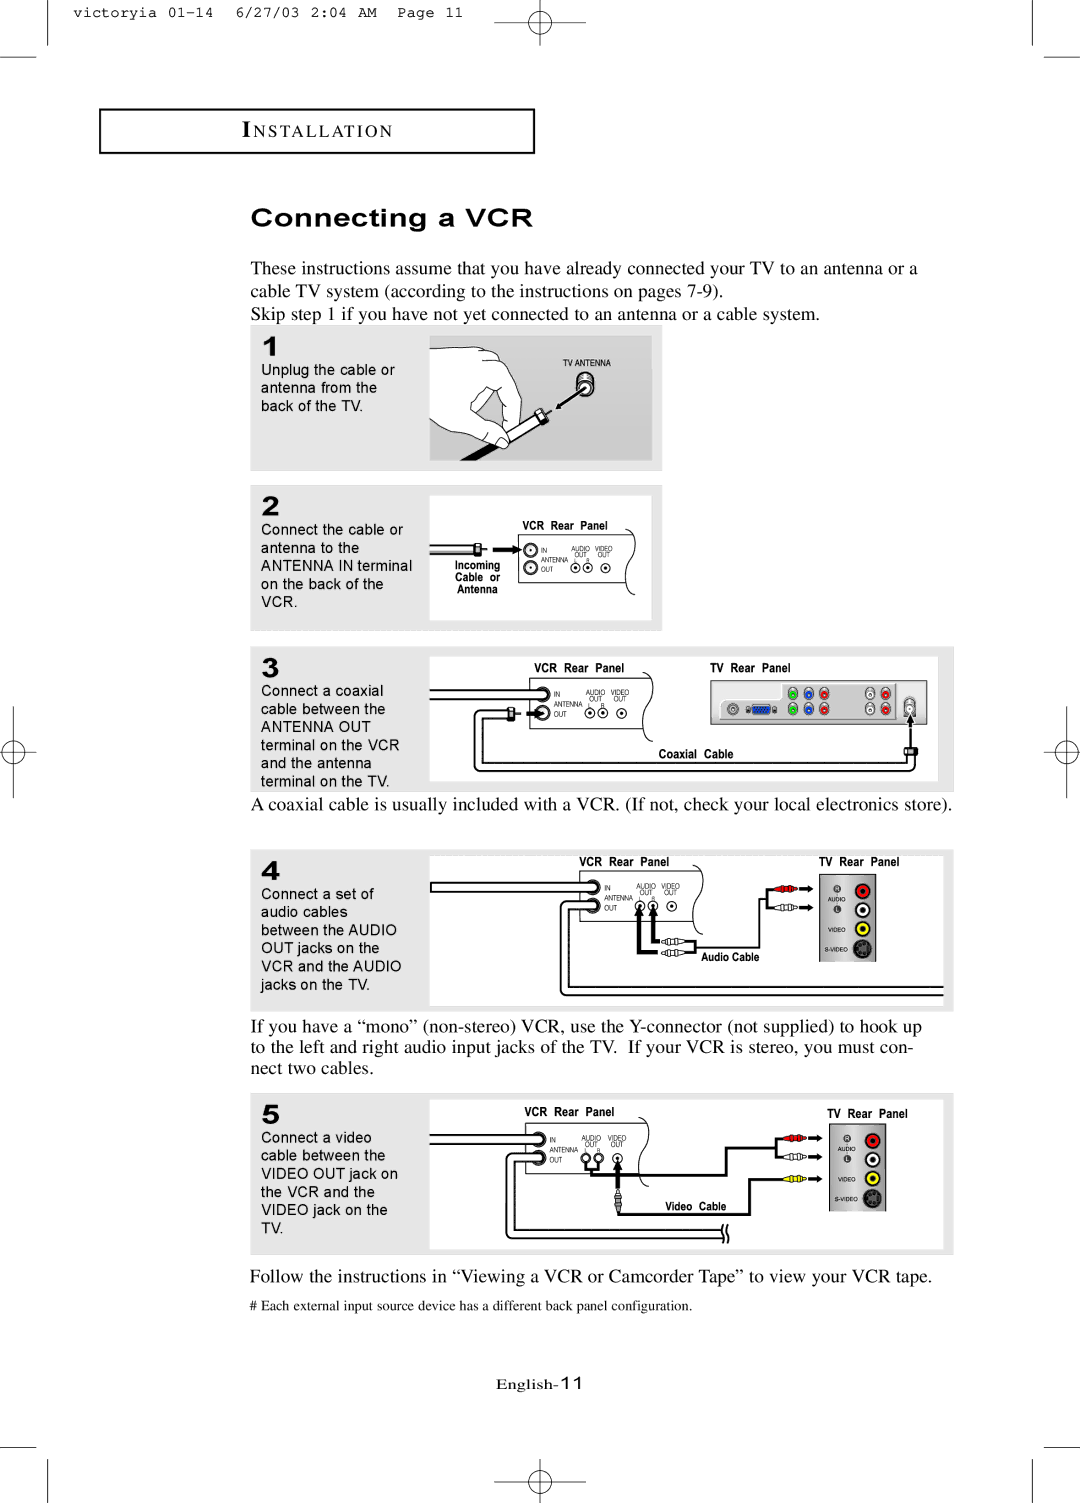
1
Unplug the cable or antenna from the back of the TV.
2
Connect the cable or antenna to the ANTENNA IN terminal on the back of the VCR.
3
Connect a coaxial cable between the
ANTENNA OUT terminal on the VCR and the antenna terminal on the TV.
A coaxial cable is usually included with a VCR. (If not, check your local electronics store).
4
Connect a set of audio cables between the AUDIO OUT jacks on the VCR and the AUDIO jacks on the TV.
If you have a “mono”
5
Connect a video cable between the VIDEO OUT jack on the VCR and the VIDEO jack on the TV.
Follow the instructions in “Viewing a VCR or Camcorder Tape” to view your VCR tape.
# Each external input source device has a different back panel configuration.