INSTALLING AND STARTING THE HomePADTM
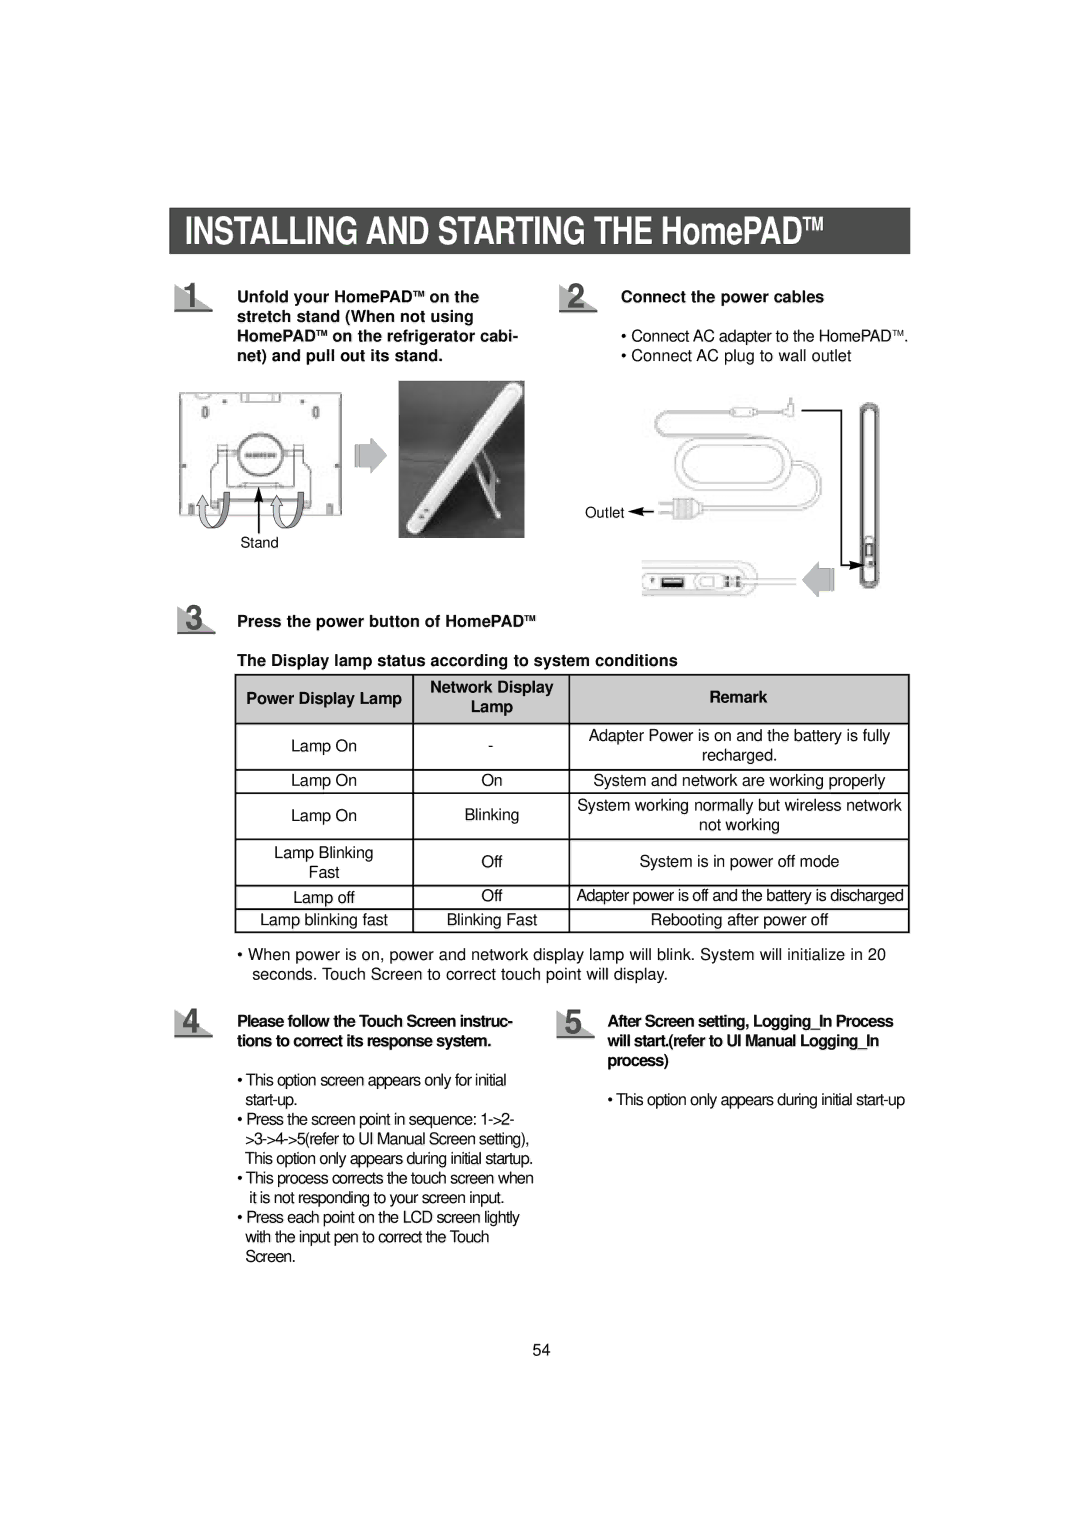
Unfold your HomePADTM on the stretch stand (When not using HomePADTM on the refrigerator cabi- net) and pull out its stand.
Connect the power cables
•Connect AC adapter to the HomePADTM.
•Connect AC plug to wall outlet
Outlet ![]()
Stand
Press the power button of HomePADTM
The Display lamp status according to system conditions
Power Display Lamp | Network Display | Remark | |
Lamp | |||
|
| ||
|
|
| |
Lamp On | - | Adapter Power is on and the battery is fully | |
recharged. | |||
|
| ||
|
|
| |
Lamp On | On | System and network are working properly | |
|
|
| |
Lamp On | Blinking | System working normally but wireless network | |
not working | |||
|
| ||
|
|
| |
Lamp Blinking | Off | System is in power off mode | |
Fast | |||
|
| ||
|
|
| |
Lamp off | Off | Adapter power is off and the battery is discharged | |
Lamp blinking fast | Blinking Fast | Rebooting after power off | |
|
|
|
•When power is on, power and network display lamp will blink. System will initialize in 20 seconds. Touch Screen to correct touch point will display.
Please follow the Touch Screen instruc- tions to correct its response system.
•This option screen appears only for initial start-up.
•Press the screen point in sequence:
•This process corrects the touch screen when it is not responding to your screen input.
•Press each point on the LCD screen lightly with the input pen to correct the Touch Screen.
After Screen setting, Logging_In Process will start.(refer to UI Manual Logging_In process)
• This option only appears during initial start-up
54
