 On Screen Display information
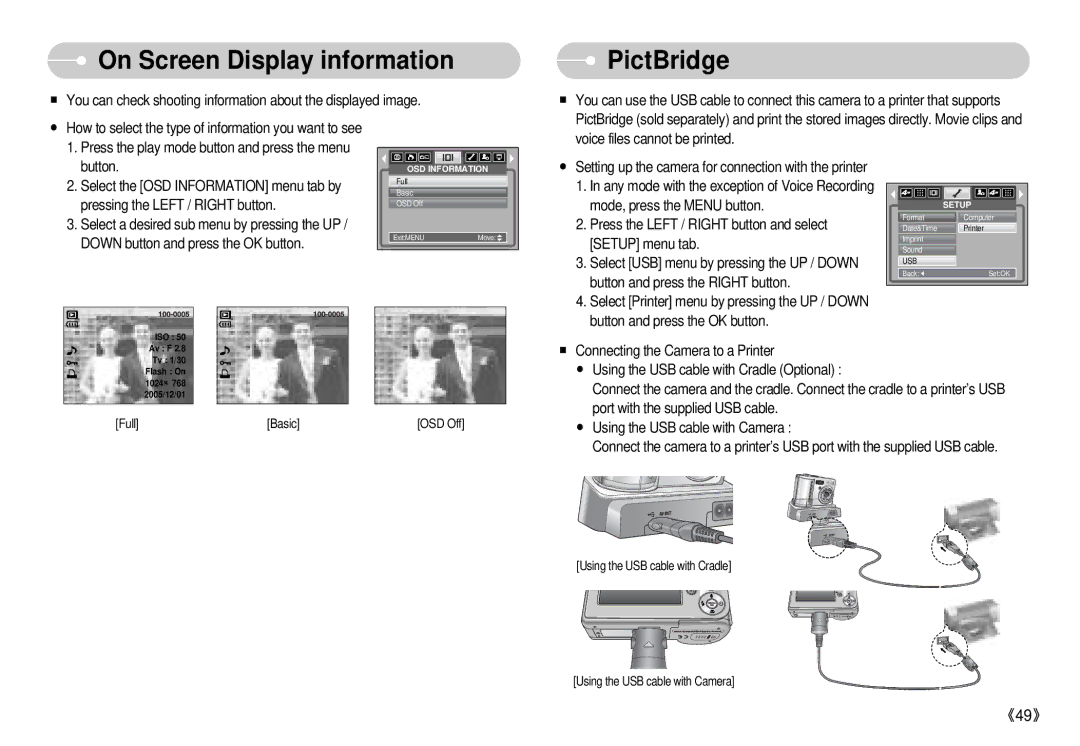
■You can check shooting information about the displayed image.
 PictBridge
■ You can use the USB cable to connect this camera to a printer that supports |
PictBridge (sold separately) and print the stored images directly. Movie clips and |
● How to select the type of information you want to see |
1. Press the play mode button and press the menu |
voice files cannot be printed. |
button. |
2. Select the [OSD INFORMATION] menu tab by |
pressing the LEFT / RIGHT button. |
3. Select a desired sub menu by pressing the UP / |
DOWN button and press the OK button. |
OSD INFORMATION | |
Full |
|
Basic |
|
OSD Off |
|
Exit:MENU | Move: |
●Setting up the camera for connection with the printer
1.In any mode with the exception of Voice Recording mode, press the MENU button.
2.Press the LEFT / RIGHT button and select [SETUP] menu tab.
3.Select [USB] menu by pressing the UP / DOWN button and press the RIGHT button.
4.Select [Printer] menu by pressing the UP / DOWN button and press the OK button.
| SETUP |
Format | Computer |
Date&Time | Printer |
Imprint |
|
Sound |
|
USB |
|
Back: | Set:OK |
ISO : 50
Av : F 2.8 Tv : 1/30 Flash : On 1024×768 2005/12/01
[Full] | [Basic] | [OSD Off] |
■Connecting the Camera to a Printer
●Using the USB cable with Cradle (Optional) :
Connect the camera and the cradle. Connect the cradle to a printer’s USB port with the supplied USB cable.
●Using the USB cable with Camera :
Connect the camera to a printer’s USB port with the supplied USB cable.
[Using the USB cable with Cradle]
[Using the USB cable with Camera]
《49》
