Installing the CD-R/RW Drive
To install your
1
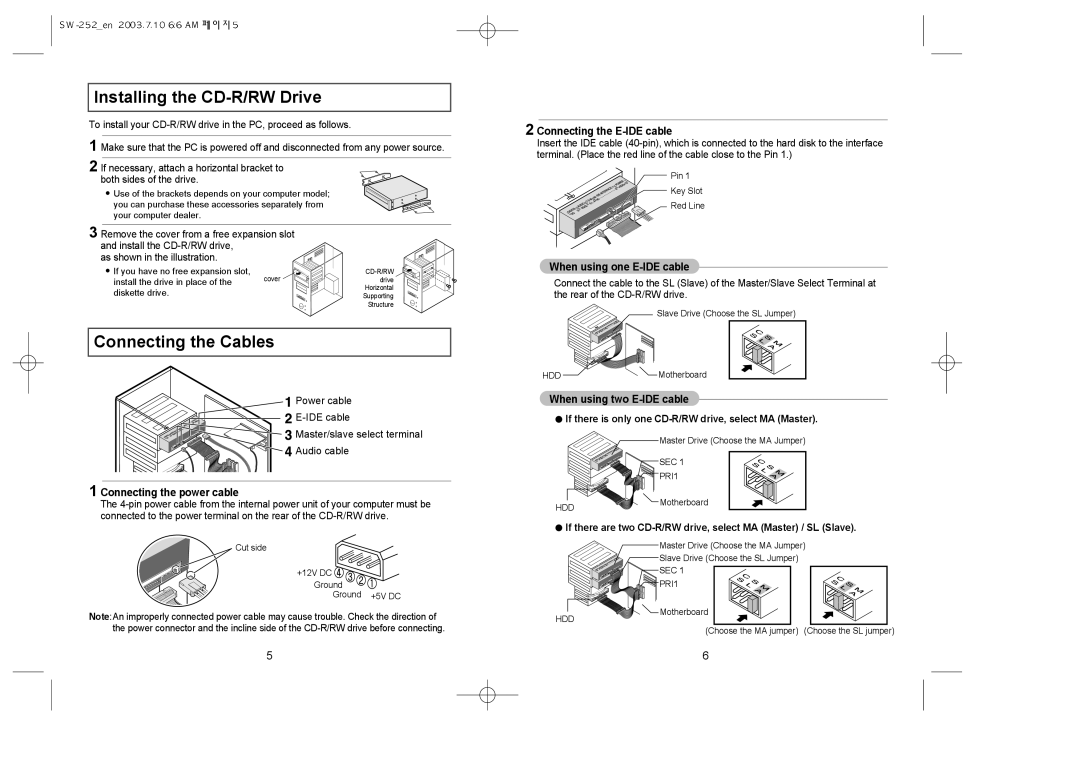
2 If necessary, attach a horizontal bracket to both sides of the drive.
![]() Use of the brackets depends on your computer model; you can purchase these accessories separately from your computer dealer.
Use of the brackets depends on your computer model; you can purchase these accessories separately from your computer dealer.
3 Remove the cover from a free expansion slot and install the
as shown in the illustration.
If you have no free expansion slot, | cover | |
install the drive in place of the | drive | |
| Horizontal | |
diskette drive. |
| |
| Supporting | |
|
| |
|
| Structure |
Connecting the Cables
![]() Power cable
Power cable
![]()
![]() Master/slave select terminal
Master/slave select terminal ![]() Audio cable
Audio cable
1 Connecting the power cable
The
2 Connecting the E-IDE cable
Insert the IDE cable
Pin 1
Key Slot
![]()
![]()
![]()
![]()
![]()
![]()
![]() Red Line
Red Line
When using one E-IDE cable
Connect the cable to the SL (Slave) of the Master/Slave Select Terminal at the rear of the
Slave Drive (Choose the SL Jumper)
HDDMotherboard
When using two E-IDE cable
![]() If there is only one
If there is only one
Master Drive (Choose the MA Jumper)
SEC 1
PRI1
HDD ![]() Motherboard
Motherboard
 If there are two
 CD-R/RW drive, select MA (Master) / SL (Slave).
Cut side |
|
| Master Drive (Choose the MA Jumper) | |
|
|
| Slave Drive (Choose the SL Jumper) |
|
+12V DC |
|
| SEC 1 |
|
|
|
|
| |
Ground |
|
| PRI1 |
|
Ground | +5V DC |
|
|
|
Note:An improperly connected power cable may cause trouble. Check the direction of | HDD | Motherboard |
| |
|
| |||
the power connector and the incline side of the |
| (Choose the MA jumper) | (Choose the SL jumper) | |
5 | 6 |
