DVR setup
To specify the alarm recording time
You can specify the alarm recording time for each channel.
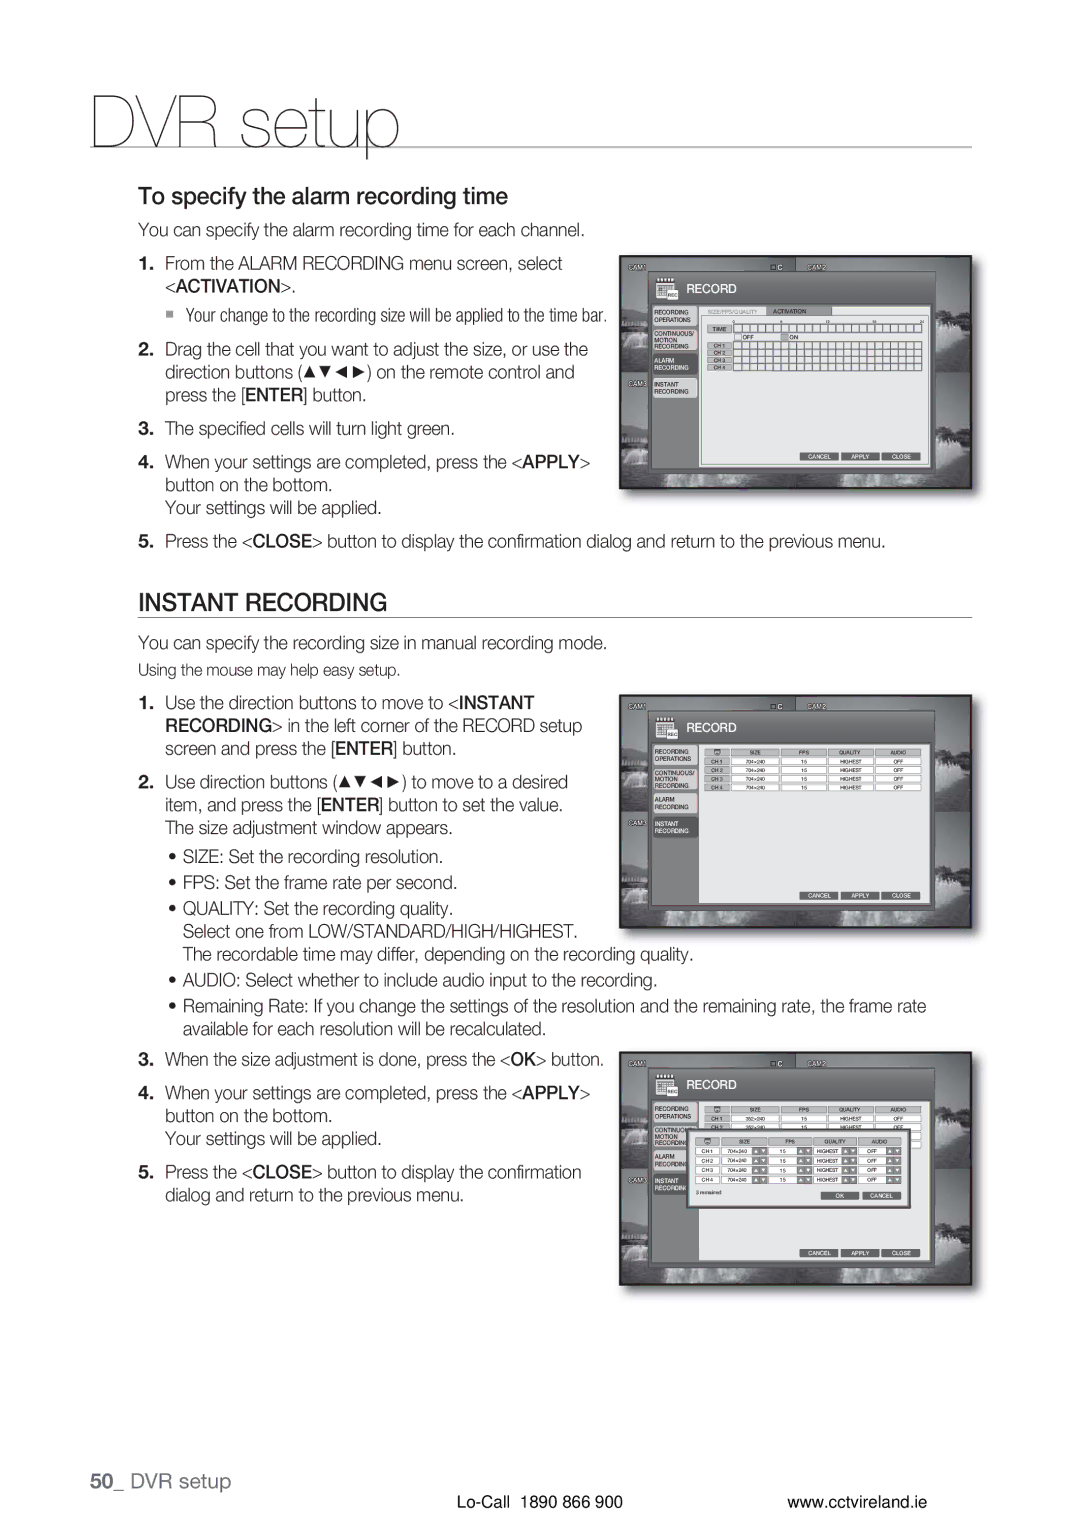
1.From the ALARM RECORDING menu screen, select <ACTIVATION>.
Your change to the recording size will be applied to the time bar.
2.Drag the cell that you want to adjust the size, or use the direction buttons (▲▼◄►) on the remote control and press the [ENTER] button.
3.The specified cells will turn light green.
4.When your settings are completed, press the <APPLY> button on the bottom.
Your settings will be applied.
RECORD |
|
|
|
| |
RECORDING | SIZE/FPS/QUALITY | ACTIVATION |
|
|
|
OPERATIONS | 0 | 6 | 12 | 18 | 24 |
CONTINUOUS/ | TIME |
|
|
|
|
OFF | ON |
|
|
| |
MOTION |
|
|
| ||
RECORDING | CH 1 |
|
|
|
|
ALARM | CH 2 |
|
|
|
|
CH 3 |
|
|
|
| |
RECORDING | CH 4 |
|
|
|
|
INSTANT |
|
|
|
|
|
RECORDING |
|
|
|
|
|
|
|
| CANCEL | APPLY | CLOSE |
5.Press the <CLOSE> button to display the confirmation dialog and return to the previous menu.
INSTANT RECORDING
You can specify the recording size in manual recording mode.
Using the mouse may help easy setup.
1. Use the direction buttons to move to <INSTANT | RECORD |
|
|
|
| |
RECORDING> in the left corner of the RECORD setup |
|
|
|
| ||
screen and press the [ENTER] button. | OPERATIONS | CH 1 | 704×240 | 15 | HIGHEST | OFF |
| RECORDING |
| SIZE | FPS | QUALITY | AUDIO |
2. Use direction buttons (▲▼◄►) to move to a desired | CONTINUOUS/ | CH 2 | 704×240 | 15 | HIGHEST | OFF |
ALARM | CH 4 | 704×240 | 15 | HIGHEST | OFF | |
| MOTION | CH 3 | 704×240 | 15 | HIGHEST | OFF |
item, and press the [ENTER] button to set the value. | RECORDING |
|
|
|
|
|
INSTANT |
|
|
|
|
| |
The size adjustment window appears. | RECORDING |
|
|
|
|
|
RECORDING |
|
|
|
|
| |
•SIZE: Set the recording resolution.
•FPS: Set the frame rate per second.
CANCEL APPLY CLOSE
•QUALITY: Set the recording quality.
Select one from LOW/STANDARD/HIGH/HIGHEST.
The recordable time may differ, depending on the recording quality.
•AUDIO: Select whether to include audio input to the recording.
•Remaining Rate: If you change the settings of the resolution and the remaining rate, the frame rate available for each resolution will be recalculated.
3.When the size adjustment is done, press the <OK> button.
4.When your settings are completed, press the <APPLY> button on the bottom.
Your settings will be applied.
5.Press the <CLOSE> button to display the confirmation dialog and return to the previous menu.
RECORD |
|
|
|
|
|
|
| ||
RECORDING | CH 1 | SIZE |
|
| FPS |
| QUALITY |
| AUDIO |
OPERATIONS | 352×240 |
|
| 15 |
| HIGHEST |
| OFF | |
CONTINUOUS/ | CH 2 | 352×240 |
|
| 15 |
| HIGHEST |
| OFF |
MOTION | CH 3 | 352×240 |
| FPS | 15 |
| HIGHEST | AUDIO | OFF |
RECORDING | CH 4 | SIZE |
| 15 | QUALITY | OFF | |||
352×240 | 15 |
| HIGHEST | HIGHEST | OFF | ||||
ALARM | CH 1 | 704×240 |
| 15 | HIGHEST | OFF | |||
CH 5 | 352×240 | 15 |
|
| OFF | ||||
RECORDING | CH 2CH 6 | 704×240352×240 |
| 15 | HIGHEST HIGHEST | OFF | |||
INSTANT | CH 3CH 7 | 704×240352×240 | 15 |
| 15 | HIGHEST HIGHEST | OFF | OFF | |
CH 4 | 704×240 | 15 |
|
| HIGHEST |
| OFF |
| |
RECORDING | 3 remained |
|
|
|
| OK | CANCEL | ||
|
|
|
|
| |||||
|
|
|
|
| CANCEL | APPLY | CLOSE | ||
50_ DVR setup
www.cctvireland.ie |
