Installation
Installation
Important note to installer
Please read the following instructions carefully before installing your washer. These instructions should be retained for future reference.
We recommend you hire a professional to install this washer.
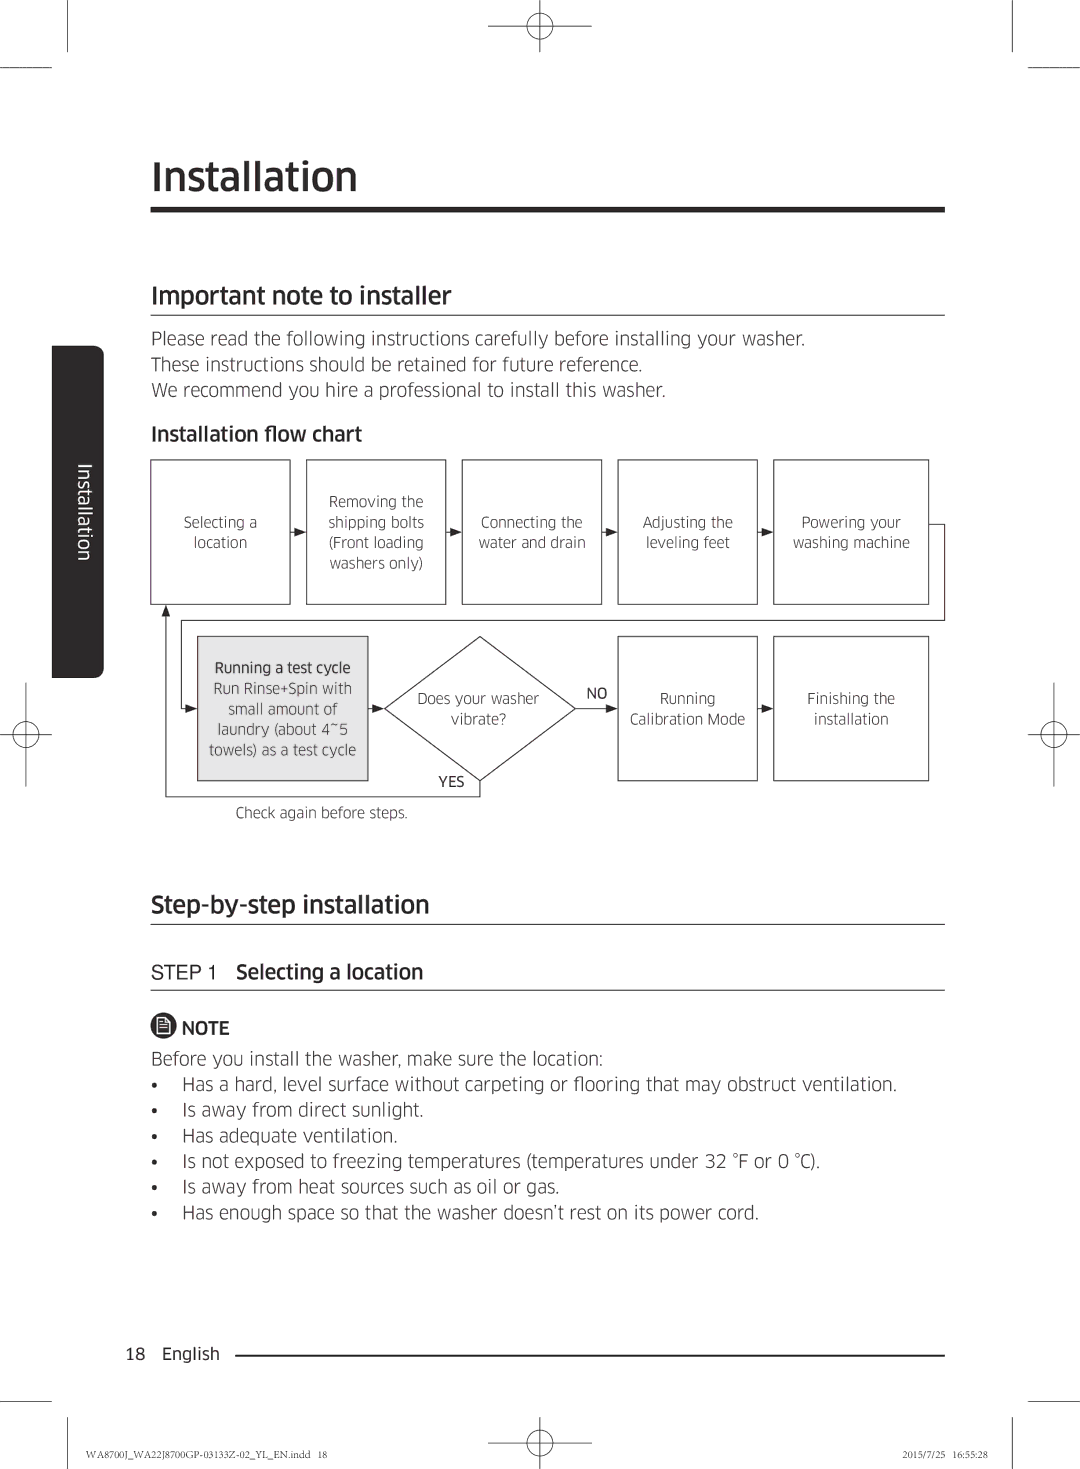
Installation flow chart
| Removing the |
|
|
|
Selecting a | shipping bolts | Connecting the | Adjusting the | Powering your |
location | (Front loading | water and drain | leveling feet | washing machine |
| washers only) |
|
|
|
| Running a test cycle |
|
|
|
|
|
|
| Run Rinse+Spin with |
|
| Does your washer | NO | ||
| small amount of |
|
| ||||
|
|
|
| ||||
|
|
| vibrate? |
| |||
| laundry (about 4~5 |
|
|
| |||
|
|
|
|
|
|
| |
| towels) as a test cycle |
|
|
|
|
|
|
|
|
|
| YES |
|
|
|
|
|
|
|
|
| ||
|
|
|
|
|
| ||
| Check again before steps. |
|
|
|
| ||
Running
Calibration Mode
Finishing the
installation
Step-by-step installation
STEP 1 Selecting a location
![]() NOTE
NOTE
Before you install the washer, make sure the location:
• Has a hard, level surface without carpeting or flooring that may obstruct ventilation.
•Is away from direct sunlight.
•Has adequate ventilation.
•Is not exposed to freezing temperatures (temperatures under 32 °F or 0 °C).
•Is away from heat sources such as oil or gas.
•Has enough space so that the washer doesn’t rest on its power cord.
18 English
2015/7/25 16:55:28