ADJUSTING THE CLOCK (Main unit only)
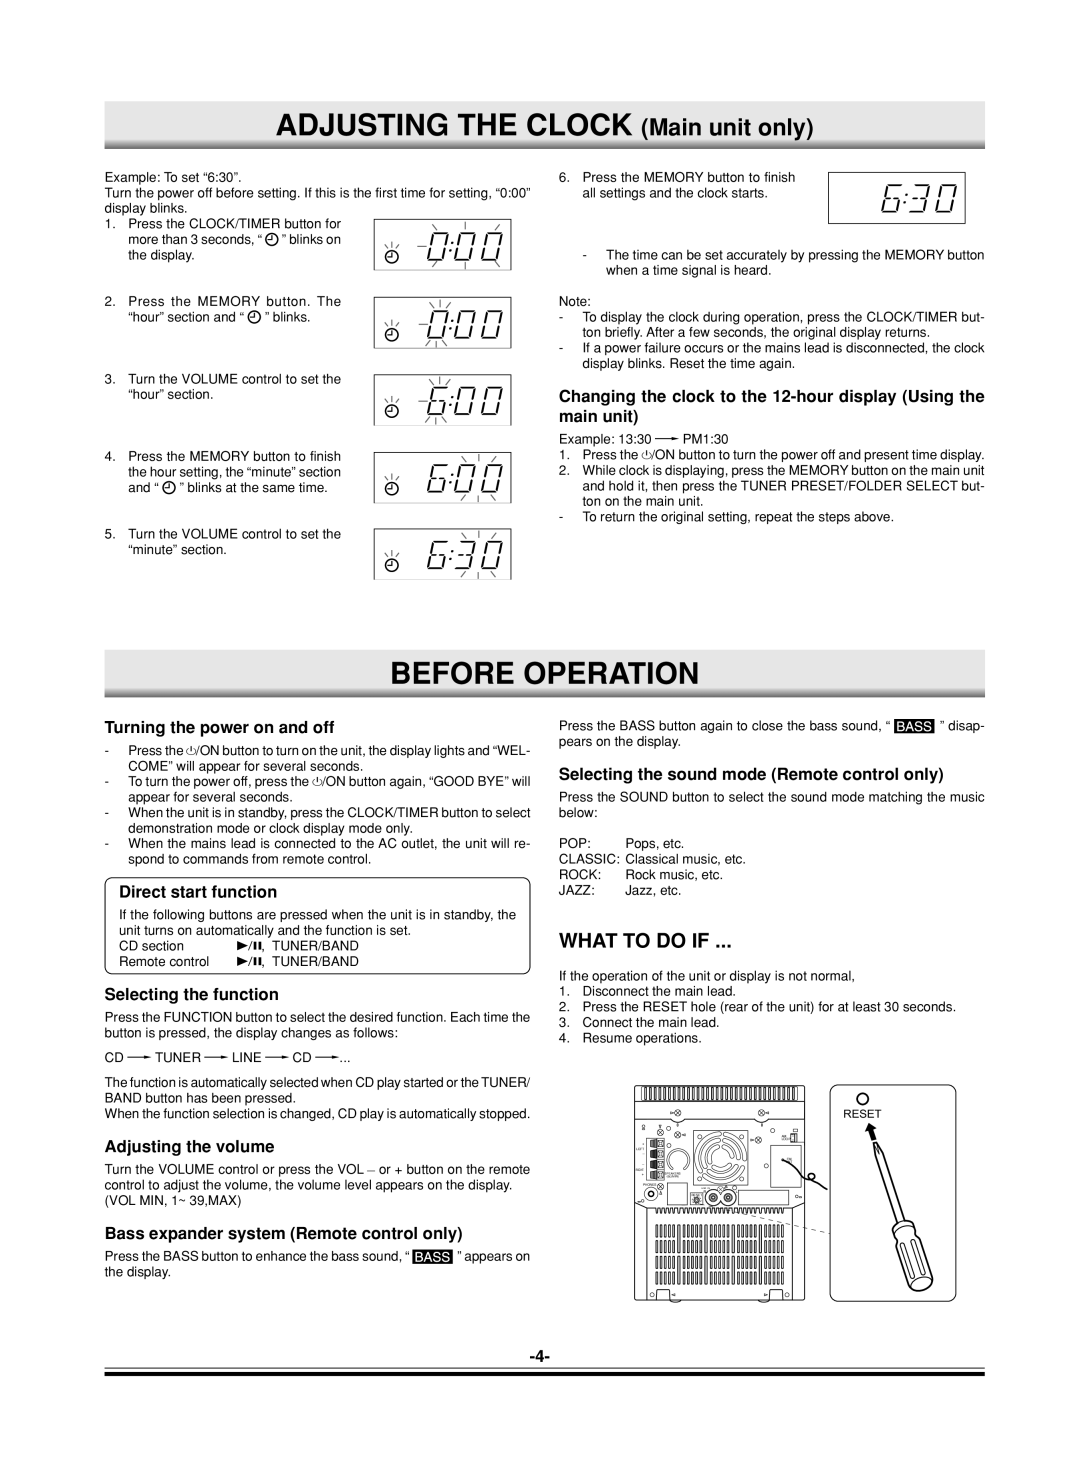
Example: To set “6:30”.
Turn the power off before setting. If this is the first time for setting, “0:00” display blinks.
1. Press the CLOCK/TIMER button for more than 3 seconds, “ ![]() ” blinks on the display.
” blinks on the display.
2. Press the MEMORY button. The “hour” section and “ ![]() ” blinks.
” blinks.
3. Turn the VOLUME control to set the “hour” section.
4. Press the MEMORY button to finish the hour setting, the “minute” section and “ ![]() ” blinks at the same time.
” blinks at the same time.
5. Turn the VOLUME control to set the “minute” section.
6. Press the MEMORY button to finish all settings and the clock starts.
-The time can be set accurately by pressing the MEMORY button when a time signal is heard.
Note:
- To display the clock during operation, press the CLOCK/TIMER but- ton briefly. After a few seconds, the original display returns.
-If a power failure occurs or the mains lead is disconnected, the clock display blinks. Reset the time again.
Changing the clock to the
Example: 13:30 vPM1:30
1.Press the z/ON button to turn the power off and present time display.
2.While clock is displaying, press the MEMORY button on the main unit and hold it, then press the TUNER PRESET/FOLDER SELECT but- ton on the main unit.
-To return the original setting, repeat the steps above.
BEFORE OPERATION
Turning the power on and off
- Press the z/ON button to turn on the unit, the display lights and “WEL- COME” will appear for several seconds.
-To turn the power off, press the z/ON button again, “GOOD BYE” will appear for several seconds.
-When the unit is in standby, press the CLOCK/TIMER button to select demonstration mode or clock display mode only.
-When the mains lead is connected to the AC outlet, the unit will re- spond to commands from remote control.
Direct start function
If the following buttons are pressed when the unit is in standby, the unit turns on automatically and the function is set.
CD section i, TUNER/BAND
Remote control i, TUNER/BAND
Selecting the function
Press the FUNCTION button to select the desired function. Each time the button is pressed, the display changes as follows:
CD vTUNER vLINE vCD v...
The function is automatically selected when CD play started or the TUNER/ BAND button has been pressed.
When the function selection is changed, CD play is automatically stopped.
Adjusting the volume
Turn the VOLUME control or press the VOL _ or + button on the remote control to adjust the volume, the volume level appears on the display. (VOL MIN, 1~ 39,MAX)
Bass expander system (Remote control only)
Press the BASS button to enhance the bass sound, “ ![]()
![]() ” appears on the display.
” appears on the display.
Press the BASS button again to close the bass sound, “ ![]()
![]() ” disap- pears on the display.
” disap- pears on the display.
Selecting the sound mode (Remote control only)
Press the SOUND button to select the sound mode matching the music below:
POP: Pops, etc.
CLASSIC: Classical music, etc.
ROCK: | Rock music, etc. |
JAZZ: | Jazz, etc. |
WHAT TO DO IF ...
If the operation of the unit or display is not normal,
1.Disconnect the main lead.
2.Press the RESET hole (rear of the unit) for at least 30 seconds.
3.Connect the main lead.
4.Resume operations.
RESET
|
| AM |
|
| LOOP |
+ |
|
|
LEFT |
|
|
_ |
|
|
|
| FM |
_ |
| ANT |
RIGHT |
|
|
+ | SPEAKERS |
|
(6Ω MIN) |
| |
PHONES |
|
|
| LINE IN |
|
| R | L |
| RESET |
|