RFID SPECIFIC MENU ITEMS
The LCD menu items specific to RFID are located in the Service Mode menu area. To reach the Service Mode menu area, power the printer on while pressing and holding the LINE and FEED keys. Release the keys upon hearing the printer beep. Press the LINE key twice, and then the FEED key to enter the Service Mode menu items.
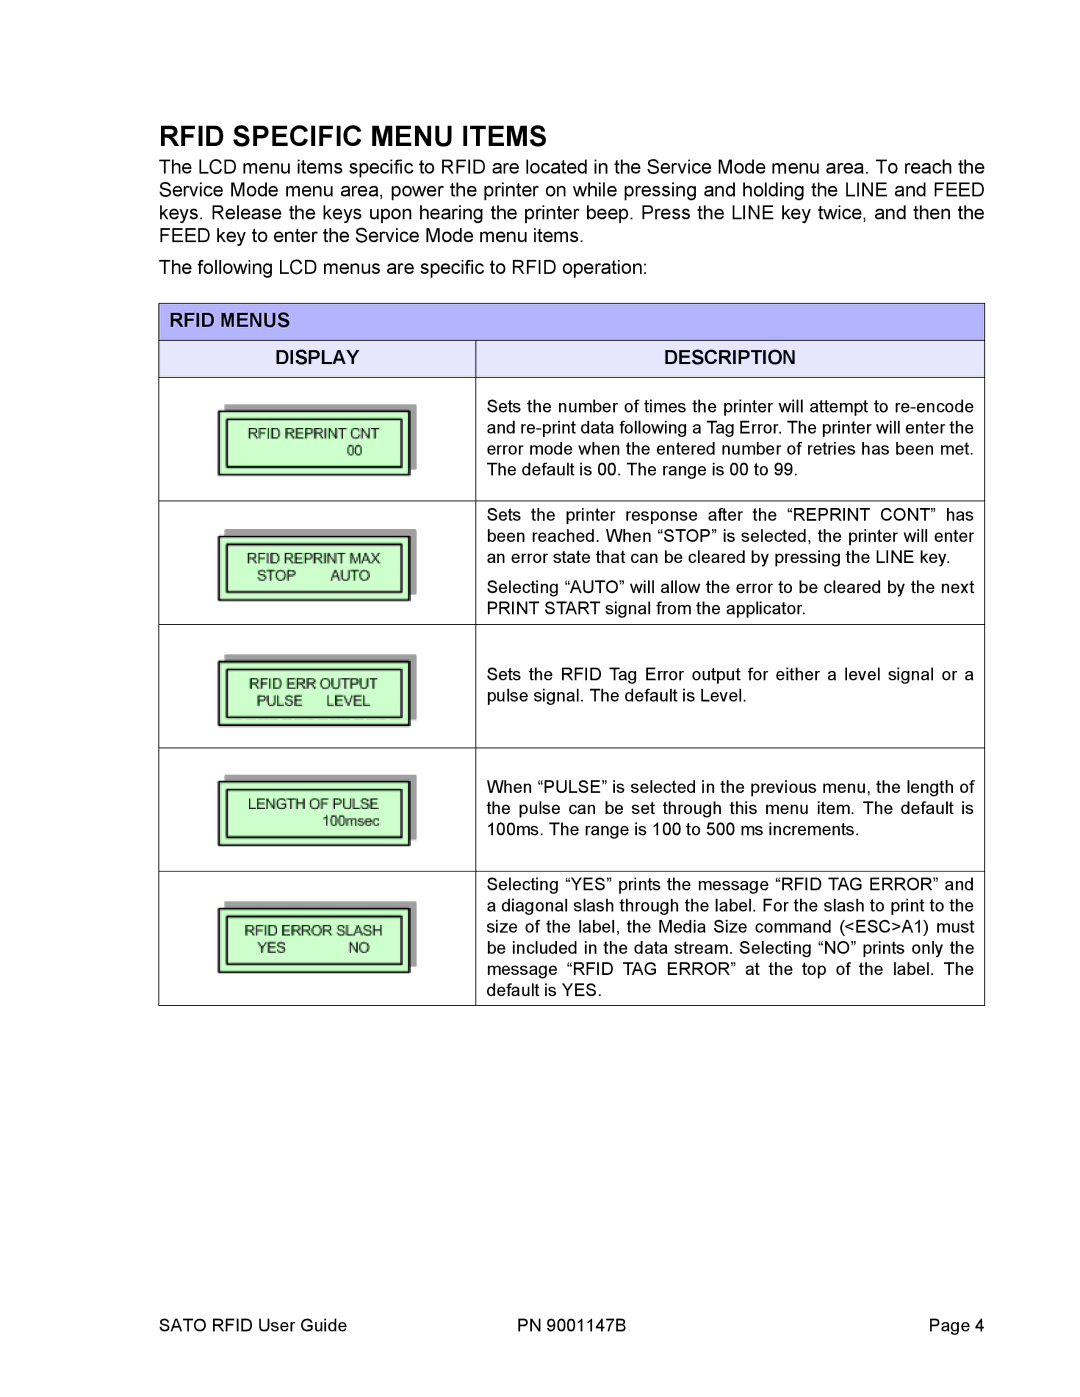
The following LCD menus are specific to RFID operation:
RFID MENUS
DISPLAY | DESCRIPTION |
|
|
| Sets the number of times the printer will attempt to |
| and |
| error mode when the entered number of retries has been met. |
| The default is 00. The range is 00 to 99. |
|
|
| Sets the printer response after the “REPRINT CONT” has |
| been reached. When “STOP” is selected, the printer will enter |
| an error state that can be cleared by pressing the LINE key. |
| Selecting “AUTO” will allow the error to be cleared by the next |
| PRINT START signal from the applicator. |
|
|
| Sets the RFID Tag Error output for either a level signal or a |
| pulse signal. The default is Level. |
|
|
| When “PULSE” is selected in the previous menu, the length of |
| the pulse can be set through this menu item. The default is |
| 100ms. The range is 100 to 500 ms increments. |
|
|
| Selecting “YES” prints the message “RFID TAG ERROR” and |
| a diagonal slash through the label. For the slash to print to the |
| size of the label, the Media Size command (<ESC>A1) must |
| be included in the data stream. Selecting “NO” prints only the |
| message “RFID TAG ERROR” at the top of the label. The |
| default is YES. |
|
|
SATO RFID User Guide | PN 9001147B | Page 4 |