H. | OUTPUT SELECTOR CONTROLS |
| WARNING: This charger is manual operation only and must be monitored at all times. |
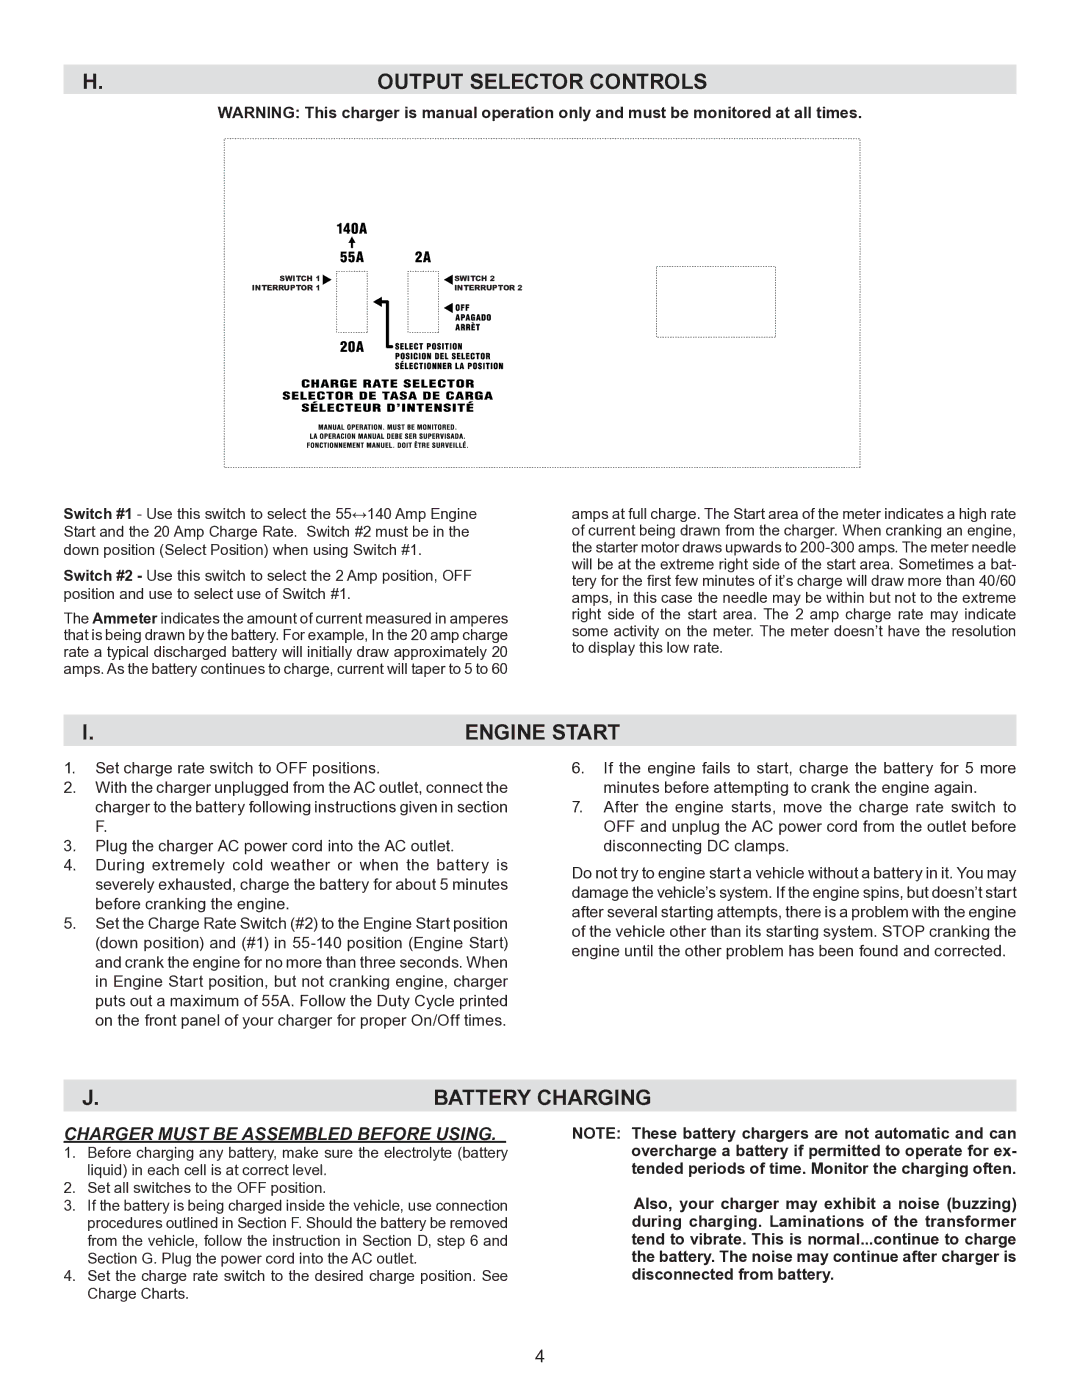
SWITCH 1 INTERRUPTOR 1
SWITCH 2 INTERRUPTOR 2
Switch #1 - Use this switch to select the 55↔140 Amp Engine Start and the 20 Amp Charge Rate. Switch #2 must be in the down position (Select Position) when using Switch #1.
Switch #2 - Use this switch to select the 2 Amp position, OFF position and use to select use of Switch #1.
The Ammeter indicates the amount of current measured in amperes that is being drawn by the battery. For example, In the 20 amp charge rate a typical discharged battery will initially draw approximately 20 amps. As the battery continues to charge, current will taper to 5 to 60
amps at full charge. The Start area of the meter indicates a high rate of current being drawn from the charger. When cranking an engine, the starter motor draws upwards to
I. | ENGINE START |
1.Set charge rate switch to OFF positions.
2.With the charger unplugged from the AC outlet, connect the charger to the battery following instructions given in section
F.
3.Plug the charger AC power cord into the AC outlet.
4.During extremely cold weather or when the battery is severely exhausted, charge the battery for about 5 minutes before cranking the engine.
5.Set the Charge Rate Switch (#2) to the Engine Start position (down position) and (#1) in
6.If the engine fails to start, charge the battery for 5 more minutes before attempting to crank the engine again.
7.After the engine starts, move the charge rate switch to OFF and unplug the AC power cord from the outlet before disconnecting DC clamps.
Do not try to engine start a vehicle without a battery in it. You may damage the vehicle’s system. If the engine spins, but doesn’t start after several starting attempts, there is a problem with the engine of the vehicle other than its starting system. STOP cranking the engine until the other problem has been found and corrected.
j. | BATTERY CHARGING |
CHARGER MUST BE ASSEMBLED BEFORE USING.
1.Before charging any battery, make sure the electrolyte (battery liquid) in each cell is at correct level.
2.Set all switches to the OFF position.
3.If the battery is being charged inside the vehicle, use connection procedures outlined in Section F. Should the battery be removed from the vehicle, follow the instruction in Section D, step 6 and Section G. Plug the power cord into the AC outlet.
4.Set the charge rate switch to the desired charge position. See Charge Charts.
NOTE: These battery chargers are not automatic and can overcharge a battery if permitted to operate for ex- tended periods of time. Monitor the charging often.
Also, your charger may exhibit a noise (buzzing) during charging. Laminations of the transformer tend to vibrate. This is normal...continue to charge the battery. The noise may continue after charger is disconnected from battery.
4