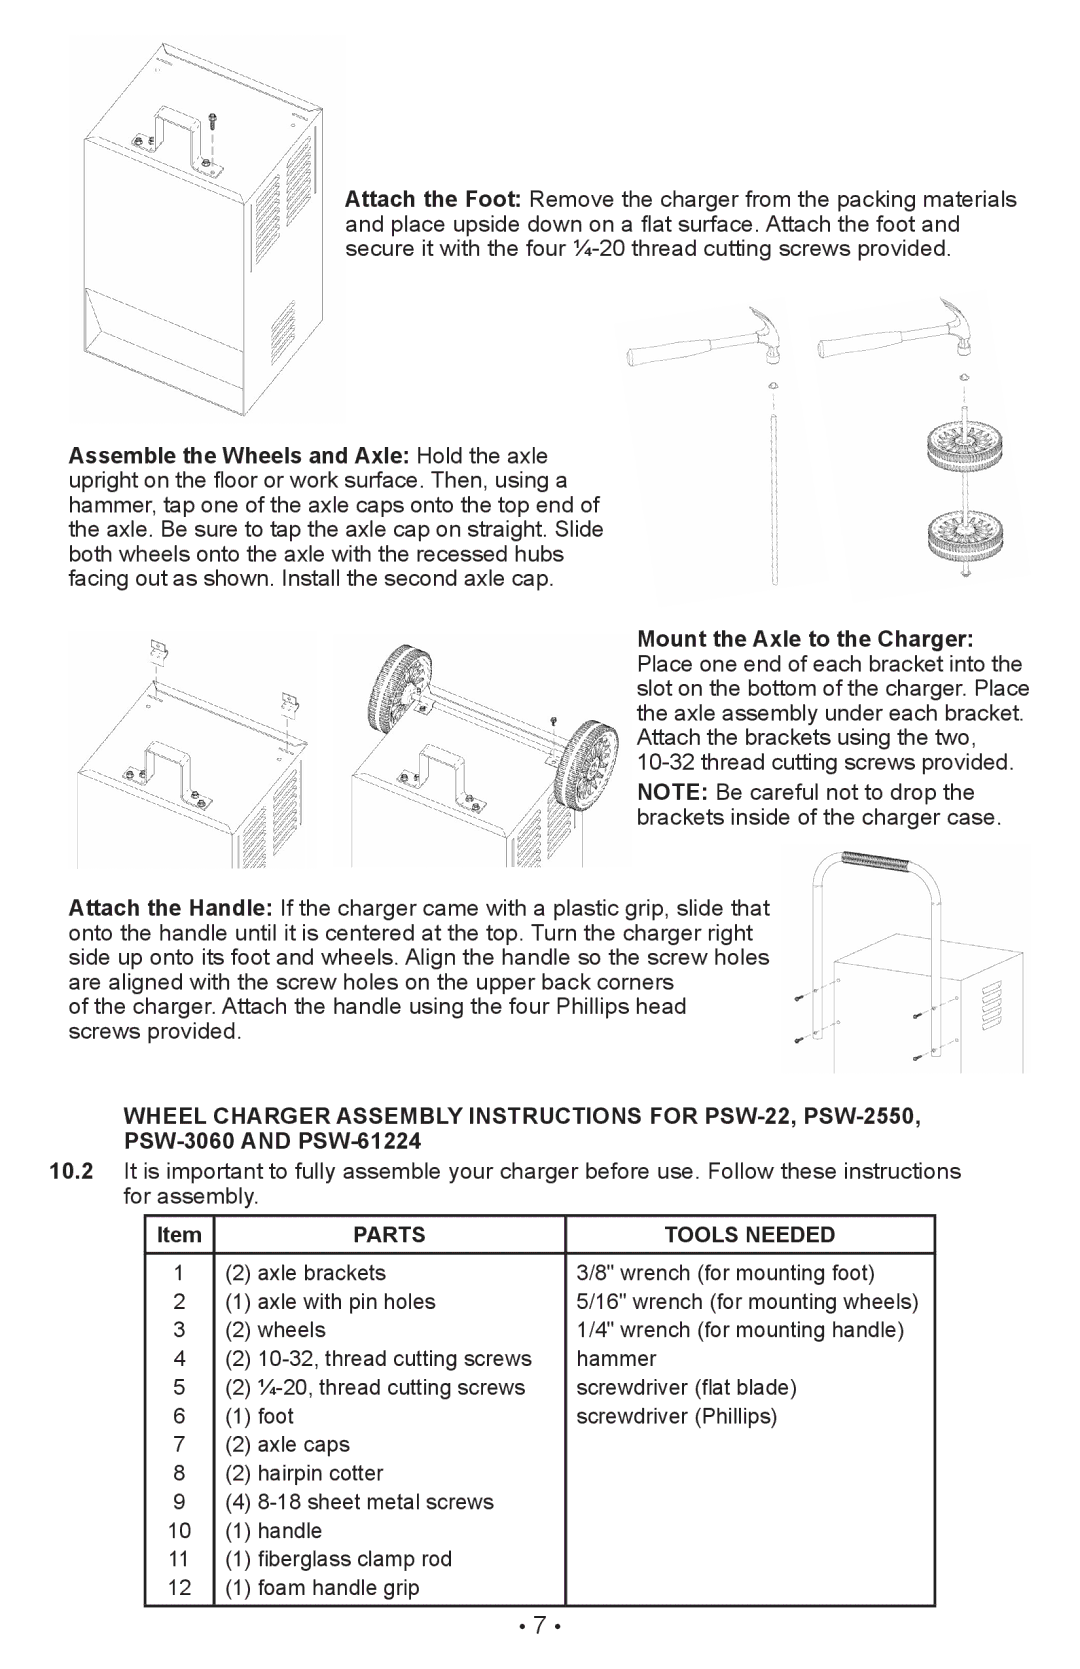
Attach the Foot: Remove the charger from the packing materials and place upside down on a flat surface. Attach the foot and secure it with the four
Assemble the Wheels and Axle: Hold the axle upright on the floor or work surface. Then, using a hammer, tap one of the axle caps onto the top end of the axle. Be sure to tap the axle cap on straight. Slide both wheels onto the axle with the recessed hubs facing out as shown. Install the second axle cap.
Mount the Axle to the Charger: Place one end of each bracket into the slot on the bottom of the charger. Place the axle assembly under each bracket. Attach the brackets using the two,
Attach the Handle: If the charger came with a plastic grip, slide that onto the handle until it is centered at the top. Turn the charger right side up onto its foot and wheels. Align the handle so the screw holes are aligned with the screw holes on the upper back corners
of the charger. Attach the handle using the four Phillips head screws provided.
Wheel Charger Assembly Instructions for
10.2It is important to fully assemble your charger before use. Follow these instructions for assembly.
Item |
| PARTS | TOOLS NEEDED |
1 | (2) axle brackets | 3/8" wrench (for mounting foot) | |
2 | (1) axle with pin holes | 5/16" wrench (for mounting wheels) | |
3 | (2) wheels | 1/4" wrench (for mounting handle) | |
4 | (2) | hammer | |
5 | (2) | screwdriver (flat blade) | |
6 | (1) foot | screwdriver (Phillips) | |
7 | (2) axle caps |
| |
8 | (2) hairpin cotter |
| |
9 | (4) |
| |
10 | (1) handle |
| |
11 | (1) fiberglass clamp rod |
| |
12 | (1) foam handle grip |
| |
• 7 •