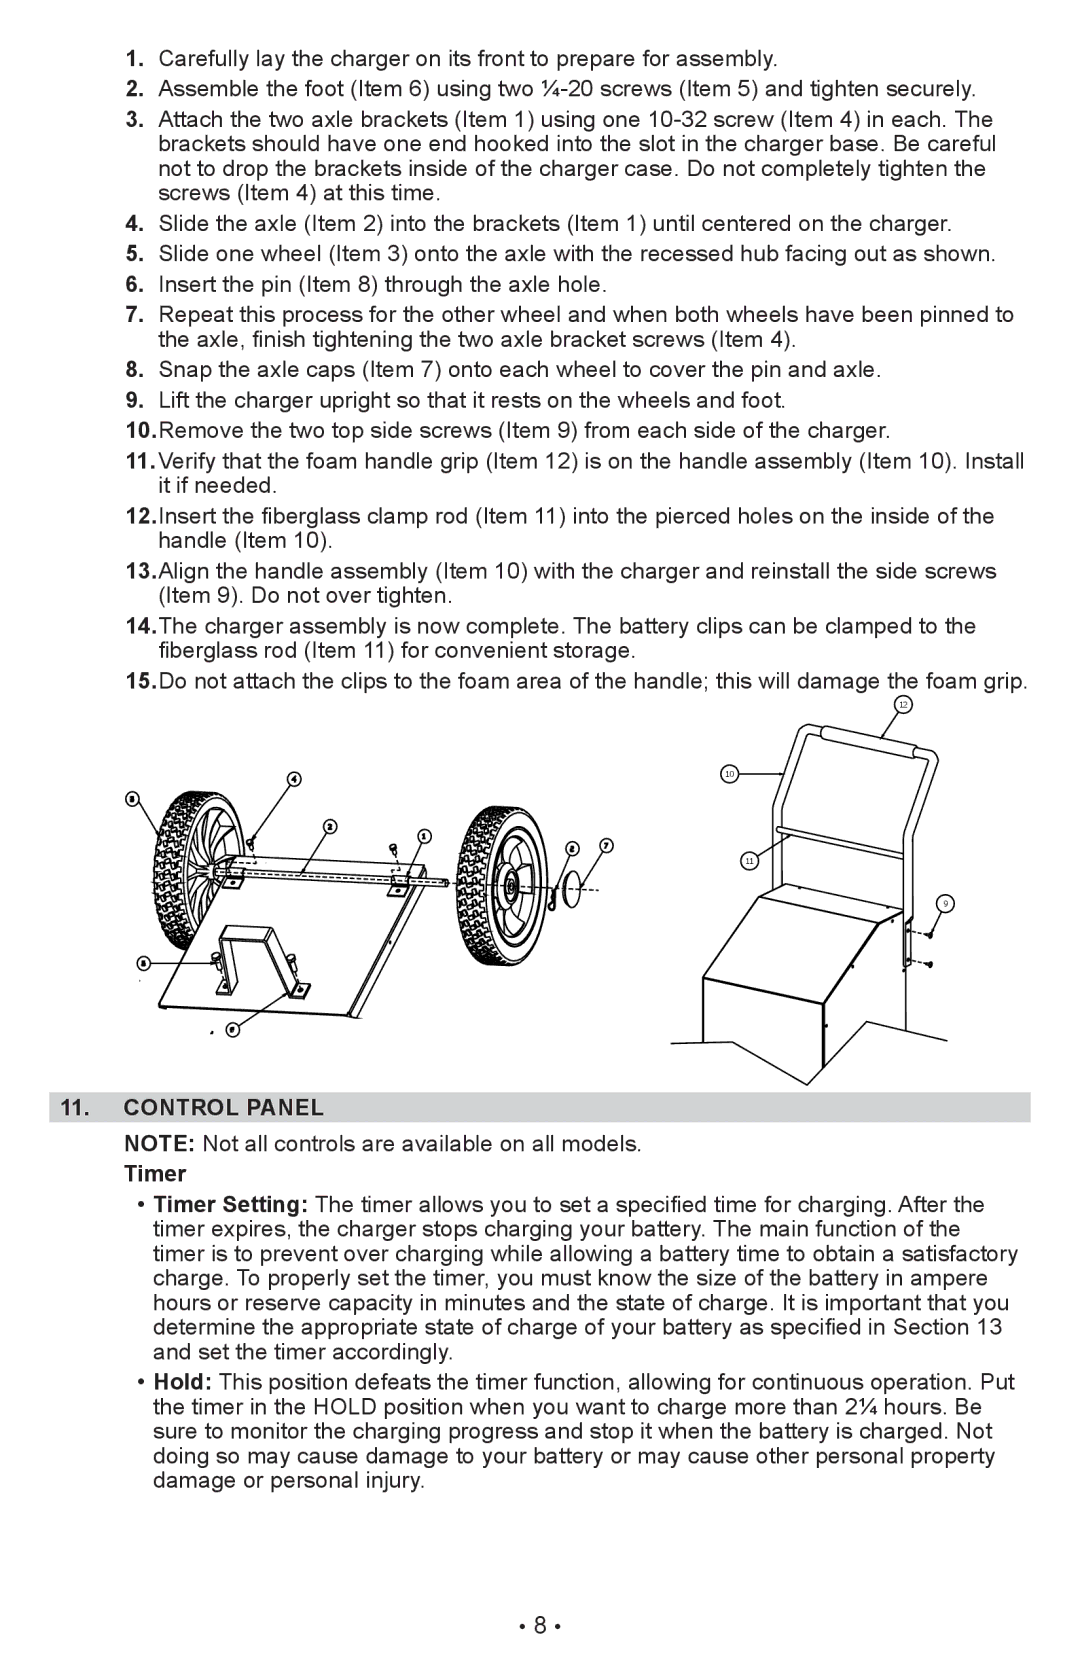
1.Carefully lay the charger on its front to prepare for assembly.
2.Assemble the foot (Item 6) using two
3.Attach the two axle brackets (Item 1) using one
4.Slide the axle (Item 2) into the brackets (Item 1) until centered on the charger.
5.Slide one wheel (Item 3) onto the axle with the recessed hub facing out as shown.
6.Insert the pin (Item 8) through the axle hole.
7.Repeat this process for the other wheel and when both wheels have been pinned to the axle, finish tightening the two axle bracket screws (Item 4).
8.Snap the axle caps (Item 7) onto each wheel to cover the pin and axle.
9.Lift the charger upright so that it rests on the wheels and foot.
10.Remove the two top side screws (Item 9) from each side of the charger.
11.Verify that the foam handle grip (Item 12) is on the handle assembly (Item 10). Install it if needed.
12.Insert the fiberglass clamp rod (Item 11) into the pierced holes on the inside of the handle (Item 10).
13.Align the handle assembly (Item 10) with the charger and reinstall the side screws (Item 9). Do not over tighten.
14.The charger assembly is now complete. The battery clips can be clamped to the fiberglass rod (Item 11) for convenient storage.
15.Do not attach the clips to the foam area of the handle; this will damage the foam grip.
12
10
11
9
11.CONTROL PANEL
Note: Not all controls are available on all models.
Timer
•Timer Setting: The timer allows you to set a specified time for charging. After the timer expires, the charger stops charging your battery. The main function of the timer is to prevent over charging while allowing a battery time to obtain a satisfactory charge. To properly set the timer, you must know the size of the battery in ampere hours or reserve capacity in minutes and the state of charge. It is important that you determine the appropriate state of charge of your battery as specified in Section 13 and set the timer accordingly.
•Hold: This position defeats the timer function, allowing for continuous operation. Put the timer in the HOLD position when you want to charge more than 2¼ hours. Be sure to monitor the charging progress and stop it when the battery is charged. Not doing so may cause damage to your battery or may cause other personal property damage or personal injury.
• 8 •