Modem Installation
Installing the Modem
Follow these steps for proper installation.
1. | Power down your PC and unplug it from the power source. |
2. | Connect the active RF coaxial cable to the CABLE IN |
| connector. Use an optional cable signal splitter to add a |
| TV, a DHCT or |
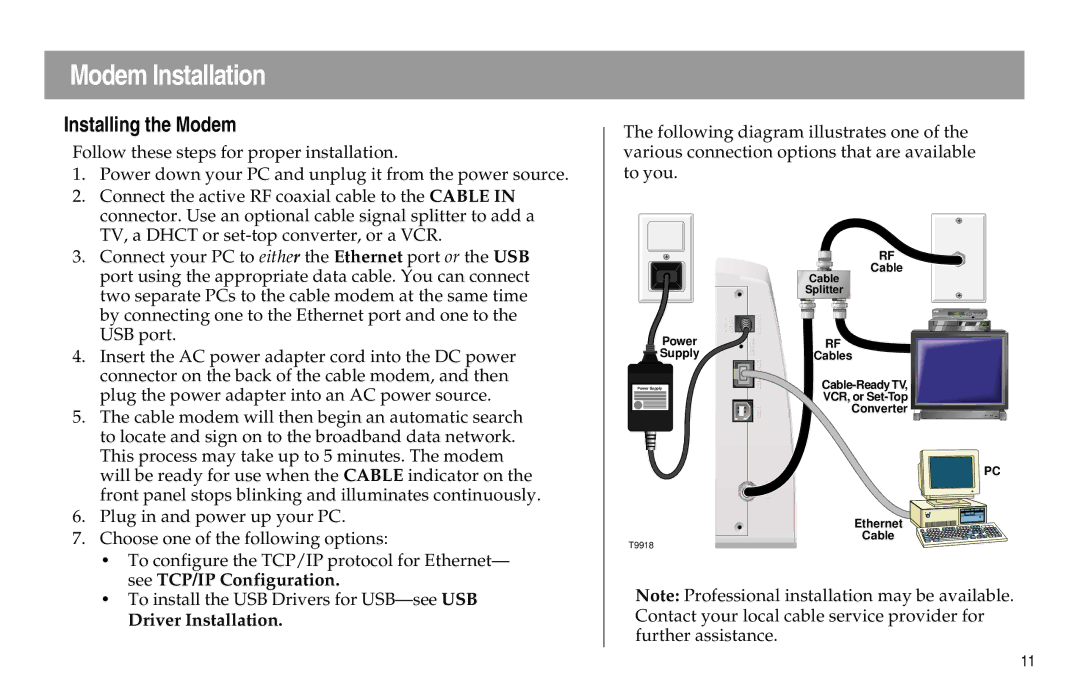
The following diagram illustrates one of the various connection options that are available to you.
3. | Connect your PC to either the Ethernet port or the USB |
| port using the appropriate data cable. You can connect |
| two separate PCs to the cable modem at the same time |
| by connecting one to the Ethernet port and one to the |
| USB port. |
4. | Insert the AC power adapter cord into the DC power |
| connector on the back of the cable modem, and then |
| plug the power adapter into an AC power source. |
5. | The cable modem will then begin an automatic search |
| to locate and sign on to the broadband data network. |
| This process may take up to 5 minutes. The modem |
| will be ready for use when the CABLE indicator on the |
| front panel stops blinking and illuminates continuously. |
6. | Plug in and power up your PC. |
7. | Choose one of the following options: |
| • To configure the TCP/IP protocol for Ethernet— |
| see TCP/IP Configuration. |
Power ![]()
![]() Supply
Supply
Power Supply
T9918
12VDC | POWER |
| RESET |
| ETHERNET |
| USB |
| CABLE ININ |
RF
Cable
Cable
Splitter
RF
Cables
VCR, or
Converter
PC
Ethernet
Cable
• To install the USB Drivers for |
Driver Installation. |
Note: Professional installation may be available. Contact your local cable service provider for further assistance.
11