3.3Jumper settings
3.3.1Master/slave configuration
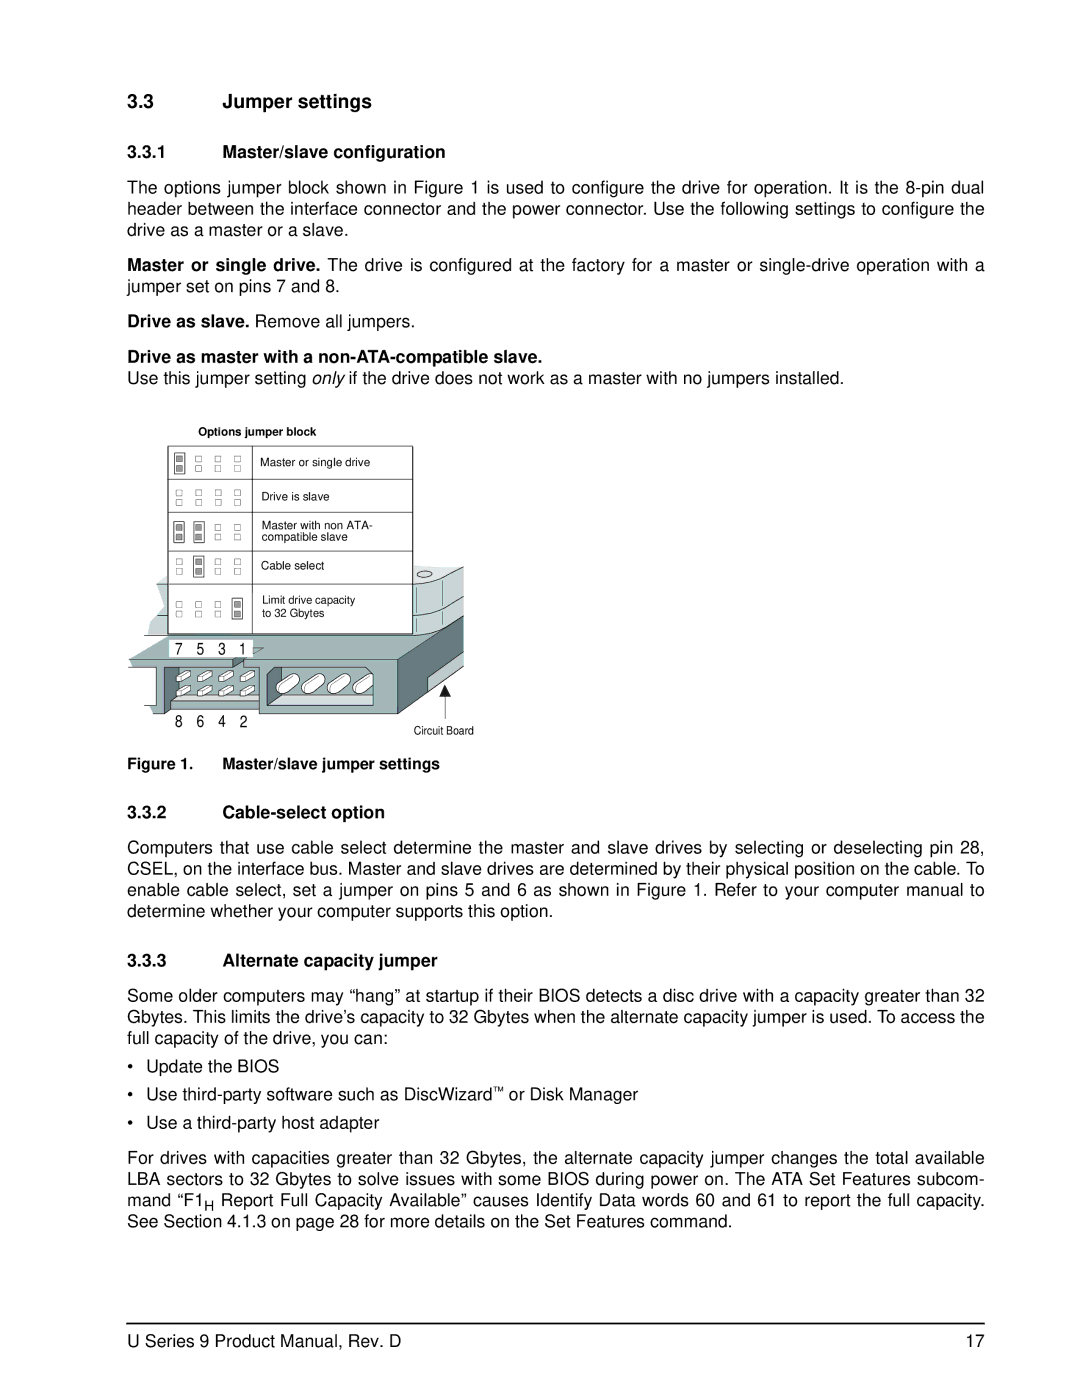
The options jumper block shown in Figure 1 is used to configure the drive for operation. It is the
Master or single drive. The drive is configured at the factory for a master or
Drive as slave. Remove all jumpers.
Drive as master with a non-ATA-compatible slave.
Use this jumper setting only if the drive does not work as a master with no jumpers installed.
Options jumper block
Master or single drive
Drive is slave
Master with non ATA- compatible slave
Cable select
Limit drive capacity to 32 Gbytes
7 5 3 1 ![]()
8 6 4 2
Circuit Board
Figure 1. Master/slave jumper settings
3.3.2Cable-select option
Computers that use cable select determine the master and slave drives by selecting or deselecting pin 28, CSEL, on the interface bus. Master and slave drives are determined by their physical position on the cable. To enable cable select, set a jumper on pins 5 and 6 as shown in Figure 1. Refer to your computer manual to determine whether your computer supports this option.
3.3.3Alternate capacity jumper
Some older computers may “hang” at startup if their BIOS detects a disc drive with a capacity greater than 32 Gbytes. This limits the drive’s capacity to 32 Gbytes when the alternate capacity jumper is used. To access the full capacity of the drive, you can:
•Update the BIOS
•Use
•Use a
For drives with capacities greater than 32 Gbytes, the alternate capacity jumper changes the total available LBA sectors to 32 Gbytes to solve issues with some BIOS during power on. The ATA Set Features subcom- mand “F1H Report Full Capacity Available” causes Identify Data words 60 and 61 to report the full capacity. See Section 4.1.3 on page 28 for more details on the Set Features command.
U Series 9 Product Manual, Rev. D | 17 |
