Installation
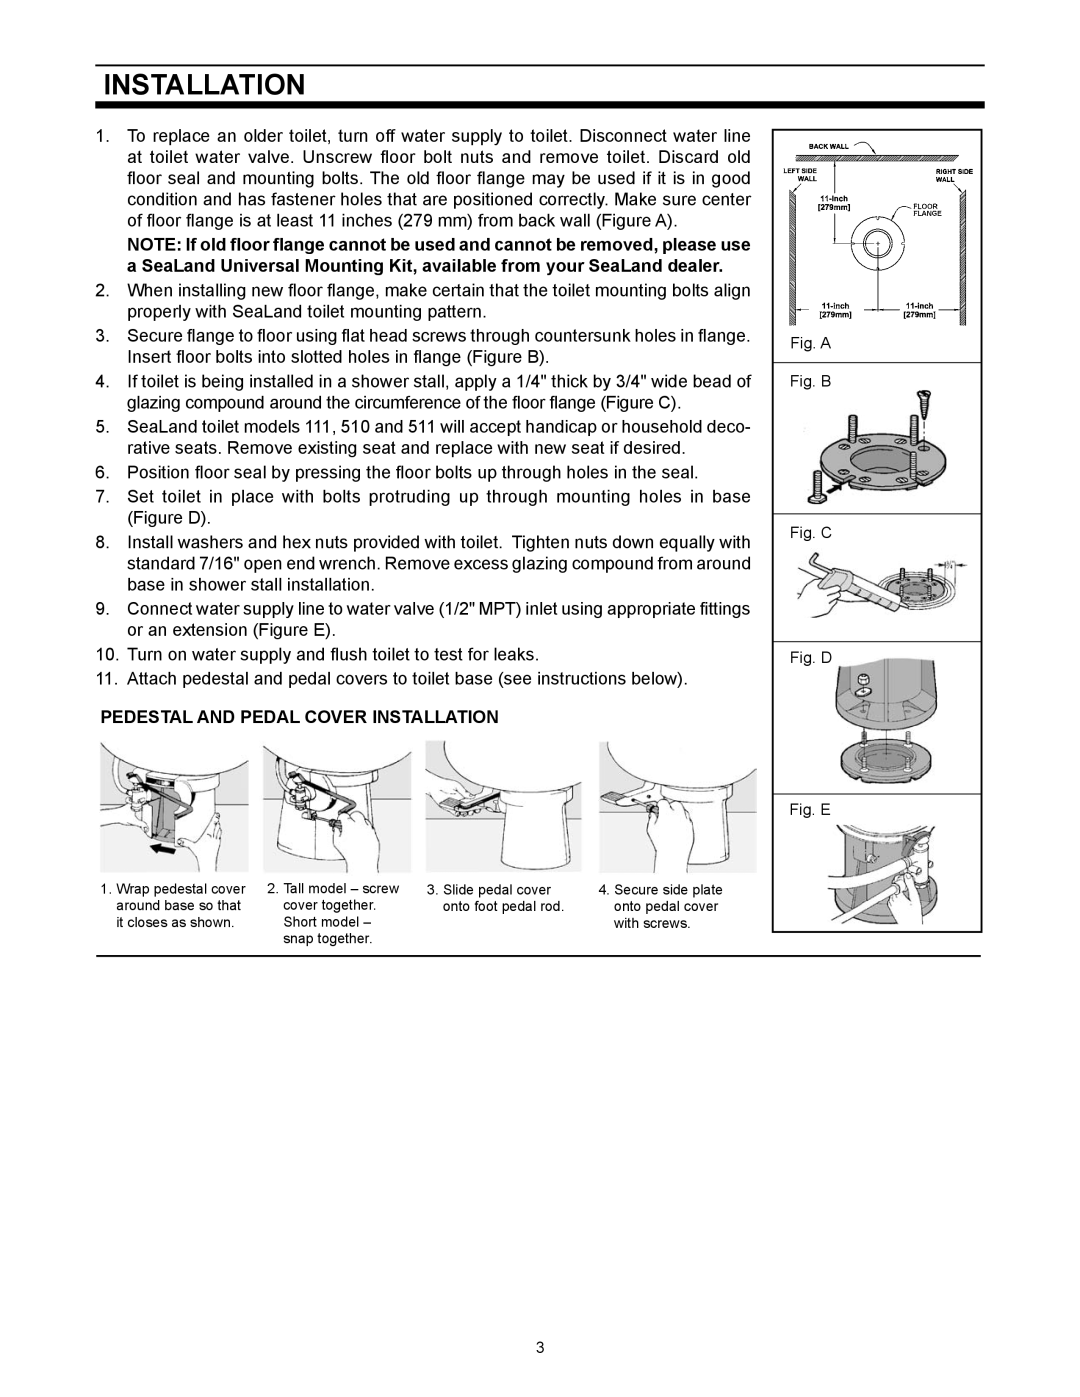
1.To replace an older toilet, turn off water supply to toilet. Disconnect water line at toilet water valve. Unscrew floor bolt nuts and remove toilet. Discard old floor seal and mounting bolts. The old floor flange may be used if it is in good condition and has fastener holes that are positioned correctly. Make sure center of floor flange is at least 11 inches (279 mm) from back wall (Figure A).
NOTE: If old floor flange cannot be used and cannot be removed, please use a SeaLand Universal Mounting Kit, available from your SeaLand dealer.
2.When installing new floor flange, make certain that the toilet mounting bolts align properly with SeaLand toilet mounting pattern.
3.Secure flange to floor using flat head screws through countersunk holes in flange. Insert floor bolts into slotted holes in flange (Figure B).
4.If toilet is being installed in a shower stall, apply a 1/4" thick by 3/4" wide bead of glazing compound around the circumference of the floor flange (Figure C).
5.SeaLand toilet models 111, 510 and 511 will accept handicap or household deco- rative seats. Remove existing seat and replace with new seat if desired.
6.Position floor seal by pressing the floor bolts up through holes in the seal.
7.Set toilet in place with bolts protruding up through mounting holes in base (Figure D).
8.Install washers and hex nuts provided with toilet. Tighten nuts down equally with standard 7/16" open end wrench. Remove excess glazing compound from around base in shower stall installation.
9.Connect water supply line to water valve (1/2" MPT) inlet using appropriate fittings or an extension (Figure E).
10.Turn on water supply and flush toilet to test for leaks.
11.Attach pedestal and pedal covers to toilet base (see instructions below).
Pedestal and pedal Cover Installation
1. Wrap pedestal cover | 2. Tall model – screw | 3. Slide pedal cover | 4. Secure side plate |
around base so that | cover together. | onto foot pedal rod. | onto pedal cover |
it closes as shown. | Short model – |
| with screws. |
| snap together. |
|
|