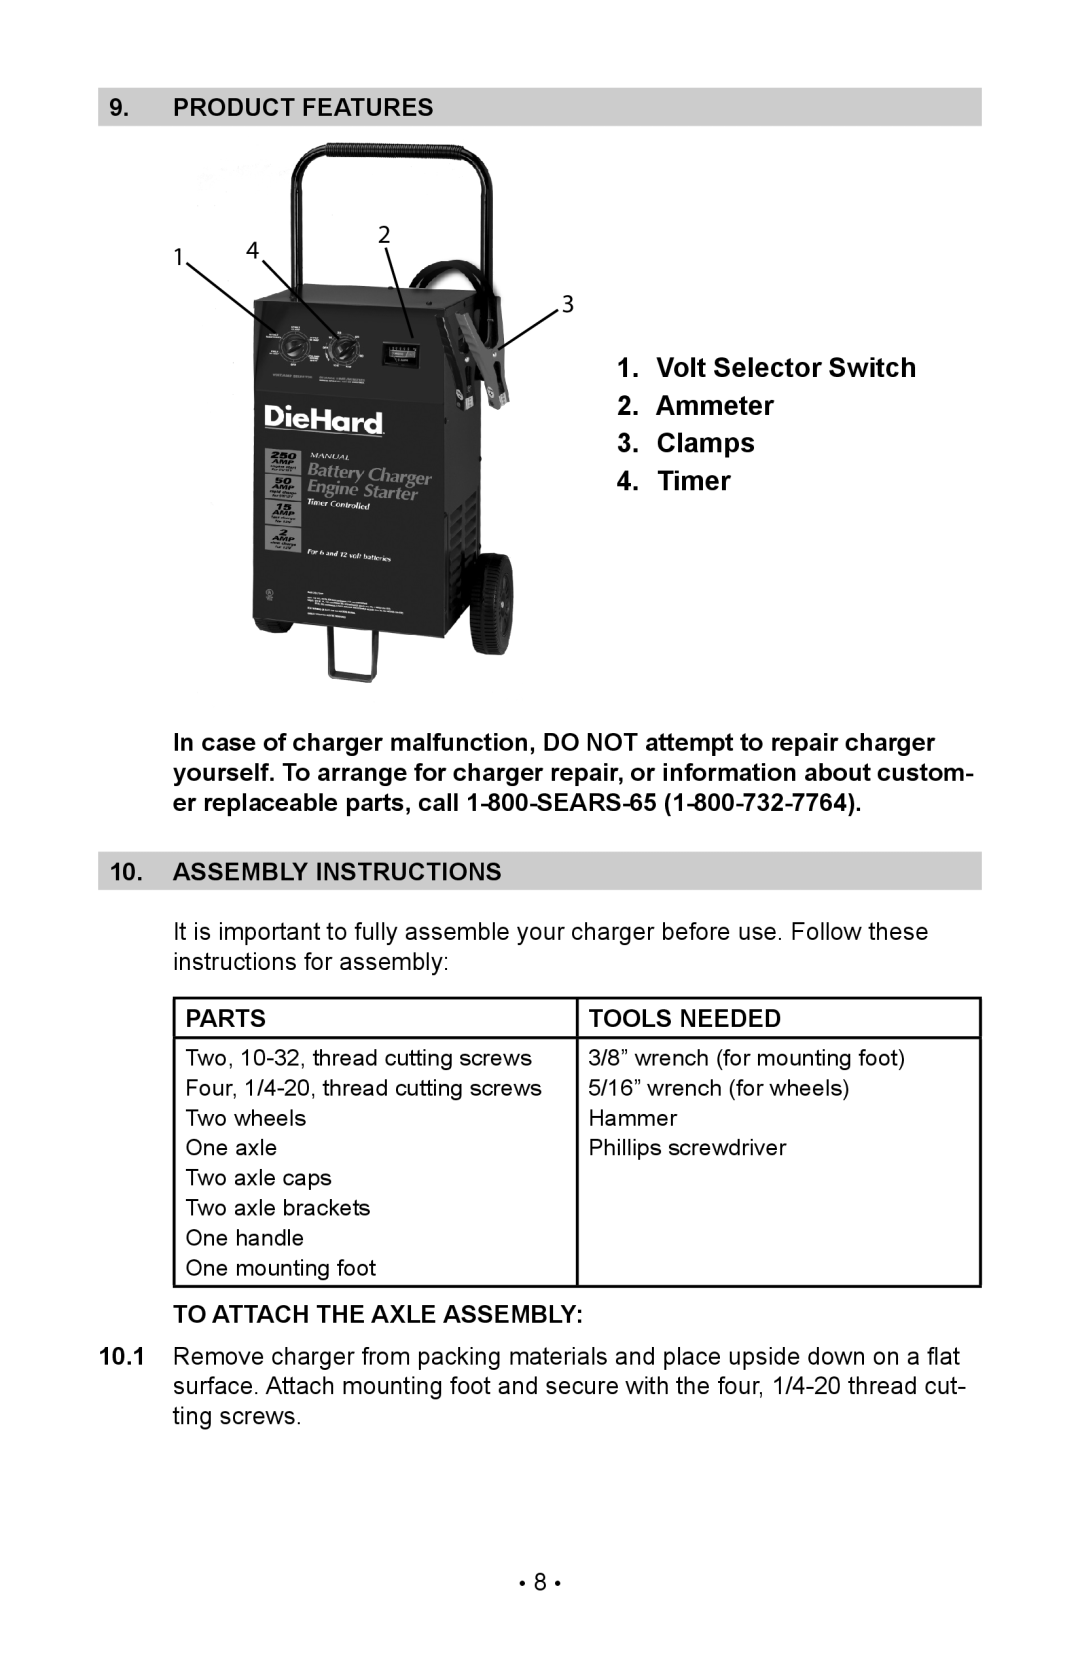
9.product features
1 | 4 | 2 |
|
3
1. Volt Selector Switch
2. Ammeter
3. Clamps
4. Timer
In case of charger malfunction, DO NOT attempt to repair charger yourself. To arrange for charger repair, or information about custom- er replaceable parts, call
10.assembly instructions
It is important to fully assemble your charger before use. Follow these instructions for assembly:
PARTS | TOOLS NEEDED |
Two, | 3/8” wrench (for mounting foot) |
Four, | 5/16” wrench (for wheels) |
Two wheels | Hammer |
One axle | Phillips screwdriver |
Two axle caps |
|
Two axle brackets |
|
One handle |
|
One mounting foot |
|
To attach the axle assembly:
10.1Remove charger from packing materials and place upside down on a flat surface. Attach mounting foot and secure with the four,
• 8 •
