2.15Clean the battery terminals before using the jump starter. During cleaning, keep airborne corrosion from coming into contact with your eyes, nose and mouth. Use baking soda and water to neutralize the battery acid and help eliminate airborne corrosion. Do not touch your eyes, nose or mouth.
2.16Determine the voltage of the battery by referring to the vehicle owner’s manual and make sure that the output voltage of the jump starter is correct.
2.17Make sure that the jump starter cable clips make tight connections.
3.FOLLOW THESE STEPS WHEN connecting to a BATTERY
A SPARK NEAR THE BATTERY MAY CAUSE
A BATTERY EXPLOSION. TO REDUCE THE
RISK OF A SPARK NEAR THE BATTERY:
3.1 Attach the output cables to the battery and chassis as indicated below. Never allow the output clips to touch each other.
3.2Position the DC cables to reduce the risk of damage by the hood, door and moving or hot engine parts. NOTE: If it is necessary to close the hood during the charging process, ensure that the hood does not touch the metal part of the battery clips or cut the insulation of the cables.
3.3Stay clear of fan blades, belts, pulleys and other parts that can cause injury.
3.4Check the polarity of the battery posts. The
POSITIVE (POS, P, +) battery post usually has a larger diameter then the NEGATIVE
(NEG, N,
3.5Determine which post of the battery is grounded (connected) to the chassis. If the negative post is grounded to the chassis
(as in most vehicles), see step 3.6. If the positive post is grounded to the chassis, see step 3.7.
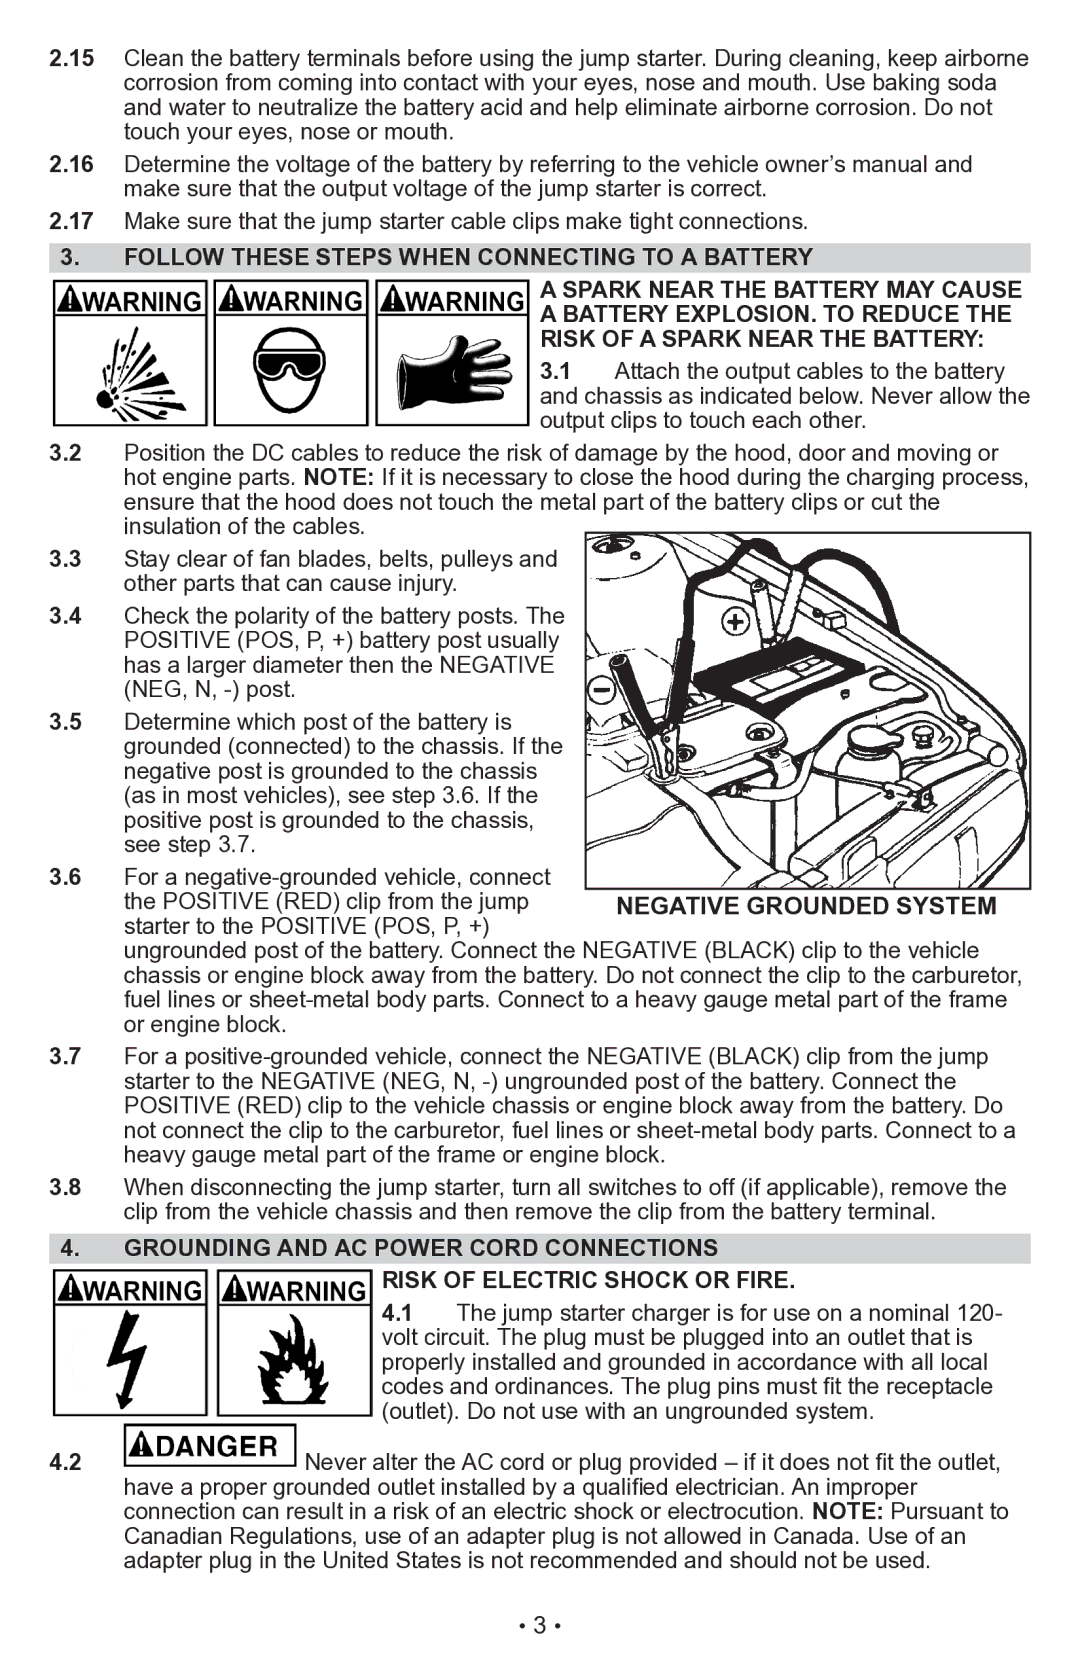
3.6For a
the POSITIVE (RED) clip from the jump starter to the POSITIVE (POS, P, +)
ungrounded post of the battery. Connect the NEGATIVE (BLACK) clip to the vehicle chassis or engine block away from the battery. Do not connect the clip to the carburetor, fuel lines or
3.7For a
3.8When disconnecting the jump starter, turn all switches to off (if applicable), remove the clip from the vehicle chassis and then remove the clip from the battery terminal.
4.Grounding and AC power cord connections
RISK OF ELECTRIC SHOCK OR FIRE.
4.1The jump starter charger is for use on a nominal 120- volt circuit. The plug must be plugged into an outlet that is properly installed and grounded in accordance with all local codes and ordinances. The plug pins must fit the receptacle (outlet). Do not use with an ungrounded system.
4.2![]() Never alter the AC cord or plug provided – if it does not fit the outlet, have a proper grounded outlet installed by a qualified electrician. An improper connection can result in a risk of an electric shock or electrocution. NOTE: Pursuant to Canadian Regulations, use of an adapter plug is not allowed in Canada. Use of an adapter plug in the United States is not recommended and should not be used.
Never alter the AC cord or plug provided – if it does not fit the outlet, have a proper grounded outlet installed by a qualified electrician. An improper connection can result in a risk of an electric shock or electrocution. NOTE: Pursuant to Canadian Regulations, use of an adapter plug is not allowed in Canada. Use of an adapter plug in the United States is not recommended and should not be used.
• 3 •