5.ASSEMBLY INSTRUCTIONS
Remove all cord wraps and uncoil the cables prior to using the jump starter.
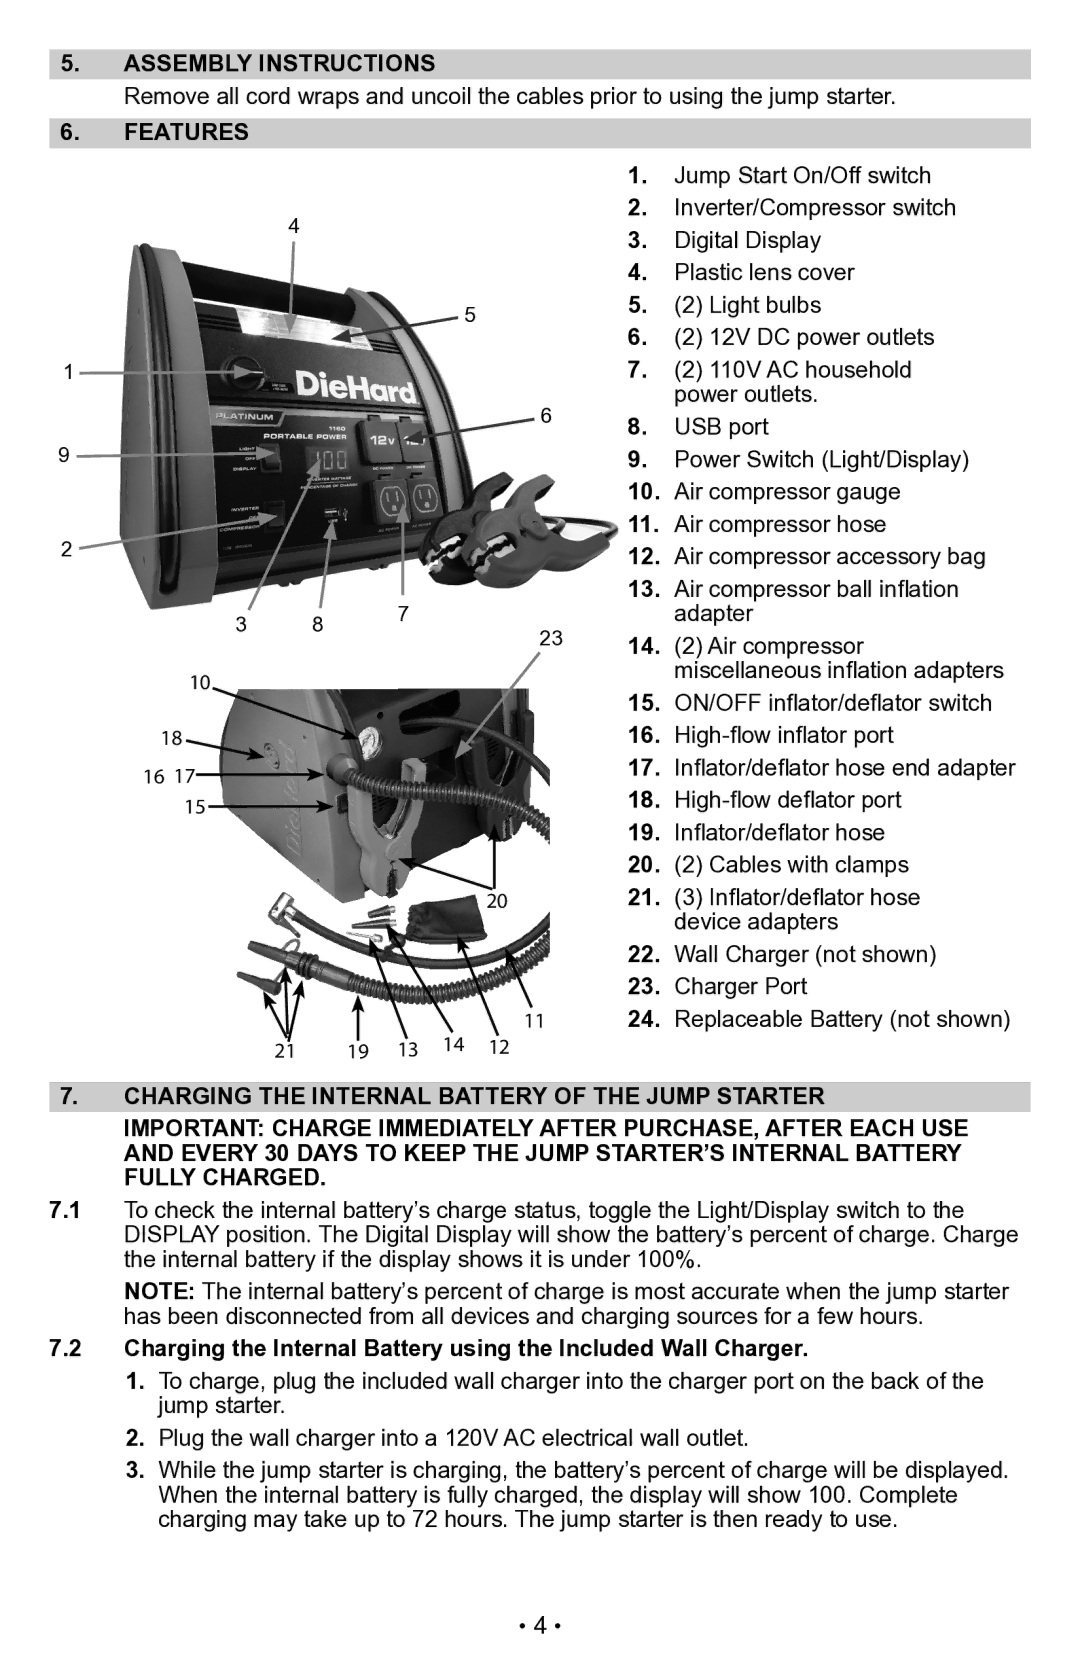
6.FEATURES
4
5
1 ![]()
9
2
3 8 7
10
18
1617
15
20
21 19 13 14 12
1.Jump Start On/Off switch
2.Inverter/Compressor switch
3.Digital Display
4.Plastic lens cover
5.(2) Light bulbs
6.(2) 12V DC power outlets
7.(2) 110V AC household power outlets.
68. USB port
9.Power Switch (Light/Display)
10.Air compressor gauge
11.Air compressor hose
12.Air compressor accessory bag
13.Air compressor ball inflation adapter
2314. (2) Air compressor miscellaneous inflation adapters
15.ON/Off inflator/deflator switch
16.
17.Inflator/deflator hose end adapter
18.
19.Inflator/deflator hose
20.(2) Cables with clamps
21.(3) Inflator/deflator hose device adapters
22.Wall Charger (not shown)
23.Charger Port
1124. Replaceable Battery (not shown)
7.Charging the internal battery of the Jump starter
Important: charge immediately after purchase, after each use and every 30 days to keep the jump starter’S INTERNAL BATTERY FULLY CHARGED.
7.1To check the internal battery’s charge status, toggle the Light/Display switch to the DISPLAY position. The Digital Display will show the battery’s percent of charge. Charge the internal battery if the display shows it is under 100%.
Note: The internal battery’s percent of charge is most accurate when the jump starter has been disconnected from all devices and charging sources for a few hours.
7.2Charging the Internal Battery using the Included Wall Charger.
1.To charge, plug the included wall charger into the charger port on the back of the jump starter.
2.Plug the wall charger into a 120V AC electrical wall outlet.
3.While the jump starter is charging, the battery’s percent of charge will be displayed. When the internal battery is fully charged, the display will show 100. Complete charging may take up to 72 hours. The jump starter is then ready to use.
• 4 •