INSTALLATION
IMPORTANT: Leave these instructions
with the appliance.
TOOL LIST
The following tools are needed to Install your new counter unit.
Pipe wrenches
Flat bladed screwdriver
•Rule or tape measure and straightedge
•Hand saw or saber saw
ADDITIONAL MATERIALS
•Gas supply line
•Pipe joint sealant (resistant to L.P. gas)
OWNER: Keep these instructions for future use.
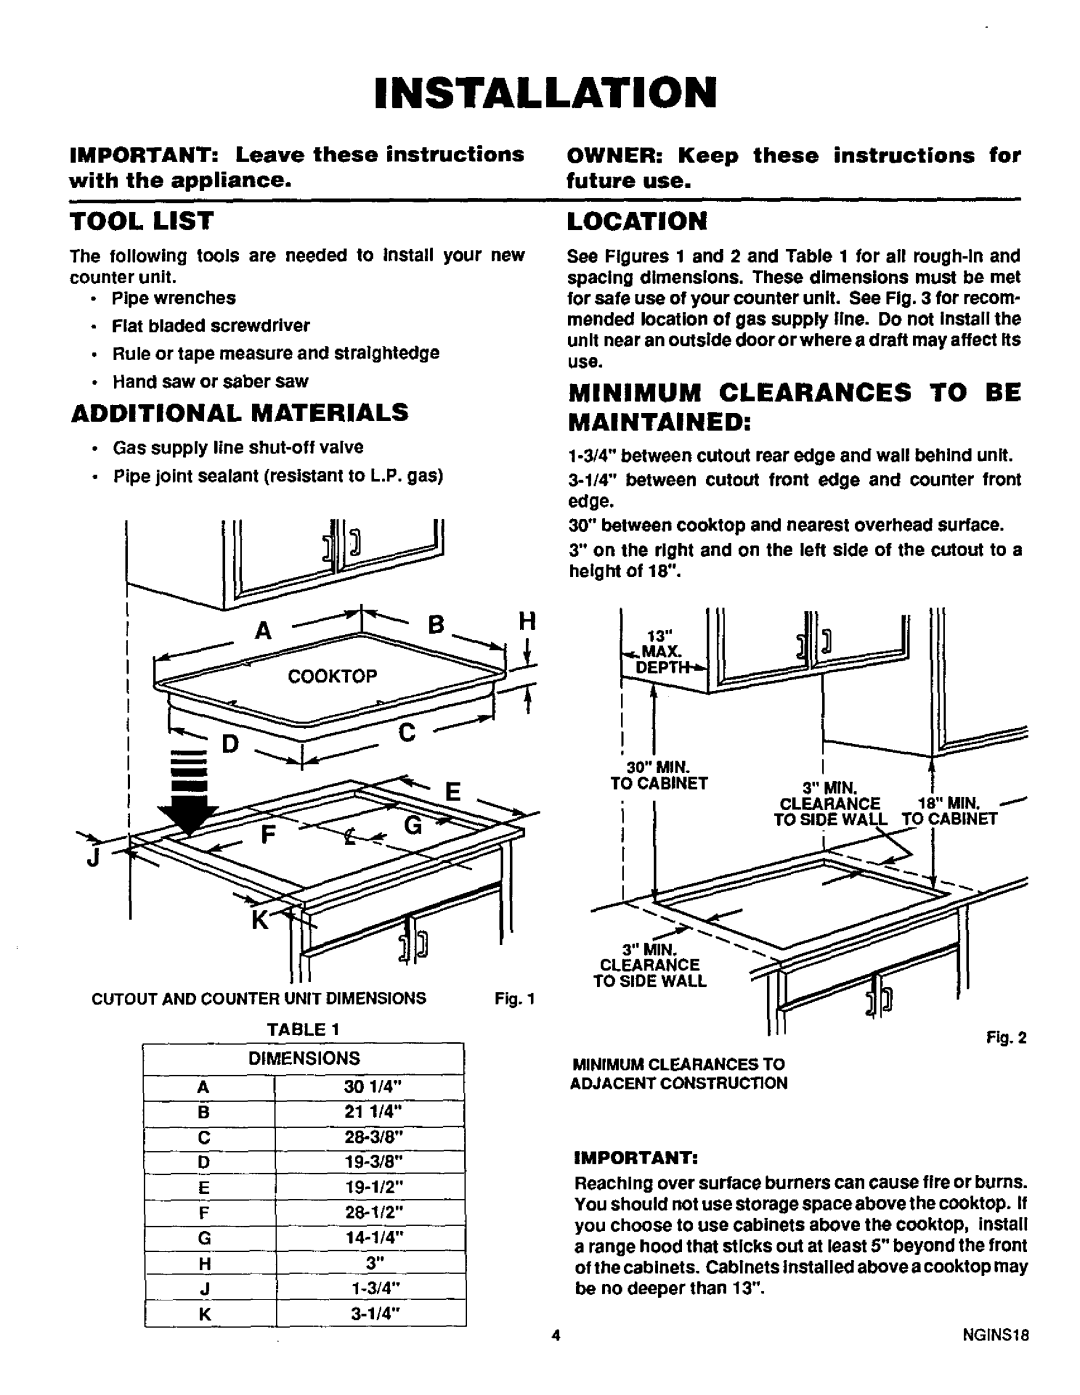
LOCATION
See Figures 1 and 2 and Table 1 for all
MINIMUM CLEARANCES TO BE MAINTAINED:
edge.
30" between cooktop and nearest overhead surface.
3" on the right and on the left side of the cutout to a height of 18".
30" MIN. | I |
|
TO CABINET | 3" MIN. |
|
| CLEARANCE | 18" MIN. I" |
J | TO SIDE WALL .TO CABINET | |
CLEARANCE _ | // | I I |
CUTOUT AND COUNTER UNIT DIMENSIONS | Fig. 1 | |
TABLE | 1 |
|
DIMENSIONS |
| |
A | 30 1/4" |
|
B | 21 1/4" |
|
C |
| |
D |
| |
E |
| |
F |
| |
G |
| |
H | 3" |
|
J |
| |
K |
| |
" ' | Fig. 2 |
MINIMUM CLEARANCES TO
ADJACENT CONSTRUCTION
IMPORTANT:
Reaching over surface burners can cause fire or burns. You should not use storage space above the cooktop. If you choose to use cabinets above the cooktop, install a range hood that sticks out at least 5" beyond the front of the cabinets. Cabinets Installed above a cooktop may benD deeperthan 13".
4 | NGINS18 |