REMOVING SHIPPING SCREWS
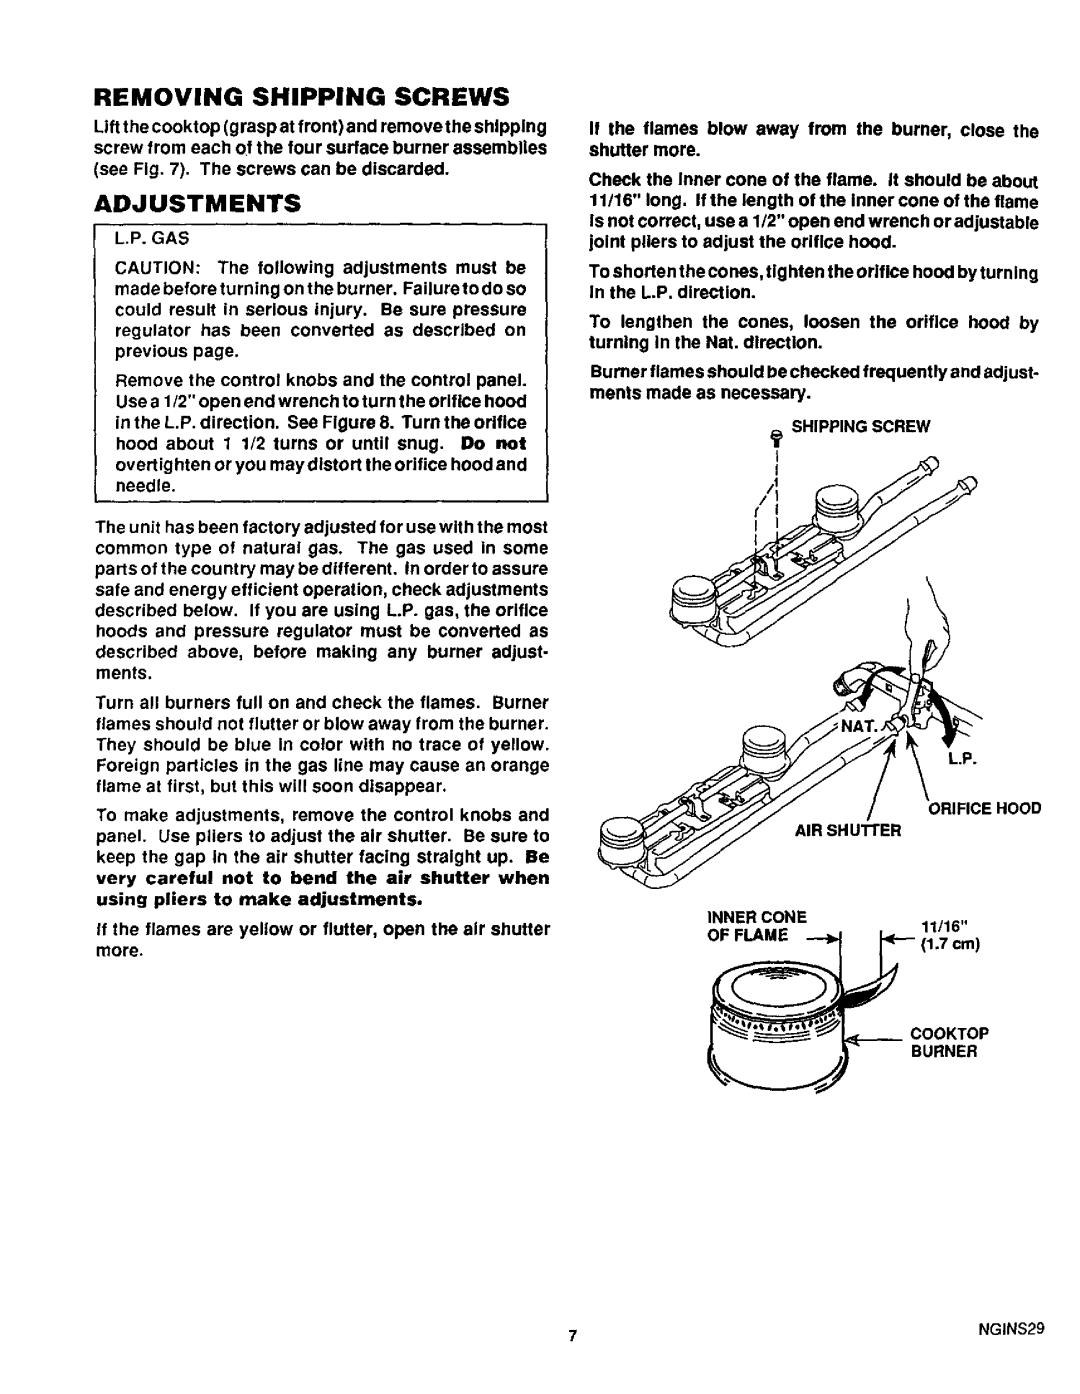
Lift the cooktop (g rasp at front) and remove the shipping screw from each of the four surface burner assemblies (see Fig. 7). The screws can be discarded.
ADJUSTMENTS
L.P. GAS
CAUTION: The following adjustments must be made before turning on the burner. Failure to do so could result in serious injury. Be sure pressure regulator has been converted as described on previous page.
Remove the control knobs and the control panel. Use a 1/2" open end wrench to turn the orifice hood in the L.P. direction. See Figure 8. Turn the orifice hood about 1 1/2 turns or until snug. Do not overtig hten or you may distort the orifice hood and needle.
The unit has been factory adjusted for use with the most common type of natural gas. The gas used in some parts of the country may be different. In order to assure safe and energy efficient operation, check adjustments described below. If you are using L.P. gas, the orifice hoods and pressure regulator must be converted as
described above, before making any burner adjust- ments.
Turn all burners full on and check the flames. Burner flames should not flutter or blow away from the burner. They should be blue In color with no trace of yellow. Foreign particles in the gas line may cause an orange flame at first, but this will soon disappear.
To make adjustments, remove the control knobs and panel. Use pliers to adjust the air shutter. Be sure to keep the gap In the air shutter facing straight up. Be very careful not to bend the air shutter when using pliers to make adjustments.
If the flames blow away from the burner, close the shutter more.
Check the Inner cone of the flame. It should be about 11/16" long. If the length of the inner cone of the flame Is not correct, use a 1/2" open end wrench or adjustable joint pliers to adjust the orifice hood.
To shorten the cones, fig hten the orifice hood by turning In the L.P. direction.
To lengthen the cones, loosen the orifice hood by turning in the Nat. direction.
Burner flames should be checked frequently and adjust- ments made as necessary.
SHIPPING SCREW
L.P.
ORIFICE HOOD
AIR
INNER CONE
if the flames are yellow or flutter, open the air shutter more.
OF FLAME
11/16"
COOKTOP BURNER
7 | NGINS29 |