: :-ASSEMBLY .....
Place all pa_rtsof the exemise bike in a cleared area and remove th'_'l_.ckingm_t_ials: DSh0t clisp6se_' of the packing materials until assembly is completed.
Read all steps and examine all drawings carefully before beginning.
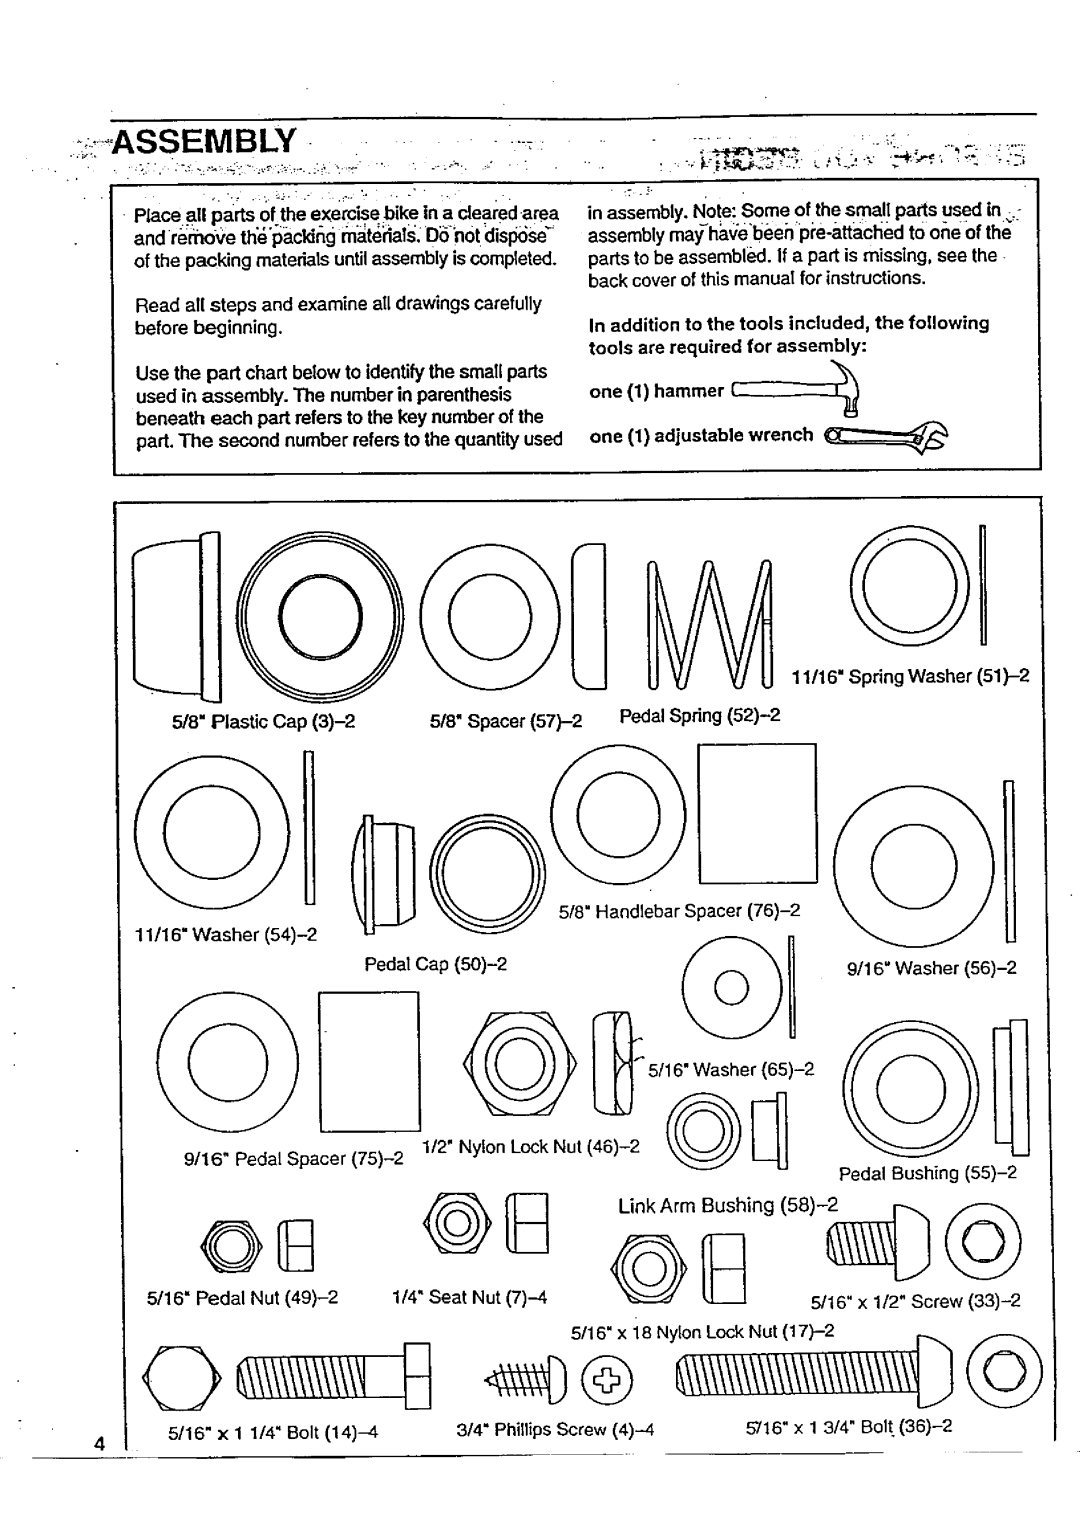
Use the part chart below to identify the small parts used in assembly. The number in parenthesis beneath each part refers to the key number of the part. The second number refers to the quantity used
f
5/8" =lastic Cap | 5/8" Spacer |
in assembly. Note: Some of the small parts used in _.-
assembly may_ha(ielbeeh
In addition to the tools included, the following
tools are required for assembly:
one (1) hammer
one (1) adjustable wrench
11/16" Spring Washer
Pedal Spring (52)-2
5/8" Handlebar Spacer
11/16" Washer
9/16" Washer
|
|
| 5/ | |
9/16" Pedal Spacer | 1/2" Nylon Lock Nut ( |
| Pedal Bushing | |
|
|
|
| |
|
| Link Arm Bushing | ||
5/16" Pedal Nut |
| G | _ | 5/16" x 1/2" Screw |
1/4" Seat Nut |
|
| ||
4 | 5/16" x 1 1/4" Bolt | 3/4" Phillips Screw | 5716" x 1 3/4" Bolt |
|
|
|