Sears 917.370721 Before Starting Engine, To Stop Engine, To Start Engine, Model Number, Add Oil

Models: 917.370721

1 24
Download 24 pages 17.48 Kb
Page 10
Image 10
BEFORE STARTING ENGINE

BEFORE STARTING ENGINE

ADD OIL

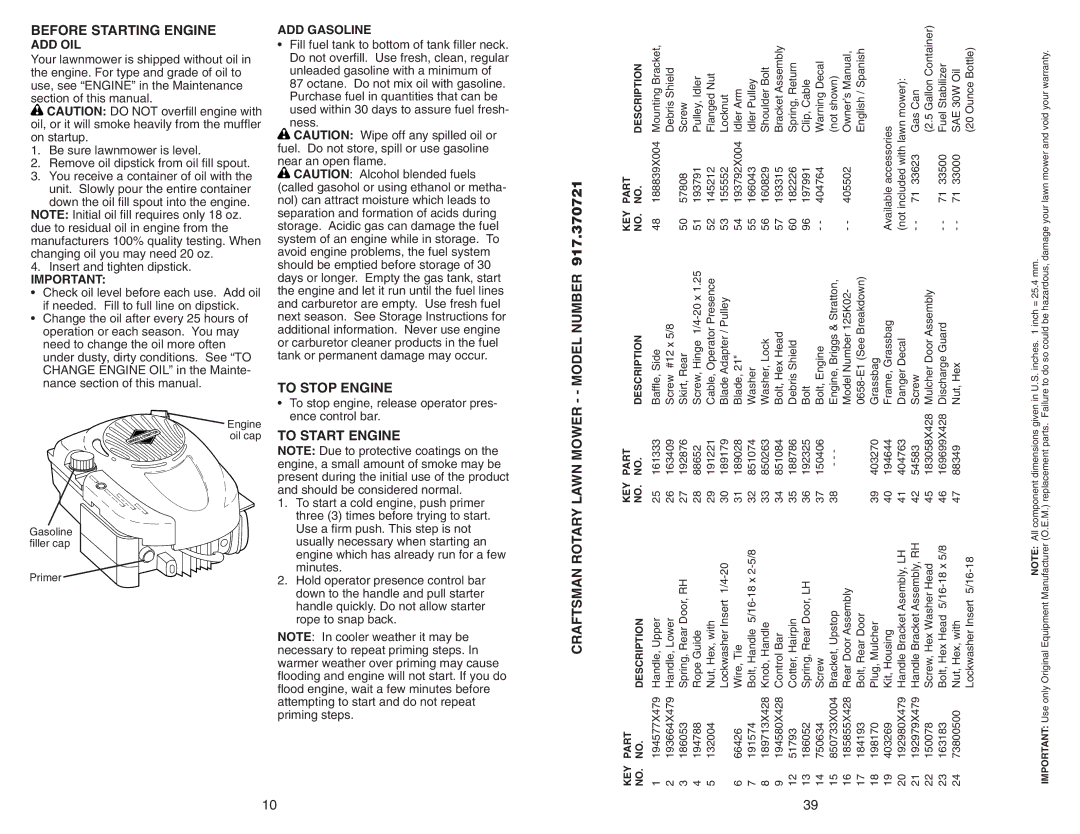
Your lawnmower is shipped without oil in the engine. For type and grade of oil to use, see “ENGINE” in the Maintenance section of this manual.

ADD OIL CAUTION: DO NOT overfill engine with oil, or it will smoke heavily from the muffler on startup.

1.Be sure lawnmower is level.

2.Remove oil dipstick from oil fill spout.

3.You receive a container of oil with the unit. Slowly pour the entire container down the oil fill spout into the engine.

NOTE: Initial oil fill requires only 18 oz. due to residual oil in engine from the manufacturers 100% quality testing. When changing oil you may need 20 oz.

4.Insert and tighten dipstick.

IMPORTANT:

• Check oil level before each use. Add oil if needed. Fill to full line on dipstick.

• Change the oil after every 25 hours of operation or each season. You may need to change the oil more often under dusty, dirty conditions. See “TO CHANGE ENGINE OIL” in the Mainte- nance section of this manual.

Engine oil cap

Gasoline filler cap

Primer ADD GASOLINE

ADD GASOLINE

Fill fuel tank to bottom of tank filler neck. Do not overfill. Use fresh, clean, regular unleaded gasoline with a minimum of

87 octane. Do not mix oil with gasoline. Purchase fuel in quantities that can be used within 30 days to assure fuel fresh-

ness.

TO STOP ENGINE CAUTION: Wipe off any spilled oil or fuel. Do not store, spill or use gasoline near an open flame.

TO START ENGINE CAUTION: Alcohol blended fuels (called gasohol or using ethanol or metha- nol) can attract moisture which leads to separation and formation of acids during storage. Acidic gas can damage the fuel system of an engine while in storage. To avoid engine problems, the fuel system should be emptied before storage of 30 days or longer. Empty the gas tank, start the engine and let it run until the fuel lines and carburetor are empty. Use fresh fuel next season. See Storage Instructions for additional information. Never use engine or carburetor cleaner products in the fuel tank or permanent damage may occur.

TO STOP ENGINE

To stop engine, release operator pres- ence control bar.

TO START ENGINE

NOTE: Due to protective coatings on the engine, a small amount of smoke may be present during the initial use of the product and should be considered normal.

1.To start a cold engine, push primer three (3) times before trying to start. Use a firm push. This step is not usually necessary when starting an engine which has already run for a few minutes.

2.Hold operator presence control bar down to the handle and pull starter handle quickly. Do not allow starter rope to snap back.

NOTE: In cooler weather it may be necessary to repeat priming steps. In warmer weather over priming may cause flooding and engine will not start. If you do flood engine, wait a few minutes before attempting to start and do not repeat priming steps.

917.370721

KEY PART

NO. NO. DESCRIPTION

48 188839X004 Mounting Bracket,

Debris Shield

50 57808 Screw

51 193791 Pulley, Idler

52 145212 Flanged Nut

53 155552 Locknut

54 193792X004 Idler Arm

55 166043 Idler Pulley

56 160829 Shoulder Bolt

57 193315 Bracket Assembly

60 182226 Spring, Return

96 197991 Clip, Cable

- - 404764 Warning Decal

(not shown)

- - 405502 Owner’s Manual,

English / Spanish


Available accessories

(not included with lawn mower):

- - 71 33623 Gas Can

(2.5 Gallon Container)

- - 71 33500 Fuel Stabilizer

- - 71 33000 SAE 30W Oil

(20 Ounce Bottle)

- - MODEL NUMBER


DESCRIPTION

Baffle, Side

Screw #12 x 5/8

Skirt, Rear

Screw, Hinge 1/4-20 x 1.25

Cable, Operator Presence

Blade Adapter / Pulley

Blade, 21"

Washer

Washer, Lock

Bolt, Hex Head

Debris Shield

Bolt

Bolt, Engine

Engine, Briggs & Stratton,

Model Number 125K02-

0658-E1 (See Breakdown)

Grassbag

Frame, Grassbag

Danger Decal

Screw

Mulcher Door Assembly

Discharge Guard

Nut, Hex


LAWN MOWER

KEY PART

NO. NO.

25 161333

26 163409

27 192876

28 88652

29 191221

30 189179

31 189028

32 851074

33 850263

34 851084

35 188786

36 192325

37 150406

38 - - -


39 403270

40 194644

41 404763

42 54583

45 183058X428

46 169699X428

47 88349


CRAFTSMAN ROTARY


DESCRIPTION

Handle, Upper

Handle, Lower

Spring, Rear Door, RH

Rope Guide

Nut, Hex, with

Lockwasher Insert 1/4-20

Wire, Tie

Bolt, Handle 5/16-18 x 2-5/8

Knob, Handle

Control Bar

Cotter, Hairpin

Spring, Rear Door, LH

Screw

Bracket, Upstop

Rear Door Assembly

Bolt, Rear Door

Plug, Mulcher

Kit, Housing

Handle Bracket Asembly, LH

Handle Bracket Assembly, RH

Screw, Hex Washer Head

Bolt, Hex Head 5/16-18 x 5/8

Nut, Hex, with

Lockwasher Insert 5/16-18


PART

NO.

194577X479

193664X479

186053

194788

132004


66426

191574

189713X428

194580X428

51793

186052

750634

850733X004

185855X428

184193

198170

403269

192980X479

192979X479

150078

163183

73800500


KEY

NO.

1 2 3 4

5


6

7

8

9

12

13

14

15

16

17

18

19

20

21

22

23

24


All component dimensions given in U.S. inches. 1 inch = 25.4 mm.

(O.E.M.) replacement parts. Failure to do so could be hazardous, damage your lawn mower and void your warranty.

NOTE:

Manufacturer


IMPORTANT: Use only Original Equipment

10

39

Page 10
Image 10
Sears 917.370721 Before Starting Engine, To Stop Engine, To Start Engine, Model Number, Lawn Mower, Craftsman Rotary