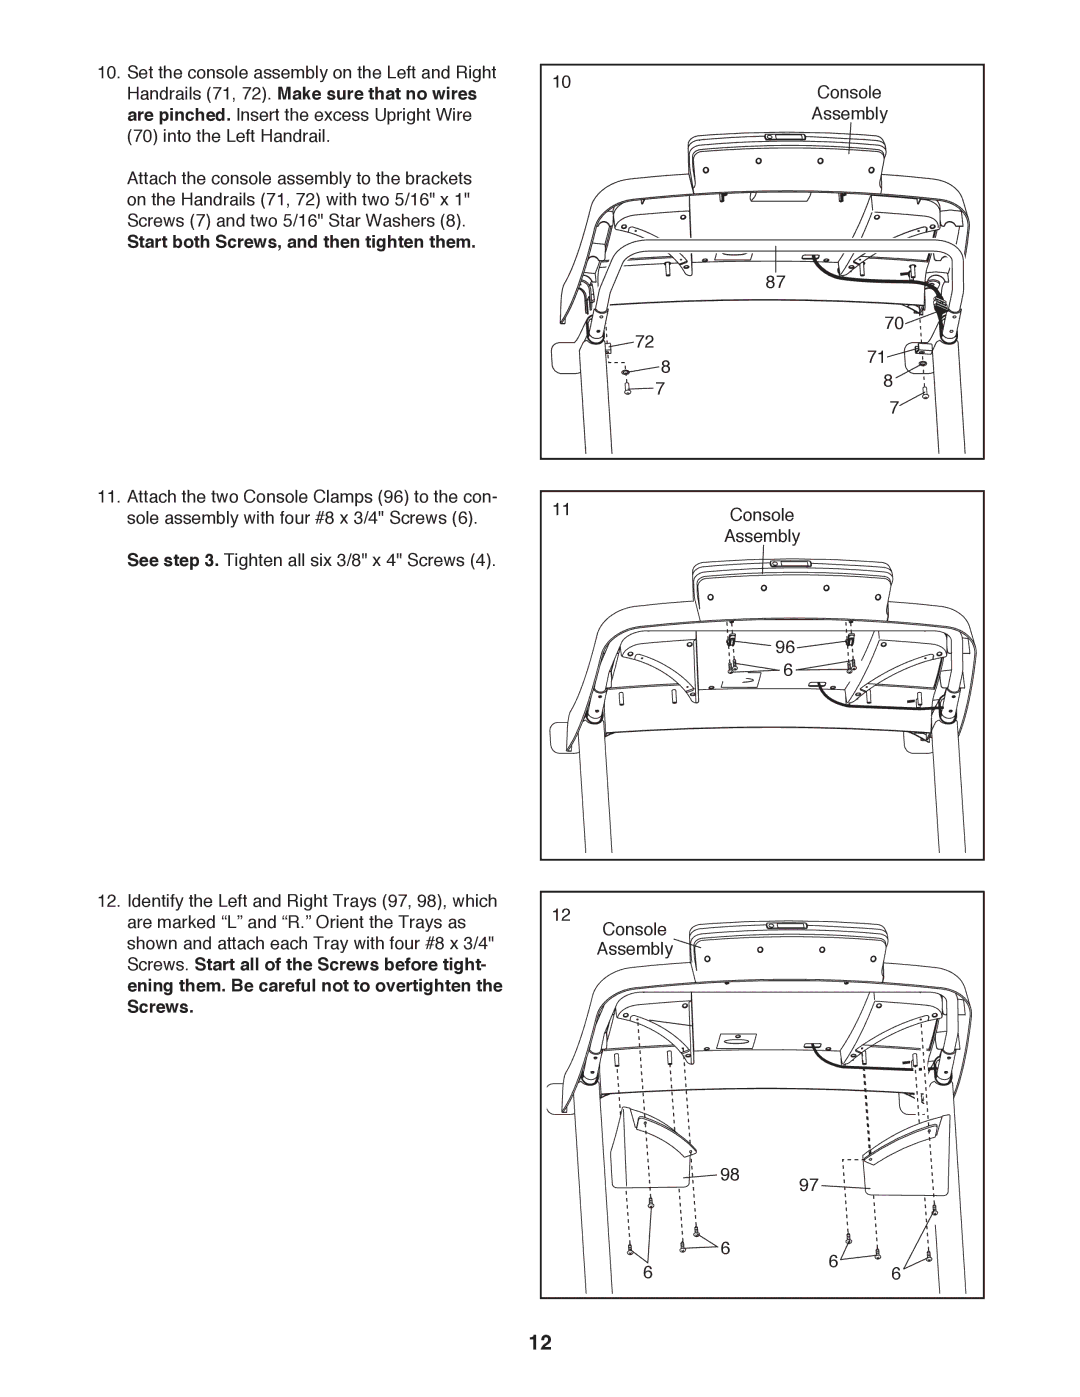
10. Set the console assembly on the Left and Right | 10 |
|
| Console | |
Handrails (71, 72). Make sure that no wires |
|
| |||
|
|
| |||
are pinched. Insert the excess Upright Wire |
|
|
| Assembly | |
(70) into the Left Handrail. |
|
|
|
|
|
Attach the console assembly to the brackets |
|
|
|
|
|
on the Handrails (71, 72) with two 5/16" x 1" |
|
|
|
|
|
Screws (7) and two 5/16" Star Washers (8). |
|
|
|
|
|
Start both Screws, and then tighten them. |
|
|
|
|
|
|
|
| 87 |
|
|
|
| 72 |
|
| 70 |
|
|
|
| 71 | |
|
| 8 |
|
| |
|
|
|
| 8 | |
|
| 7 |
|
| |
|
|
|
| 7 | |
|
|
|
|
| |
11. Attach the two Console Clamps (96) to the con- | 11 |
| Console |
|
|
sole assembly with four #8 x 3/4" Screws (6). |
|
|
| ||
See step 3. Tighten all six 3/8" x 4" Screws (4). |
|
| Assembly |
| |
|
|
|
|
| |
|
|
| 96 |
|
|
|
|
| 6 |
|
|
12. Identify the Left and Right Trays (97, 98), which | 12 |
|
|
|
|
are marked “L” and “R.” Orient the Trays as | Console |
|
|
| |
shown and attach each Tray with four #8 x 3/4" |
|
|
|
| |
| Assembly |
|
|
| |
Screws. Start all of the Screws before tight- |
|
|
|
|
|
ening them. Be careful not to overtighten the |
|
|
|
|
|
Screws. |
|
|
|
|
|
|
|
| 98 | 97 |
|
|
|
|
|
| |
|
| 6 | 6 | 6 | 6 |
|
|
| |||
|
|
|
| ||
| 12 |
|
|
|
|