ENFORCER Covert PIR Camera
Overview:
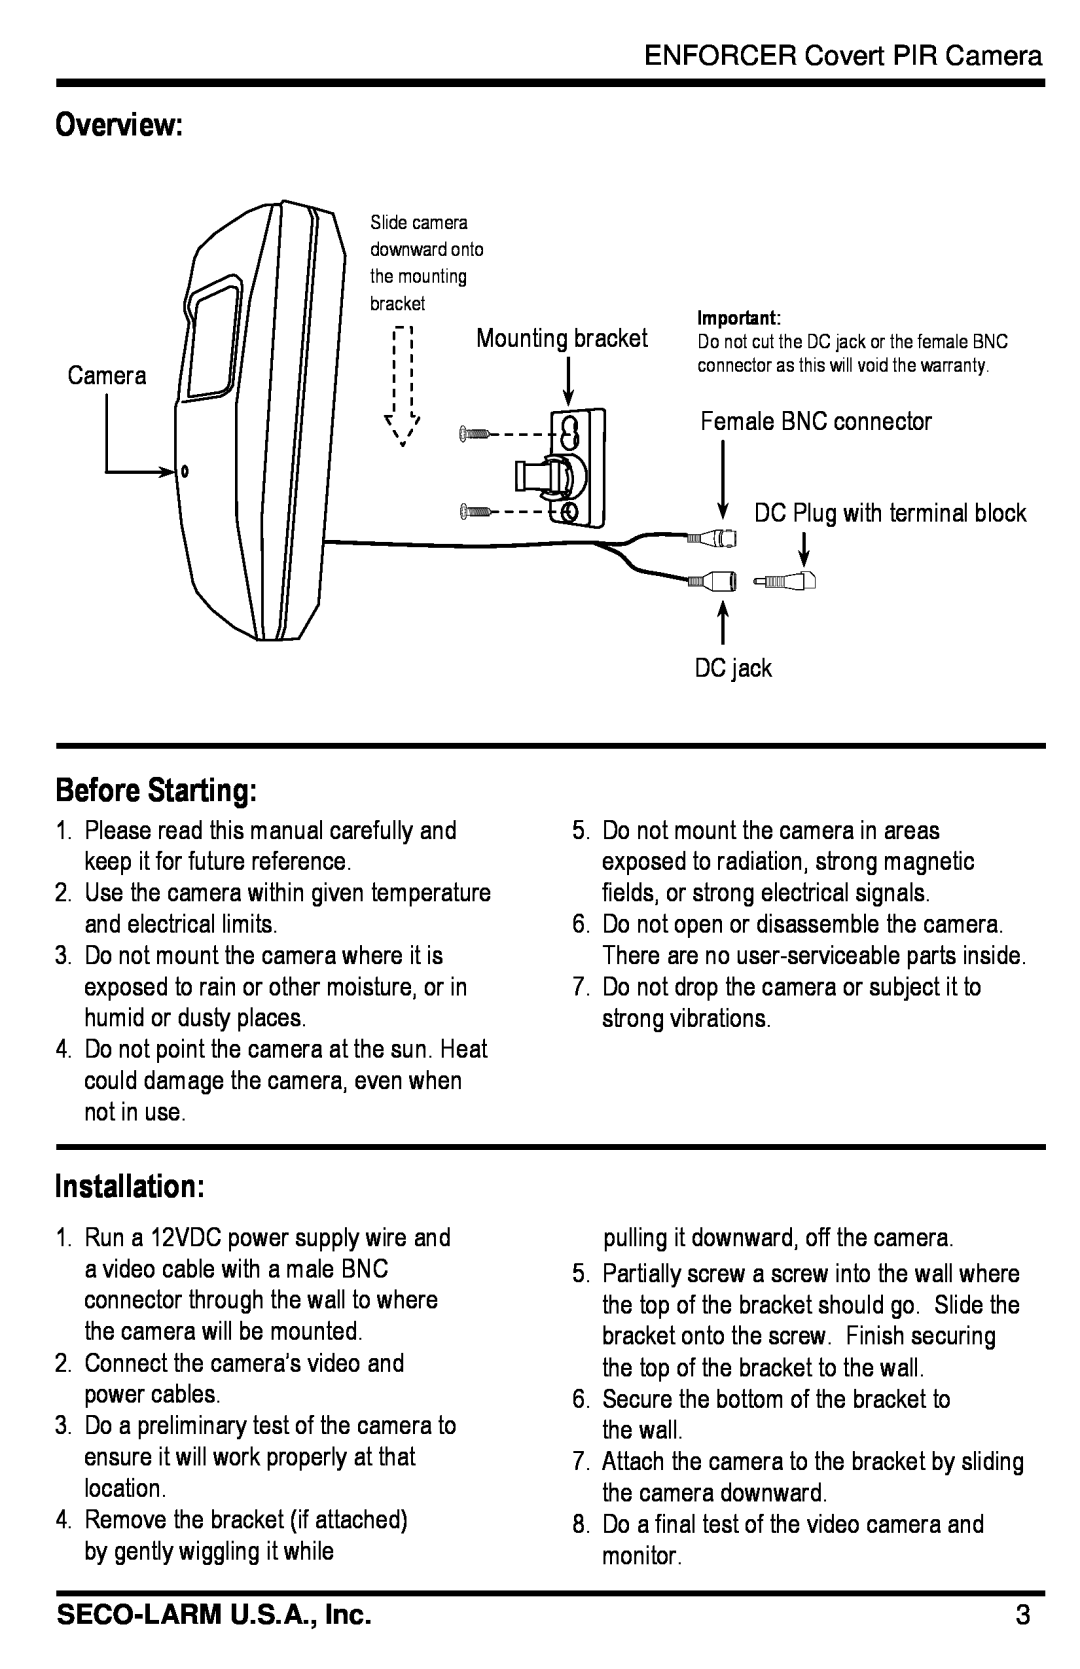
Slide camera downward onto the mounting bracket
Mounting bracket
Camera
Important:
Do not cut the DC jack or the female BNC connector as this will void the warranty.
Female BNC connector
DC Plug with terminal block
DC jack
Before Starting:
1.Please read this manual carefully and keep it for future reference.
2.Use the camera within given temperature and electrical limits.
3.Do not mount the camera where it is exposed to rain or other moisture, or in humid or dusty places.
4.Do not point the camera at the sun. Heat could damage the camera, even when not in use.
5.Do not mount the camera in areas exposed to radiation, strong magnetic fields, or strong electrical signals.
6.Do not open or disassemble the camera. There are no
7.Do not drop the camera or subject it to strong vibrations.
Installation:
1. | Run a 12VDC power supply wire and |
| pulling it downward, off the camera. |
| a video cable with a male BNC | 5. | Partially screw a screw into the wall where |
| connector through the wall to where |
| the top of the bracket should go. Slide the |
| the camera will be mounted. |
| bracket onto the screw. Finish securing |
2. | Connect the camera’s video and |
| the top of the bracket to the wall. |
| power cables. | 6. | Secure the bottom of the bracket to |
3. | Do a preliminary test of the camera to |
| the wall. |
| ensure it will work properly at that | 7. | Attach the camera to the bracket by sliding |
| location. |
| the camera downward. |
4. | Remove the bracket (if attached) | 8. | Do a final test of the video camera and |
| by gently wiggling it while |
| monitor. |
|
|
| |
| 3 | ||