EnglishEspanolFrancais
Figure 3 | Figura 3 | Schéma 3 |
|
|
|
OPERATION
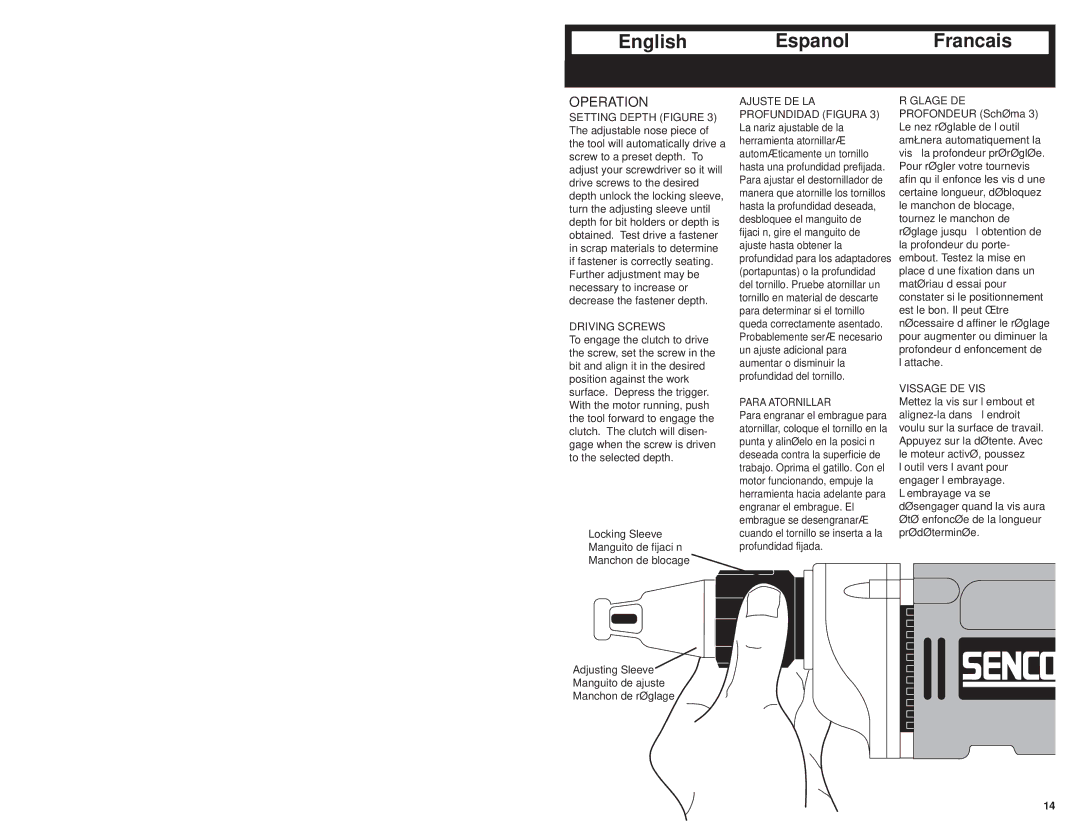
SETTING DEPTH (FIGURE 3) The adjustable nose piece of the tool will automatically drive a screw to a preset depth. To adjust your screwdriver so it will drive screws to the desired depth unlock the locking sleeve, turn the adjusting sleeve until depth for bit holders or depth is obtained. Test drive a fastener in scrap materials to determine if fastener is correctly seating. Further adjustment may be necessary to increase or decrease the fastener depth.
DRIVING SCREWS
To engage the clutch to drive the screw, set the screw in the bit and align it in the desired position against the work surface. Depress the trigger. With the motor running, push the tool forward to engage the clutch. The clutch will disen- gage when the screw is driven to the selected depth.
Locking Sleeve
Manguito de fijación
Manchon de blocage
Adjusting Sleeve
Manguito de ajuste
Manchon de réglage
AJUSTE DE LA PROFUNDIDAD (FIGURA 3) La nariz ajustable de la herramienta atornillará automáticamente un tornillo hasta una profundidad prefijada. Para ajustar el destornillador de manera que atornille los tornillos hasta la profundidad deseada, desbloquee el manguito de fijación, gire el manguito de ajuste hasta obtener la profundidad para los adaptadores (portapuntas) o la profundidad del tornillo. Pruebe atornillar un tornillo en material de descarte para determinar si el tornillo queda correctamente asentado. Probablemente será necesario un ajuste adicional para aumentar o disminuir la profundidad del tornillo.
PARA ATORNILLAR
Para engranar el embrague para atornillar, coloque el tornillo en la punta y alinéelo en la posición deseada contra la superficie de trabajo. Oprima el gatillo. Con el motor funcionando, empuje la herramienta hacia adelante para engranar el embrague. El embrague se desengranará cuando el tornillo se inserta a la profundidad fijada.
RÉGLAGE DE PROFONDEUR (Schéma 3) Le nez réglable de l’outil amènera automatiquement la vis à la profondeur préréglée. Pour régler votre tournevis afin qu’il enfonce les vis d’une certaine longueur, débloquez le manchon de blocage, tournez le manchon de réglage jusqu’à l’obtention de la profondeur du porte- embout. Testez la mise en place d’une fixation dans un matériau d’essai pour constater si le positionnement est le bon. Il peut être nécessaire d’affiner le réglage pour augmenter ou diminuer la profondeur d’enfoncement de l’attache.
VISSAGE DE VIS
Mettez la vis sur l’embout et
14