Before setting the timer, make sure the clock is properly set with the current time.
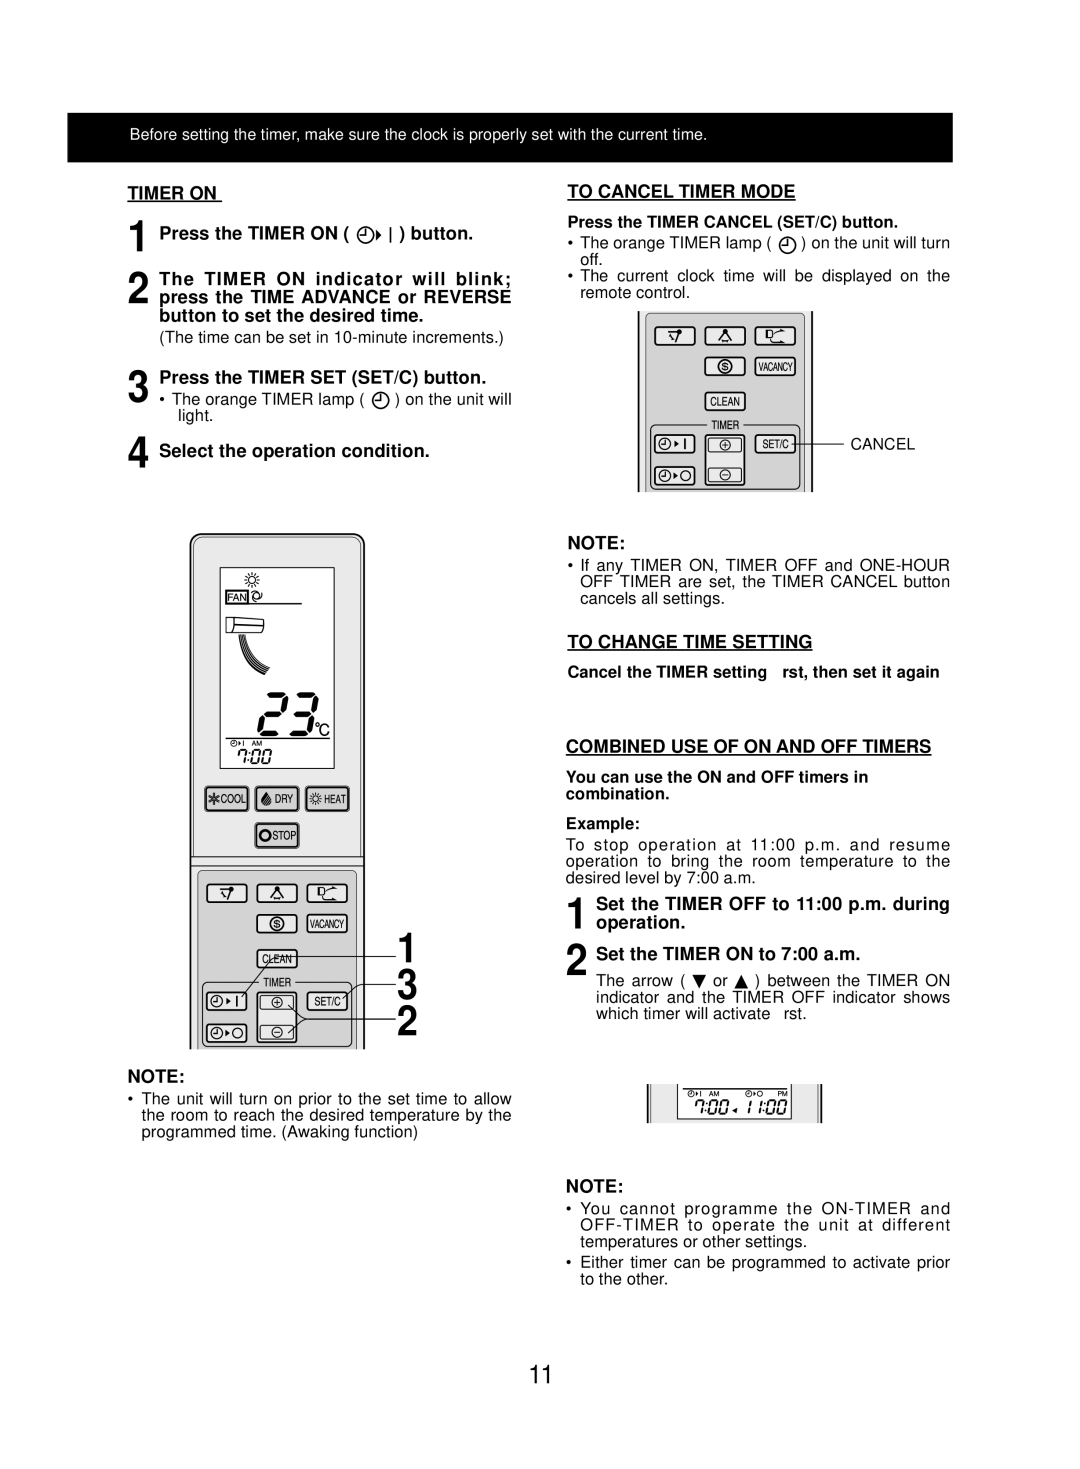
TIMER ON |
|
1 Press the TIMER ON ( | ) button. |
2 The TIMER ON indicator will blink; press the TIME ADVANCE or REVERSE button to set the desired time.
(The time can be set in
3 Press the TIMER SET (SET/C) button.
•The orange TIMER lamp ( ![]() ) on the unit will light.
) on the unit will light.
4 Select the operation condition.
1
3
2
NOTE:
•The unit will turn on prior to the set time to allow the room to reach the desired temperature by the programmed time. (Awaking function)
TO CANCEL TIMER MODE
Press the TIMER CANCEL (SET/C) button.
•The orange TIMER lamp ( ![]() ) on the unit will turn off.
) on the unit will turn off.
•The current clock time will be displayed on the remote control.
![]() CANCEL
CANCEL
NOTE:
•If any TIMER ON, TIMER OFF and
TO CHANGE TIME SETTING
Cancel the TIMER setting first, then set it again
COMBINED USE OF ON AND OFF TIMERS
You can use the ON and OFF timers in combination.
Example:
To stop operation at 11:00 p.m. and resume operation to bring the room temperature to the desired level by 7:00 a.m.
1 Set the TIMER OFF to 11:00 p.m. during operation.
2 The arrow ( or ) between the TIMER ON indicator and the TIMER OFF indicator shows which timer will activate first.
NOTE:
•You cannot programme the
•Either timer can be programmed to activate prior to the other.
11