
CD-BA2100 specifications
The Sharp CD-BA2100 is a compact audio system designed to deliver high-quality sound and a multitude of features for music lovers. This system, with its sleek and stylish design, combines functionality with aesthetics, making it a suitable addition to any room, whether it be a living space, bedroom, or office.One of the main features of the Sharp CD-BA2100 is its impressive stereo sound output, which is made possible through its dual speaker configuration. The system is equipped with a power output of 210 watts, ensuring that the audio produced is both clear and powerful, perfect for enjoying music at various volumes. The bass enhancement technology integrates well with the overall sound, delivering a well-balanced audio experience.
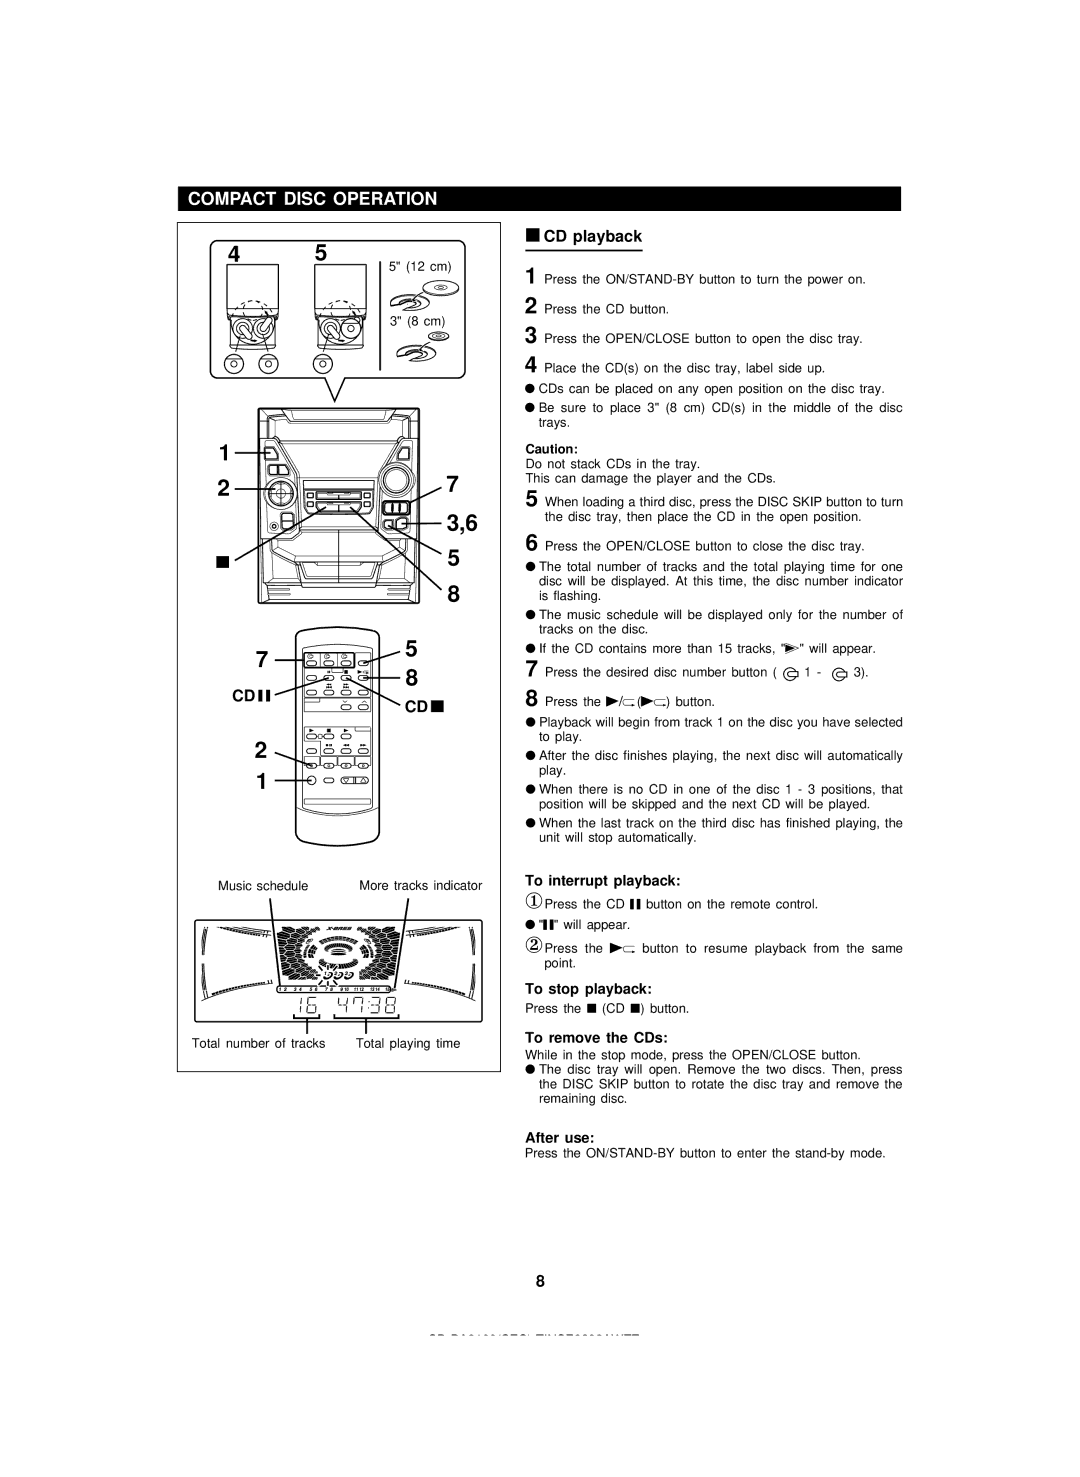
The CD player integrated into the Sharp CD-BA2100 is versatile, capable of playing a wide range of formats including standard CDs, CD-R, and CD-RW. This flexibility allows users to enjoy their entire music collection without the need for additional players. Additionally, the system offers a built-in FM tuner, allowing users to access their favorite radio stations with ease.
Connectivity is another highlight of the Sharp CD-BA2100. The system features USB connectivity that enables the playback of digital music files directly from a flash drive. This convenience is complemented by Bluetooth connectivity, which allows users to wirelessly stream music from smartphones, tablets, or laptops. This feature ensures that users can easily enjoy their favorite playlists and streaming services without the need for physical connections.
The control interface of the Sharp CD-BA2100 is user-friendly, featuring a straightforward remote control that makes navigating through settings and playback options simple. The bright display provides clear visibility, making it easy to track current functions and settings even in low-light conditions.
In terms of additional features, the system often includes various sound modes, allowing users to customize their listening experience according to their preferences. Whether users desire enhanced bass, treble adjustments, or a vocal boost for clearer dialogue in movies or other multimedia formats, the settings are readily accessible.
Overall, the Sharp CD-BA2100 stand out as an exceptional audio system that combines modern technology with user-friendly design. Its array of features, impressive sound quality, and aesthetic appeal make it a worthy choice for anyone looking to enhance their audio experience at home. The reliability and performance consistency ensure that users can enjoy their music, news, and entertainment seamlessly.