R - 5 3 0 E K

R - 530EW

COOLING FAN MOTOR REMOVAL

REMOVAL

1.Disconnect the power supply cord and then remove outer case.

2.Open the door and block it open.

3.Discharge high voltage capacitor.

4.Disconnect the wire leads from the fan motor.

5.Remove the two (2) screws holding the fan motor to the oven cavity back plate.

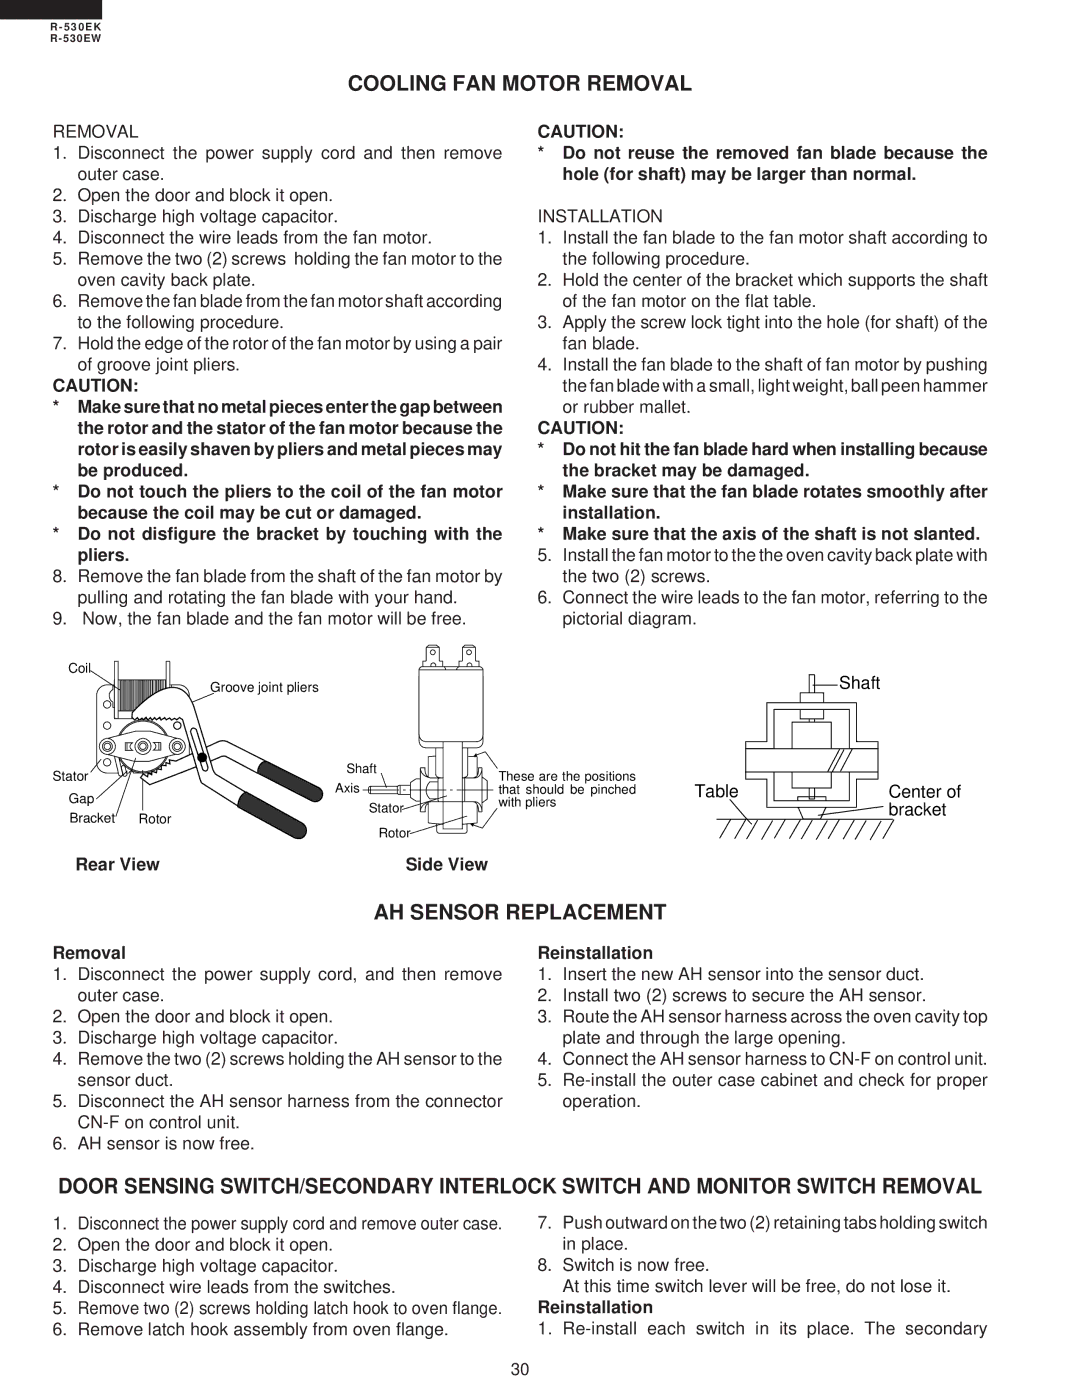
6.Remove the fan blade from the fan motor shaft according to the following procedure.

7.Hold the edge of the rotor of the fan motor by using a pair of groove joint pliers.

CAUTION:

*Make sure that no metal pieces enter the gap between the rotor and the stator of the fan motor because the rotor is easily shaven by pliers and metal pieces may be produced.

*Do not touch the pliers to the coil of the fan motor because the coil may be cut or damaged.

*Do not disfigure the bracket by touching with the pliers.

8.Remove the fan blade from the shaft of the fan motor by pulling and rotating the fan blade with your hand.

9.Now, the fan blade and the fan motor will be free.

CAUTION:

*Do not reuse the removed fan blade because the hole (for shaft) may be larger than normal.

INSTALLATION

1.Install the fan blade to the fan motor shaft according to the following procedure.

2.Hold the center of the bracket which supports the shaft of the fan motor on the flat table.

3.Apply the screw lock tight into the hole (for shaft) of the fan blade.

4.Install the fan blade to the shaft of fan motor by pushing the fan blade with a small, light weight, ball peen hammer or rubber mallet.

CAUTION:

*Do not hit the fan blade hard when installing because the bracket may be damaged.

*Make sure that the fan blade rotates smoothly after installation.

*Make sure that the axis of the shaft is not slanted.

5. Install the fan motor to the the oven cavity back plate with the two (2) screws.

6. Connect the wire leads to the fan motor, referring to the pictorial diagram.

Coil

Groove joint pliers

Stator

Shaft

Axis

Gap

Stator

Bracket

Rotor


Rotor

These are the positions

that should be pinched Table with pliers

Shaft

Center of bracket

Rear View

Side View

AH SENSOR REPLACEMENT

Removal

1.Disconnect the power supply cord, and then remove outer case.

2.Open the door and block it open.

3.Discharge high voltage capacitor.

4.Remove the two (2) screws holding the AH sensor to the sensor duct.

5.Disconnect the AH sensor harness from the connector CN-F on control unit.

6.AH sensor is now free.

Reinstallation

1.Insert the new AH sensor into the sensor duct.

2.Install two (2) screws to secure the AH sensor.

3.Route the AH sensor harness across the oven cavity top plate and through the large opening.

4.Connect the AH sensor harness to CN-F on control unit.

5.Re-install the outer case cabinet and check for proper operation.

DOOR SENSING SWITCH/SECONDARY INTERLOCK SWITCH AND MONITOR SWITCH REMOVAL

1.Disconnect the power supply cord and remove outer case.

2.Open the door and block it open.

3.Discharge high voltage capacitor.

4.Disconnect wire leads from the switches.

5.Remove two (2) screws holding latch hook to oven flange.

6.Remove latch hook assembly from oven flange.

7.Push outward on the two (2) retaining tabs holding switch in place.

8.Switch is now free.

At this time switch lever will be free, do not lose it.

Reinstallation

1. Re-install each switch in its place. The secondary

30

Page 32
Image 32
Sharp R-530EK service manual Cooling FAN Motor Removal, AH Sensor Replacement, Installation, Rear View

R-530EK specifications

The Sharp R-530EK is a notable microwave oven that combines functionality with innovation to enhance cooking convenience. With a sleek design and user-friendly interface, this model has earned a place in many kitchens around the globe.

One of the primary features of the Sharp R-530EK is its powerful microwave output. The oven boasts a maximum power of 900 watts, ensuring that food can be heated quickly and evenly. This power level allows users to prepare a variety of meals, from reheating leftovers to cooking dishes from scratch, in significantly less time than traditional cooking methods.

The R-530EK is equipped with a spacious interior, offering 25 liters of capacity. This ample space allows for cooking larger dishes or multiple servings at once. The turntable design ensures even cooking by rotating food during the heating process, further enhancing the microwave's efficiency.

Another standout feature of the Sharp R-530EK is its array of pre-programmed auto-cook menus. These presets simplify cooking by providing specific times and power levels for various types of food, including popcorn, pizzas, and oatmeal. Users can simply select the appropriate setting, and the microwave takes care of the rest, making it ideal for those who may not have extensive cooking experience.

The microwave utilizes advanced inverter technology, a feature that sets it apart from many conventional microwave ovens. Inverter technology allows for continuous and consistent power output, providing more precise temperature control. This means that delicate foods such as seafood or chocolate can be heated without the risk of overcooking or burning, resulting in better texture and flavor.

Additionally, the R-530EK is designed with multiple cooking functions that enhance its versatility. These include defrosting capabilities, grilling options, and even signals indicating the completion of cooking cycles. The easy-to-read digital display and intuitively designed buttons contribute to the overall user experience, making it accessible for individuals of all ages.

Moreover, this microwave oven ensures safety with features such as a child lock, which prevents accidental operation by little hands. The Sharp R-530EK is both an efficient and reliable addition to any kitchen, embodying the perfect blend of cutting-edge technology and practical design to meet the demands of modern cooking. With its impressive range of features and performance capabilities, it stands as a valuable tool for aspiring chefs and busy families alike.