Installing the paper roll
Caution: The paper cutter is mounted on the cover. Be careful not to cut yourself.
1. Turn the mode switch to the REG position with the AC cord connected.
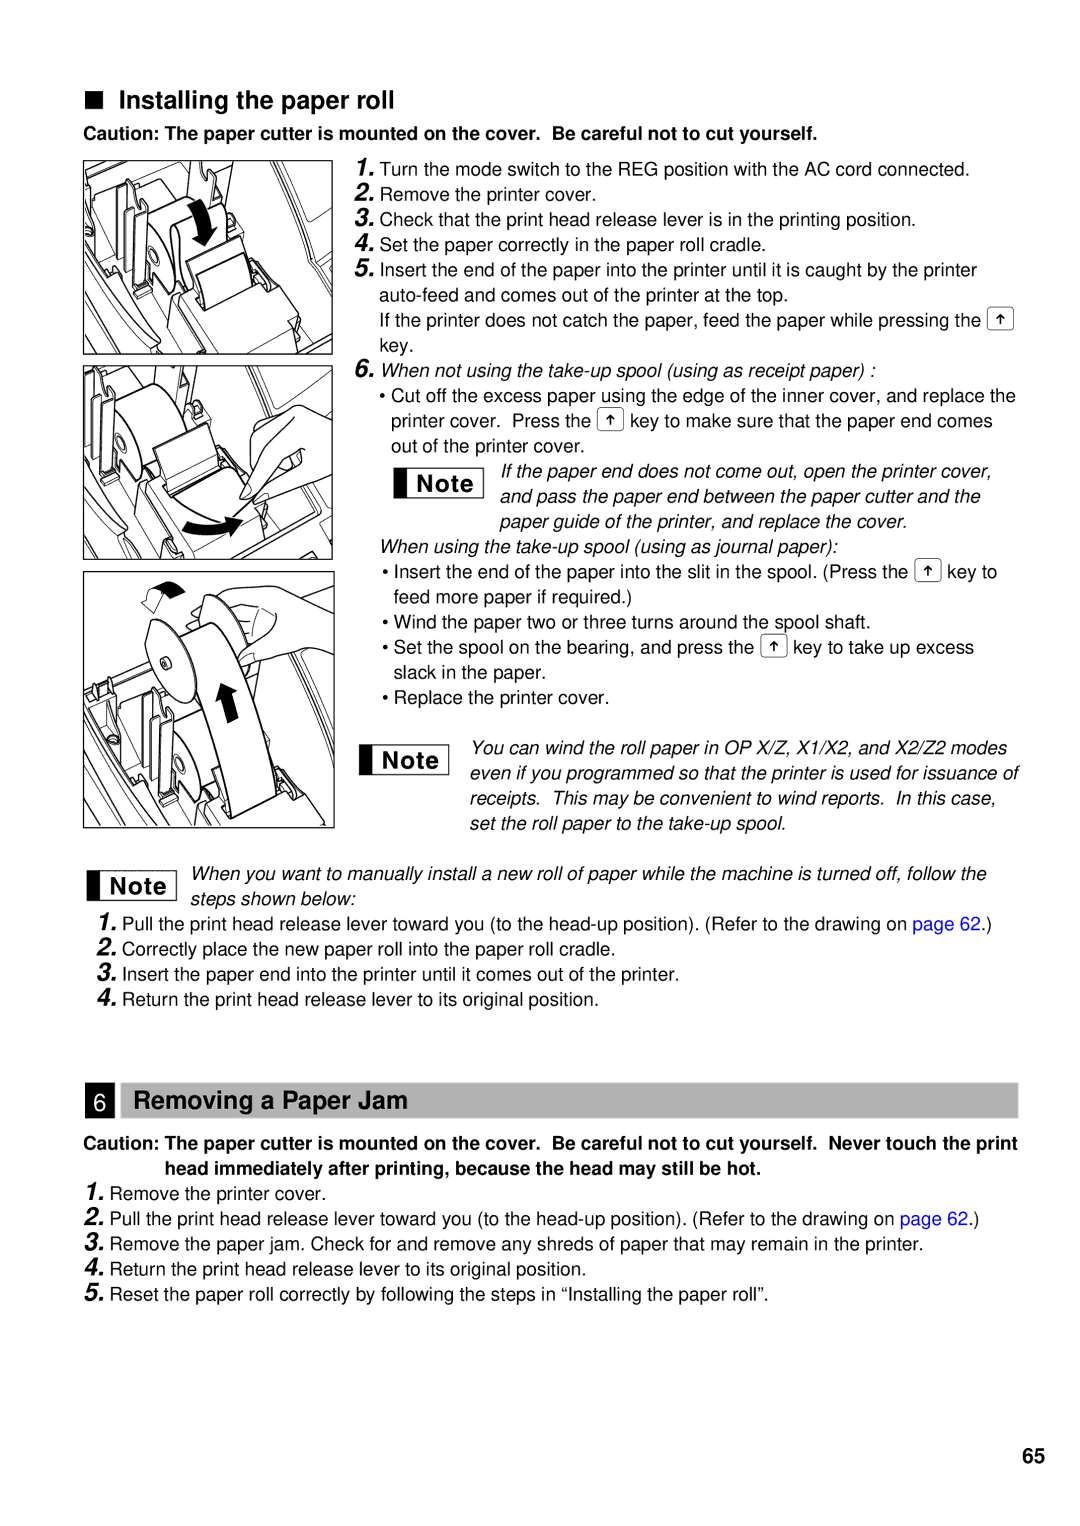
2. Remove the printer cover.
3. Check that the print head release lever is in the printing position.
4. Set the paper correctly in the paper roll cradle.
5. Insert the end of the paper into the printer until it is caught by the printer
If the printer does not catch the paper, feed the paper while pressing the F key.
6. When not using the take-up spool (using as receipt paper) :
• Cut off the excess paper using the edge of the inner cover, and replace the printer cover. Press the Fkey to make sure that the paper end comes out of the printer cover.
If the paper end does not come out, open the printer cover, and pass the paper end between the paper cutter and the paper guide of the printer, and replace the cover.
When using the
• Insert the end of the paper into the slit in the spool. (Press the Fkey to feed more paper if required.)
• Wind the paper two or three turns around the spool shaft.
• Set the spool on the bearing, and press the Fkey to take up excess slack in the paper.
• Replace the printer cover.
You can wind the roll paper in OP X/Z, X1/X2, and X2/Z2 modes even if you programmed so that the printer is used for issuance of receipts. This may be convenient to wind reports. In this case, set the roll paper to the
When you want to manually install a new roll of paper while the machine is turned off, follow the steps shown below:
1.Pull the print head release lever toward you (to the
2.Correctly place the new paper roll into the paper roll cradle.
3.Insert the paper end into the printer until it comes out of the printer.
4.Return the print head release lever to its original position.
6Removing a Paper Jam
Caution: The paper cutter is mounted on the cover. Be careful not to cut yourself. Never touch the print head immediately after printing, because the head may still be hot.
1.Remove the printer cover.
2.Pull the print head release lever toward you (to the
3.Remove the paper jam. Check for and remove any shreds of paper that may remain in the printer.
4.Return the print head release lever to its original position.
5.Reset the paper roll correctly by following the steps in “Installing the paper roll”.
65