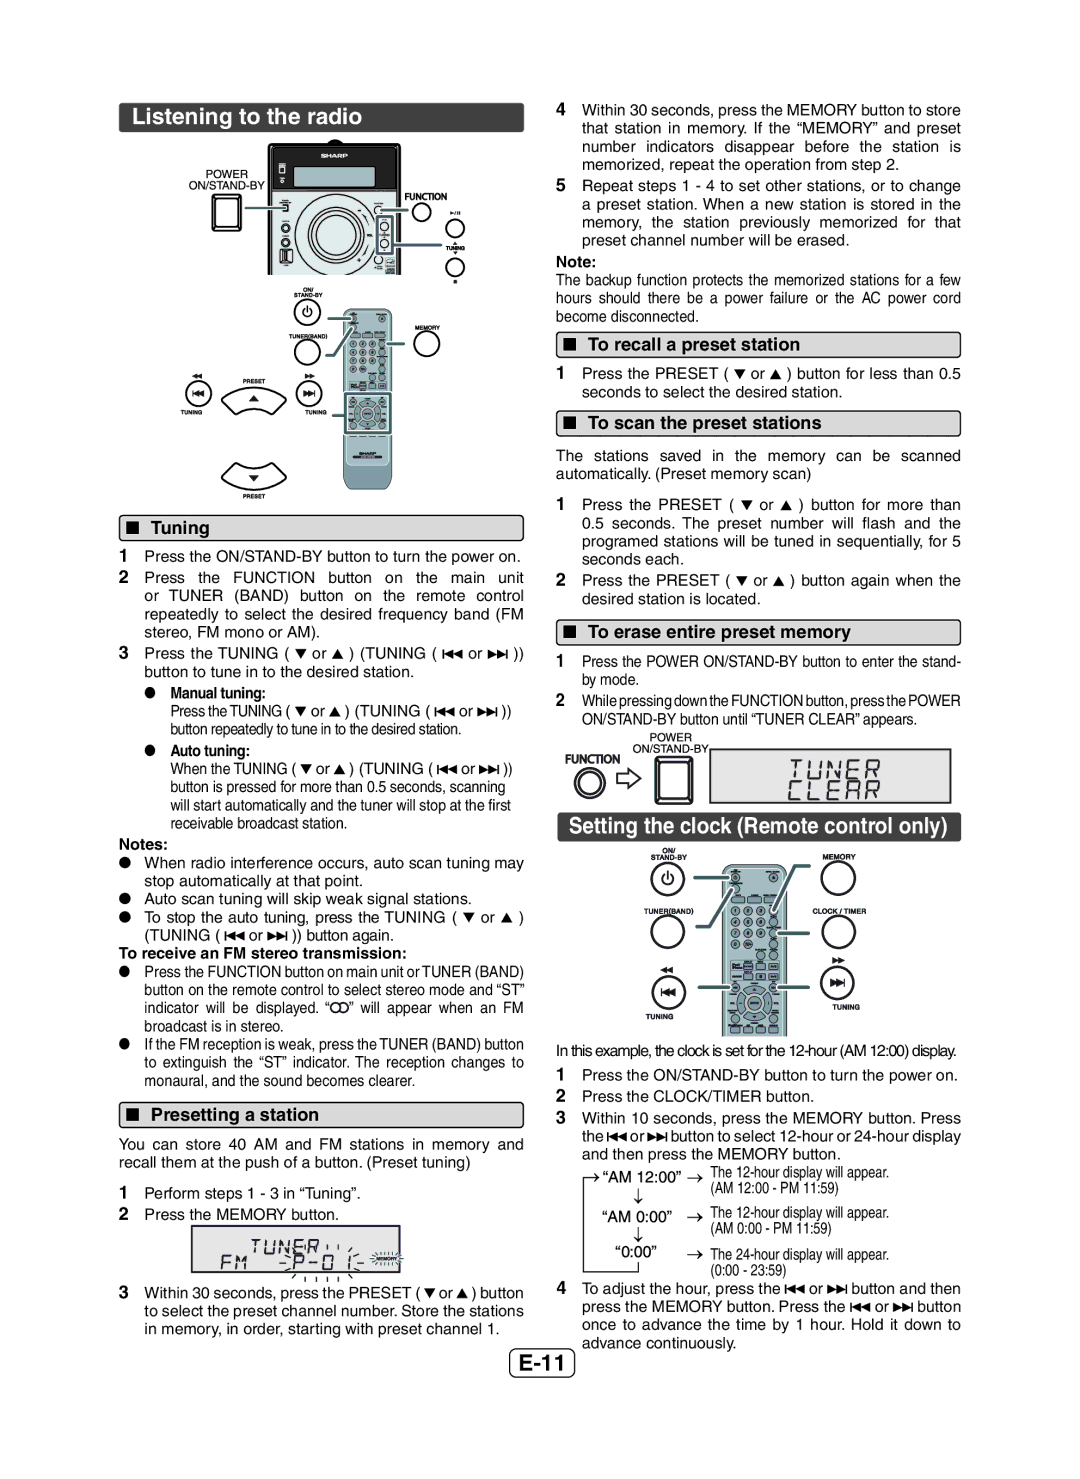
Listening to the radio

QTuning

1Press the ON/STAND-BY button to turn the power on.

2 Press the FUNCTION button on the main unit or TUNER (BAND) button on the remote control repeatedly to select the desired frequency band (FM stereo, FM mono or AM).

3Press the TUNING ( or ) (TUNING ( or )) button to tune in to the desired station.

O Manual tuning:

Press the TUNING ( or ) (TUNING ( or )) button repeatedly to tune in to the desired station.

O Auto tuning:

When the TUNING ( or ) (TUNING ( or )) button is pressed for more than 0.5 seconds, scanning will start automatically and the tuner will stop at the first receivable broadcast station.

Notes:

OWhen radio interference occurs, auto scan tuning may stop automatically at that point.

OAuto scan tuning will skip weak signal stations.

OTo stop the auto tuning, press the TUNING ( or ) (TUNING ( or )) button again.

To receive an FM stereo transmission:

OPress the FUNCTION button on main unit or TUNER (BAND) button on the remote control to select stereo mode and “ST” indicator will be displayed. “” will appear when an FM broadcast is in stereo.

OIf the FM reception is weak, press the TUNER (BAND) button to extinguish the “ST” indicator. The reception changes to monaural, and the sound becomes clearer.

QPresetting a station

You can store 40 AM and FM stations in memory and recall them at the push of a button. (Preset tuning)

1Perform steps 1 - 3 in “Tuning”.

2Press the MEMORY button.

3Within 30 seconds, press the PRESET ( or ) button to select the preset channel number. Store the stations in memory, in order, starting with preset channel 1.

4Within 30 seconds, press the MEMORY button to store that station in memory. If the “MEMORY” and preset number indicators disappear before the station is memorized, repeat the operation from step 2.

5Repeat steps 1 - 4 to set other stations, or to change a preset station. When a new station is stored in the memory, the station previously memorized for that preset channel number will be erased.

Note:

The backup function protects the memorized stations for a few hours should there be a power failure or the AC power cord become disconnected.

QTo recall a preset station

1Press the PRESET ( or ) button for less than 0.5 seconds to select the desired station.

QTo scan the preset stations

The stations saved in the memory can be scanned automatically. (Preset memory scan)

1Press the PRESET ( or ) button for more than 0.5 seconds. The preset number will flash and the programed stations will be tuned in sequentially, for 5 seconds each.

2Press the PRESET ( or ) button again when the desired station is located.

QTo erase entire preset memory

1Press the POWER ON/STAND-BY button to enter the stand- by mode.

2While pressing down the FUNCTION button, press the POWER ON/STAND-BY button until “TUNER CLEAR” appears.

Setting the clock (Remote control only)

In this example, the clock is set for the 12-hour (AM 12:00) display.

1Press the ON/STAND-BY button to turn the power on.

2Press the CLOCK/TIMER button.

3Within 10 seconds, press the MEMORY button. Press the or button to select 12-hour or 24-hour display

and then press the MEMORY button.

The 12-hour display will appear. (AM 12:00 - PM 11:59)

The 12-hour display will appear. (AM 0:00 - PM 11:59)

The 24-hour display will appear. (0:00 - 23:59)

4To adjust the hour, press the or button and then press the MEMORY button. Press the or button once to advance the time by 1 hour. Hold it down to advance continuously.

E-11

Page 12
Image 12
Sharp XL-DH229 operation manual Listening to the radio, Setting the clock Remote control only

XL-DH229 specifications

The Sharp XL-DH229 is a versatile and compact audio system designed to deliver excellent sound quality while accommodating modern media playback needs. This all-in-one stereo system combines style, functionality, and advanced technology, making it a popular choice for music lovers.

One of the standout features of the XL-DH229 is its powerful 2-way speaker system, which includes a built-in subwoofer. This design enhances bass response and overall sound clarity, providing a rich listening experience across various music genres. The system is engineered to produce 20 watts of total power output, ensuring that it can fill a room without distortion, even at higher volume levels.

The XL-DH229 comes equipped with multiple playback options, making it a highly adaptable audio solution. It includes a built-in CD player that supports various disc formats, allowing users to enjoy their favorite albums from physical media. Additionally, the system supports USB playback, enabling users to connect USB drives and play digital music files directly. This flexibility extends to radio functionality as well, featuring a built-in FM tuner for listening to local stations.

Another significant aspect of the Sharp XL-DH229 is its Bluetooth connectivity. With this feature, users can easily stream music wirelessly from smartphones, tablets, or computers, enhancing convenience and providing seamless access to a wide range of digital music services. This modern connectivity ensures that the system remains relevant in today’s increasingly wireless world.

User-friendly controls and a digital display are additional highlights of the XL-DH229, making it easy to navigate between different sources and adjust settings. The system provides users with remote control functionality, enabling them to manage their music from a distance—a feature that adds to the overall convenience.

Aesthetically, the Sharp XL-DH229 boasts a sleek and contemporary design that can complement a variety of home décor styles. Its compact size allows for easy placement in any room without taking up too much space, making it an ideal choice for small apartments or dorm rooms.

In summary, the Sharp XL-DH229 is a well-rounded audio system that offers a robust combination of features and modern technologies. With its excellent sound quality, versatile playback options, Bluetooth capability, and stylish design, it caters to a wide range of auditory needs, making it a valuable addition to any music enthusiast’s setup.