Controlling the Projector by a Computer
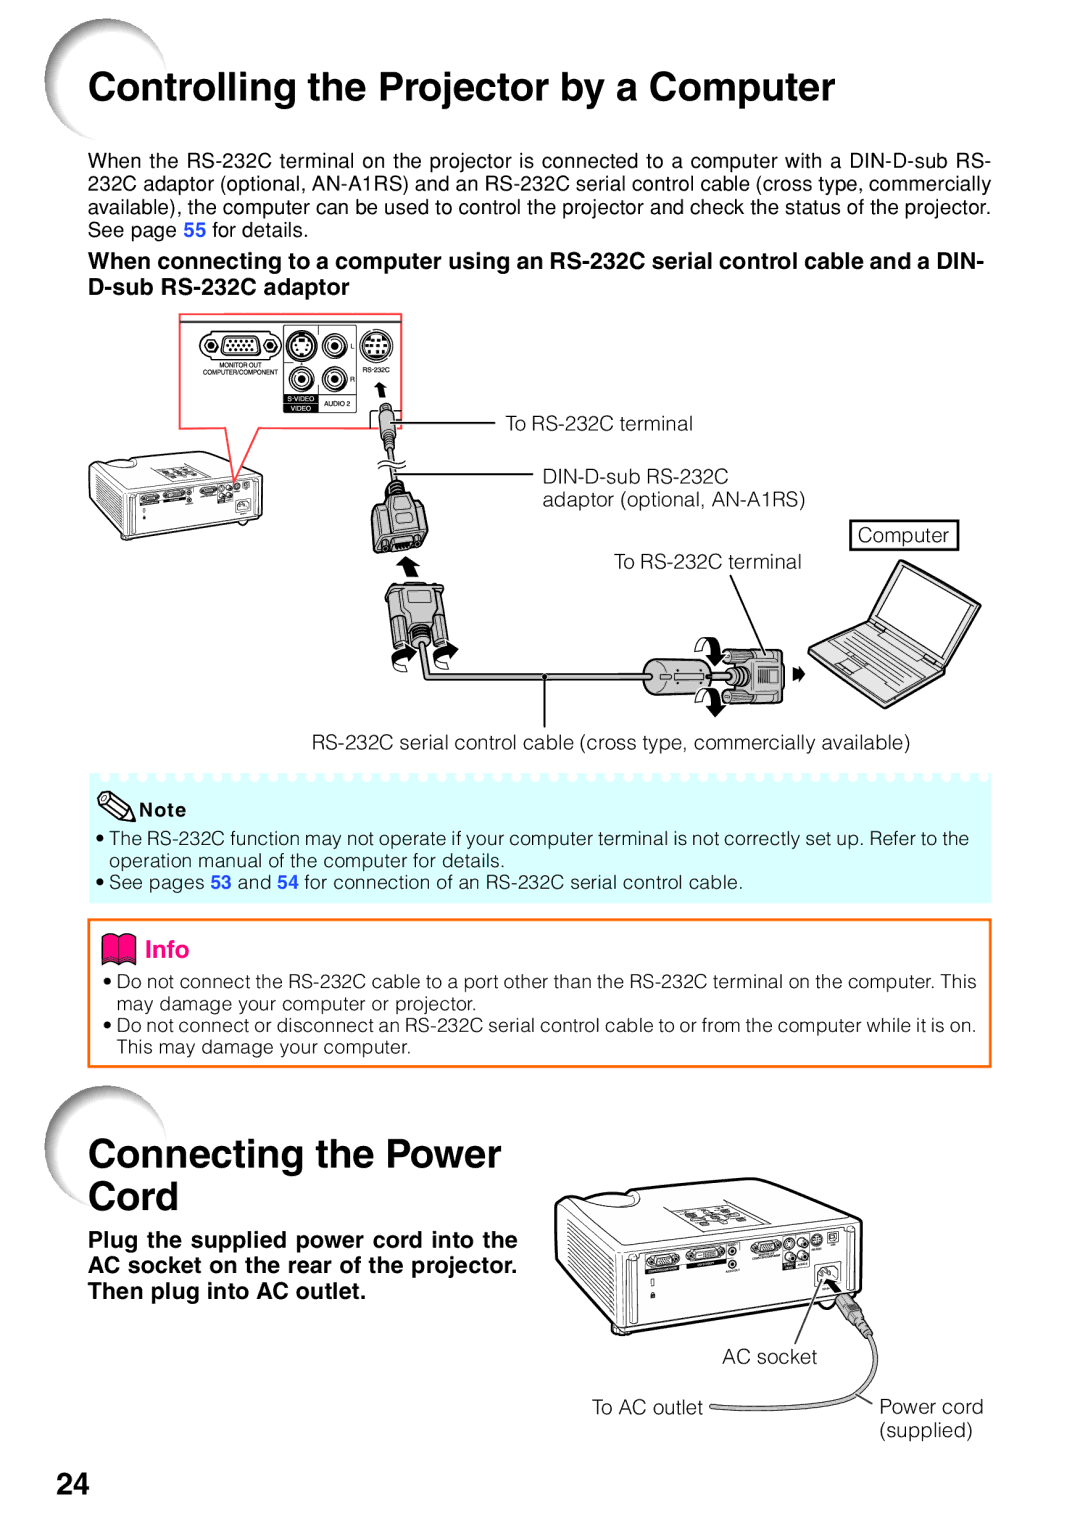
When the RS-232C terminal on the projector is connected to a computer with a DIN-D-sub RS- 232C adaptor (optional, AN-A1RS) and an RS-232C serial control cable (cross type, commercially available), the computer can be used to control the projector and check the status of the projector. See page 55 for details.
When connecting to a computer using an RS-232C serial control cable and a DIN- D-sub RS-232C adaptor
To RS-232C terminal
 DIN-D-sub RS-232C adaptor (optional, AN-A1RS)
Computer
To RS-232C terminal
RS-232C serial control cable (cross type, commercially available)
 Note
Note
•The RS-232C function may not operate if your computer terminal is not correctly set up. Refer to the operation manual of the computer for details.
•See pages 53 and 54 for connection of an RS-232C serial control cable.
 Info
Info
•Do not connect the RS-232C cable to a port other than the RS-232C terminal on the computer. This may damage your computer or projector.
•Do not connect or disconnect an RS-232C serial control cable to or from the computer while it is on. This may damage your computer.
Connecting the Power
Cord
Plug the supplied power cord into the
AC socket on the rear of the projector.
Then plug into AC outlet.
AC socket
To AC outlet
 Power cord (supplied)